


An owl is a symbol of wisdom and mystery. Aren’t these birds gorgeous?
But drawing an owl may seem overwhelming: it 's hard to decide where to start and how to find the right proportions. In this tutorial, I’ll show you an easy way to draw an owl with a graphite pencil and ink liners.
We’ll also consider the principles of layering ink hatches, and observe how to create a beautiful effect of fading in our artwork.
As a result, we’ll get an impressive nature-inspired drawing!
You may also be interested in this great article:


What You Will Need
- An ink liner number 0.3
- An ink liner number 0.1
- An ink liner number 0.05
- A graphite pencil (I recommend using a B or HB type)
- A sheet of thick drawing paper


1. How to Draw an Owl With a Graphite Pencil
Step 1
I draw a vertical core line that divides the future owl’s figure into halves; it will be our reference point for the measurements. Then I mark the side borders of the bird’s head and body.
It is useful to follow the principles of symmetry when you are drawing animals. Just keep in mind that there is nothing perfectly symmetrical in the natural world.


Step 2
I draw the rough shapes of the head and body, using light pencil lines.


Step 3
The eyes are located on a line that is slightly below the central point of the owl’s head. The core line helps me to measure the equal distance.
The interval between the eyes is close to the width of one eye.


Step 4
I draw a rough shape of the beak. It looks similar to a triangle with two rounded corners.


Step 5
I add the prominent shapes that resemble stylized ears (the ear tufts).


Step 6
I draw the pupils and add the divergent lines of feathers above the eyes.


Step 7
I refine the feathery pattern on the owl’s face, also known as the facial disc.


Step 8
I draw the smaller details of the beak and the ear tufts.


Step 9
I add the wings to the body.


Step 10
I draw the framework of the feet.
The feet have four fingers each, but the back fingers hide behind; they help the bird to take up a stable position.


Step 11
I add the hooked claws and refine the shapes of the fingers.


Step 12
I draw the contours of the tree using varying, organic lines.


Step 13
I add three groups of leaves. They will make the composition more interesting.


Step 14
I add the groups of pencil hatches to mark the pattern of the owl’s feathering.


2. How to Create Layers of Hatching With Ink
Step 1
In this part of the tutorial, we’ll pay particular attention to the hatching techniques.
Creating layers of hatches is an excellent way to make an illusion of texture, increase the contrast and accentuate the three-dimensional look of the objects in the drawing.
Here is a sample of the inclined hatching, made with the 0.1 ink liner; this will be our base.


Step 2
I add a new layer of hatching with the 0.05 liner. The lines can overlap the existing hatches, or they can be located in the gaps between them.
The lines of different widths combined in one drawing always look attractive.


Step 3
With the 0.05 liner, I add the rounded cross-hatches. You are not limited by the number of hatching layers!


Step 4
With the 0.3 liner, I apply horizontal hatches. As you can see, the more layers of lines I use, the more contrasting and intense my sample becomes.


3. How to Draw an Owl With Ink Liners
Step 1
With the 0.3 ink liner, I mark the dark sports of the feathering.


Step 2
I continue to add the groups of short lines, using the 0.3 liner.


Step 3
With the 0.3 liner, I draw the pupils. The eyes become dark and contrasting.
I also mark the shadows in the plumage.


Step 4
I add the thin hatches, using the 0.05 ink liner. The lines go from the center of the bird’s face to its sides.


Step 5
I mark the outer circles in the eyes, using the 0.05 liner.
Small dots and short hatches help me to accentuate the eyes without oversaturating the artwork.


Step 6
I work on the feathering, using the 0.05 ink liner. I place new hatches in the gaps between the existing ones.


Step 7
With the 0.3 liner, I make the contours of the owl’s feet and outline the tree.


Step 8
I draw the pattern of the bark, using the 0.3 liner. I also add groups of hatches to create shadows.


Step 9
I draw the leaves with the 0.1 ink liner. I use thin, light lines so that the leaves won’t distract the viewers' attention from the owl.
I also add some hatching to the tree to make it look more three-dimensional.


Step 10
I add short hatches to the sides of the bird’s fingers and strengthen the shadow near the feet. We get an instant three-dimensional look!
I also add more hatches to the owl’s body, using the 0.1 ink liner.


Step 11
I increase the contrast in my drawing. With the 0.1 liner, I add groups of hatches, paying special attention to the sides of the bird, and mark the contours.


Step 12
I work on the owl’s head, making it more realistic. With the 0.05 ink liner, I accentuate the facial disk with an additional layer of hatching.


Step 13
I accentuate the shadow under the bird’s beak, using the 0.05 liner. I also add short hatches to the sides of the beak.


Step 14
I add a layer of the cross-hatching to the owl’s body, using the 0.05 ink liner.


Step 15
With the 0.3 liner, I create the dark accents in the feathering.


Step 16
I increase the contrast in the lower part of the drawing and strengthen the shadows there, using the 0.1 liner.


Step 17
I apply the cross-hatching to the tree, using the 0.1 liner.


Step 18
With the 0.05 liner, I add one more layer of hatching to the bark.
As a final touch, I emphasize the contour of the branch with a wider line.


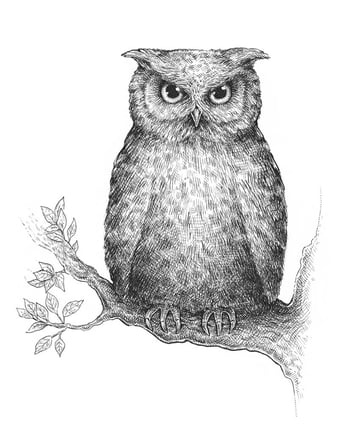
Your Artwork Is Complete!
Congratulations, you've finished the drawing! I hope you enjoyed both the process and the result. Please share your artwork in the comments!
I wish you much joy and success in mastering ink techniques!


