
Croton plant: part houseplant, part drama queen. They have a reputation as real leaf-droppers, but I prefer to think of them as leaf showstoppers. Even their scientific name, Codiaeum variegatum, is fancy.
But rest assured, Croton plant care isn’t hard once you figure out what they like — and for this many-colored royalty, that’s light, and lots of it.
Let’s dive into how to keep your Croton Queen happy and healthy, along with some tips for mitigating the dreaded leaf drop.
Table of Contents
Croton Care Guide
History, habitat, and characteristics
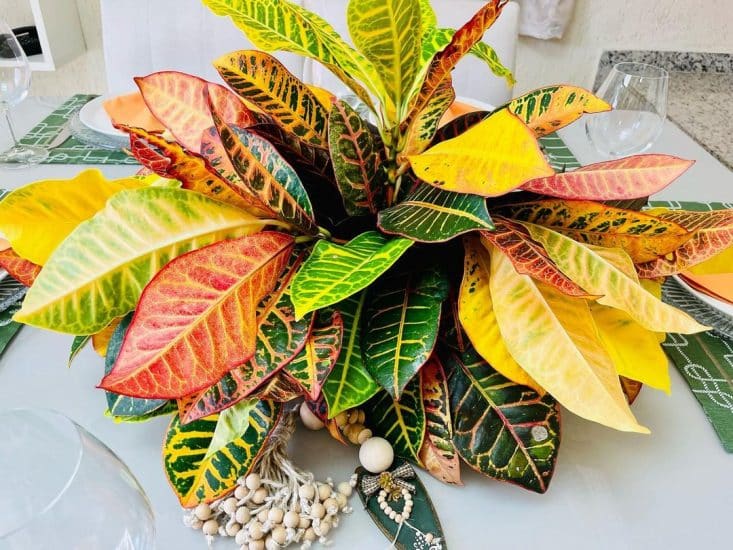
Croton plants (Codiaeum variegatum), are a fantastic species of plant that continually impress us with their expansive variety of colorful foliage (they’re not also called fire croton, variegated croton, and garden croton for nothing!), and elaborate leathery leaves.
They do have a bit of a reputation among houseplant enthusiasts for being pretty hard to take care of and dropping those stunning leaves at the first sign of discomfort. I mean, it’s so bad that I’ve seen people calling them “notons.”
In reality, if you can give these plants lots (and lots) of sun and keep up the watering, they’ll do just fine and shouldn’t drop any leaves.
(If you want to get to a specific section of Croton plant care, you can navigate to the table of contents above and jump right there.)
Originally from Southeast Asia, in their natural habitat, Croton plants grow over 8 feet tall. Indoors, though, they’ll max out at around four feet.
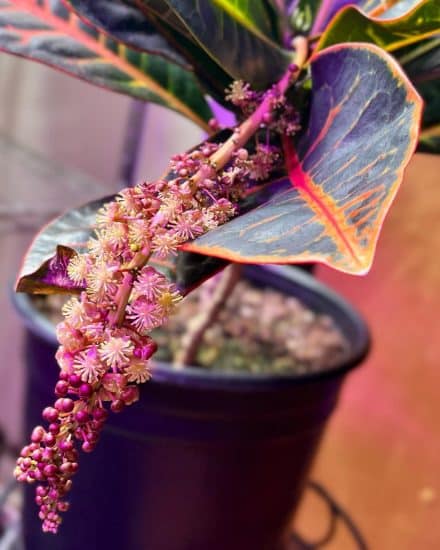
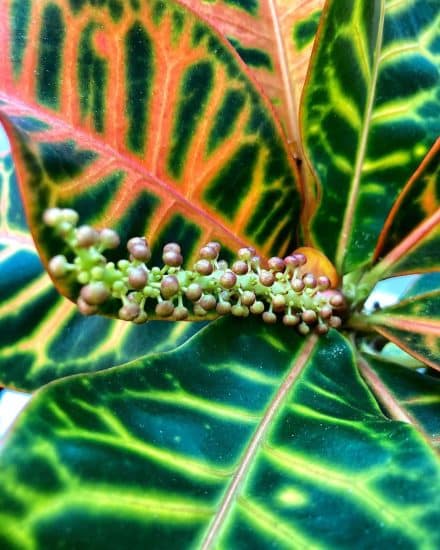
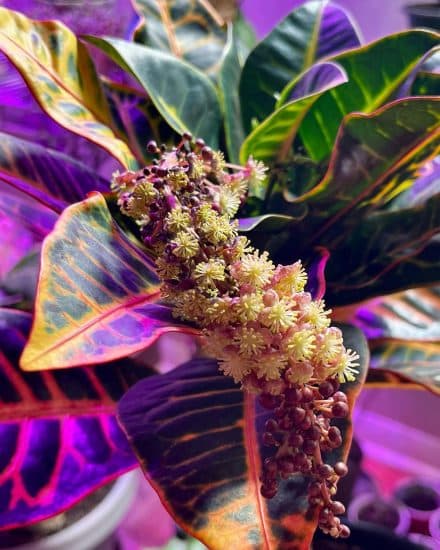
Light really is the key to keeping them happy. When they are cared for just right, Croton will reward you with a cluster of blooms with yellow creamy flowers in buds of purple and red.
Once you identify these plants as Croton, you’ll probably start to see them everywhere. They’re beloved for their ability to inject some bright yellow or splashes of red into a scene.
If you do have difficulty with your Croton plant and it looks pretty sad, don’t get rid of it quite yet. As a last-ditch effort, you can plant them outside in a lot of environments. I know of a few people who, after giving up on getting them enough sunlight, really enjoyed them as outside ornamental plants.
With hundreds of varieties, though, this tropical plant gives us a lot of options for really personalizing a look and matching the style of our home.
Croton Varieties

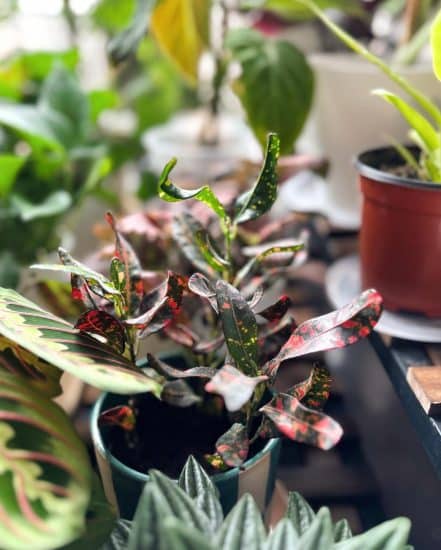
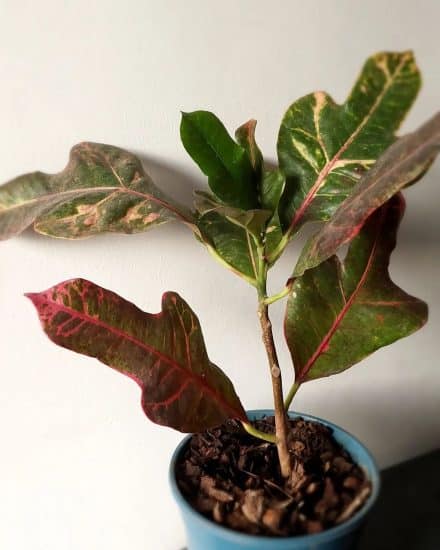
Croton plant varieties take us through a wide spectrum of colors and leaf shapes, but fortunately, the care remains very similar. There are so many varieties to choose between, so we’ll feature pictures of them throughout the article and highlight a few right here.
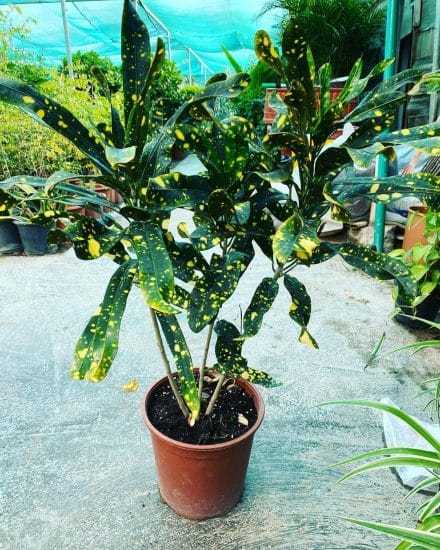
Croton ‘Gold Dust’ – Yellow-spotted, bright green oval leaves that look like they’ve been gold-dusted.
‘Gold Star’ Croton – Looks like the ‘Gold Dust’ variety but with narrower leaves.
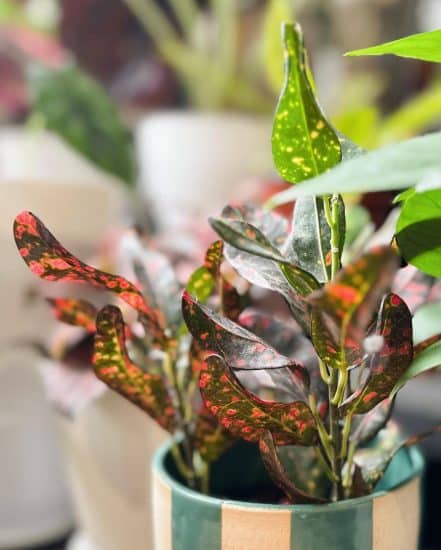
Croton ‘Petra’ – Glossy oval-shaped leaves with pointed tips spanning a huge color spectrum from pink, red, and orange to yellow and green – all in one plant!
‘Banana’ Croton – Bright green leaves with yellow mottle that resemble a mix of ripe and seriously unripe bananas. Some have “thumbs” on the side.
‘Andrew’ Croton – Narrow, long leaves with creamy streaks.
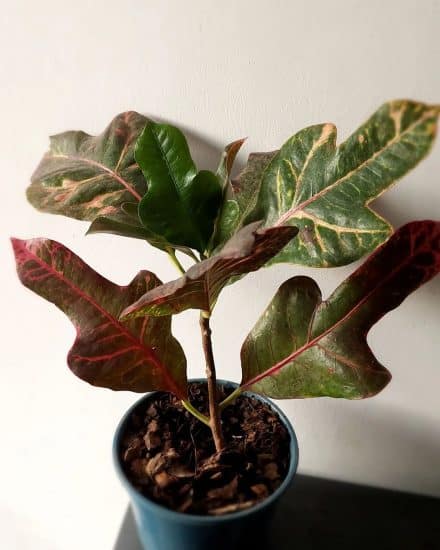
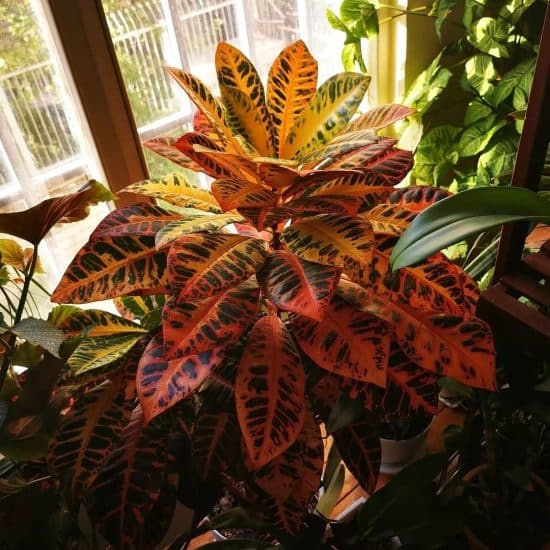
Croton ‘Oakleaf’ – When you grow this Croton plant indoors you can bring a bit of fall with you. This plant’s leaves look like an oak leaf does in the fall.
‘Bush on Fire’ Croton – Truly stunning fiery variegation in all shades of red, yellow, and orange.
‘Eleanor Roosevelt’ Croton – Thin, pointed green leaves splashed with blurry yellow dots. Also known as ‘Sloppy Painter.’
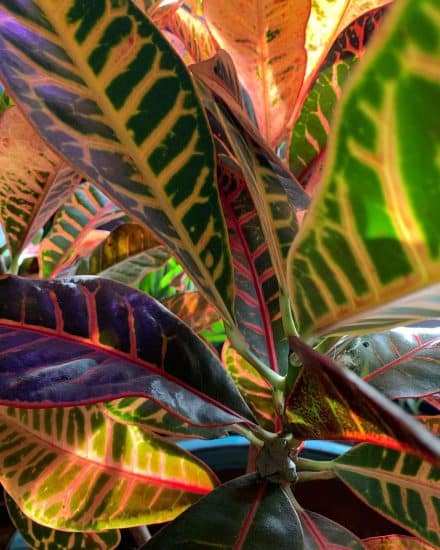
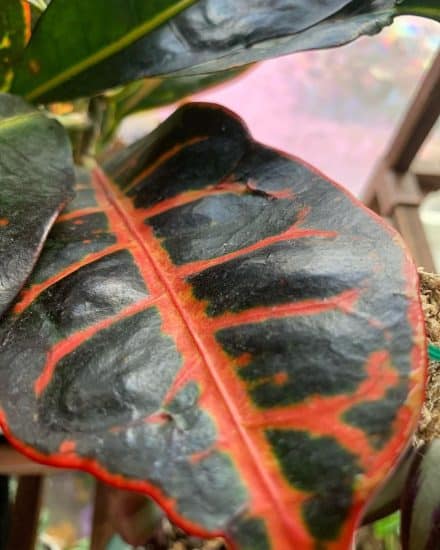
‘Florida Select’ Croton – Dark green leaves with prominent orange, red, and yellow veins.
‘Mrs. Iceton’ Croton – Yellow veins on dark green leaves, almost black. Leaves turn pink and red as they grow.
Light
Croton plants grow best in a lot of light. Like… a lot.
This is primarily the area of care where you’re going to have the most trouble with your Croton plant.
Crotons really need bright, indirect light to complement their brightly colored leaves.
In so many articles, we advise keeping plants a little bit away from a west or south-facing window, or saving that window for a plant that can really take advantage of it.
Well, this is your plant. Just keep in mind that too much direct sun will result in leaves looking scorched. The fix is usually to add a curtain or place it just behind another plant that does want direct sunlight.
You might be tempted to move this plant around trying to find exactly the right lighting or to avoid drafts at night, but our sensitive Croton plants say: actually, no thanks.
They really like to be left in one spot.
Signs of too much light look like curling, yellowing leaves that start looking crispy.
Signs of not enough light can look like leaves falling off, leggy growth, and very slow growth.
If you are having trouble getting enough light for this plant, you can always supplement with an LED grow light, ideally one that’s full spectrum. These run pretty cool, and you don’t have to worry about whether the light is too direct on your Croton plant.
Water
Watering Croton plants (Codiaeum variegatum) can be pretty time-consuming. With high light requirements come high water requirements. This is definitely an indoor plant that can benefit from a self-watering planter.
If you don’t have one, that’s not a problem, just a little bit more work.
Signs of underwatering are seeing leaves that suddenly fall off or leaves that look sad (you’ll know it when you see it) and droopy.
Signs of overwatering would be yellowing leaves, soil that doesn’t dry out, or even kind of a funky smell from the soil. If you think you might be overwatering your plant, you’ll want to switch up the soil mixture, make sure your pot has drainage holes, and slow down that watering schedule a bit.
Croton plants are easily stressed from sitting in excess water, so make sure if you use a decorative pot that it either has drainage, or you’ve double-potted your plant and given it a chance to drain before placing it back inside.
If you do move your plant, because of how easily it can drop leaves, you’ll actually want to wait a few days before watering — until its soil feels dry.
Feeling the soil is the best way of knowing when to water your Croton plant. If you feel down a few inches and it’s dry all the way through, it’s time.
Tips:
- Use lukewarm water (not cold tap water) to avoid shocking the plant’s roots.
- Reduce watering during winter months or if your plant is in lower light or growing more slowly.
- Pay attention to overwatering, as it can lead to root rot; experiment with or add drainage holes to the pot if necessary.
- Monitor new leaf growth for signs of wilting, which could indicate your Croton is thirsty.
When you do water, try to use filtered water if possible. If you are using unfiltered tap water and start noticing issues with yellowing or brown edges, and can’t quite figure out what the problem might be, try switching to filtered water — it’ll likely help.
Temperature and humidity
Finally, we get to a place where Croton care is pretty easy. While Croton plants are tropical, they’re very happy with the normal environment of a home.
Temperature: Nothing kills a tropical vibe like temperatures near-freezing! Your Croton prefers warm and balmy, so keep it between 60-80 degrees F. We did mention this plant doesn’t like to be moved, but if things get too drafty in the winter or if it’s near an AC in the summer, those are good reasons to relocate your plant.
Humidity: Croton plants are pretty forgiving when it comes to humidity, thank goodness. If you have the heat on in the winter, this can dry the out air a bit. You’ll want to increase humidity with a pebble tray; place your plant in a well-lit bathroom (it’s usually a bit more humid there); or group plants together, as this raises the local humidity while keeping your home comfy. Of course, just using a humidifier always works too!
Soil and planting
Croton plants love water, which means they also need a well-draining potting soil so that you don’t encourage fungal growth.
Fortunately, that’s pretty easy to achieve. You can mix together a mixture of regular potting soil and cactus/succulent soil, about 50/50. If you only have potting soil, you’ll want to add 20-30% perlite or pumice to increase the aeration and drainage.
Speaking of, it’s also essential that your pot have drainage holes so that your Croton doesn’t have to sit in standing water. Crotons like the soil moist, just not sopping wet.
Fertilizer
If you want to really encourage your Croton plant to grow, fertilizer is almost a necessity. You’ll want a complete balanced liquid fertilizer (it may say 10-10-10) diluted to 50% or even weaker. Apply it monthly while your Croton is growing.
If you still see growth in the winter, I really encourage you to continue with the fertilizer, just use a bit less. Similarly, when you start, go slowly and increase it over time.
Signs of too much fertilizing look like burnt leaves that are brown or crispy. You’ll want to reduce both how much and how often you fertilize. You can also flush the soil with water to leach some of those nutrients out, just make sure it drains and dries after.
Propagation guide
As you’ve either noticed from the Crotons pictured in this guide or maybe some of our not-so-subtle hints… these plants can really grow. So when you’re pruning back growth, this is a great way to get a bushy look and get cuttings for making new plants.
We’re going to quickly cover how to propagate Croton plants.
You can either replant your propagated plants in the same soil (bushier still!), in new pots, or spread the joy to some friends.
Propagating Croton plants in water:
You’ll want to prepare a few materials first: a sterilized pair of shears, containers for each cutting, and optionally something clear (plastic bag, half of a two-liter bottle, a glass) to cover your containers with.
- Cut off a 4-inch length of stem with at least a few healthy leaves attached. Cut just below a leaf node so that the bottom of your cutting has one, if possible. Nodes are little bumps on the stem where a leaf can come out of, but they’re also where your roots will form with propagation.
- Remove leaves from the bottom of the cutting so that there aren’t any leaves that will be sticking in water, again making sure you still have a few on top.
- Place your cutting in a small container of water. Leaves should be hanging over the edge and not submerged.
- Keep your stem cuttings in a warm, brightly lit location for a few weeks. This is when you can cover them to really help keep up that humidity.
- In a few weeks, you’ll notice new roots growing. Once they reach 2-3 inches, you can transplant your cutting into its own pot with the soil mixture we described above.
Keep your new baby plant in similar conditions to the parent plant, and more humidity will really help a lot.
You can follow a very similar process to propagate Croton plants in soil. Instead, you’ll just plant directly into the soil, watering it even more frequently than you normally would.
Moisture, humidity, and light are your Croton plant’s way of knowing that it’s time to root.
Common issues
Even the most seasoned indoor gardener can have problems, especially with Crotons — they aren’t the most beginner-friendly plant.
Fortunately, Croton plants are very popular, and any issue you have has likely been experienced by many other people. We’ll cover the problems we see the most!
Leaves falling off
It almost feels like in every other care section, we’re trying to stop this from happening with tips and advice, but at some point, you’re likely to experience leaf drop. That’s just how Croton plants are.
Leaves falling off suddenly are almost always an issue with underwatering, having the temperatures drop suddenly, moving your plant around, or most commonly, not enough bright, indirect light.
So, not quite a result of everything, but pretty close.
This could be a sign for you to really hone in on the watering schedule. If you are having issues, maybe now is also a good time to consider a self-watering pot or even to propagate a few new Croton plants… just in case.
If leaves are wilting before they fall off, or it’s not sudden, the problem could also be overwatering. If you feel really moist soil when you test with a finger, this is likely the cause. Also, wilting throughout your plant, and not just the older leaves, is another sign that you’ve found the culprit.
Yellowing leaves
Yellow leaves (and not the red, orange, and yellow leaves your Croton plant naturally shows off) are often caused by overwatering. You’ll want to make sure your soil has plenty of perlite and isn’t feeling compacted or dense. If you don’t have drainage holes in your pot, make some!
Other leaf issues
If you’re noticing your Croton plant’s leaves are turning dark green, not producing new growth, or looking sad, it’s likely an issue with insufficient light. These plants really need a lot of bright light, especially if you want them to look their best.
Green leaves aren’t unusual —after all, plants do require chlorophyll — but we’re looking for changes in appearance, along with slower growth or real signs of an issue with the plant that goes beyond the cosmetic.
Direct sunlight can also damage leaves, making them vulnerable to pests and some diseases. These plants can be pretty close to a south/west-facing window, but you want to leave it to your plant to tell you when bright light is… a bit too bright.
Diseases and pests
People adore Croton plants, but the bright colors of their leaves also attract a few unwelcome visitors. We’ll cover how to identify them and what to do when they do show up.
First, let’s tackle these pesky bugs: aphids, mealybugs, spider mites, and scale. The usual suspects.
Keep an eye out for these guys, because if left unchecked, they can cause leaf growth to be stunted, leaves to drop off completely (yet again!), and eventually the end of your plant.
Mites are the most common pest we come across. They’ll either leave webbing (if the spider variety), or you’ll notice huge clusters of them with small holes in the middle of your leaves, primarily the youngest ones.
The solution for any of these pests is:
- Isolate the plant and check others to figure out the extent of your problem. If your eyes aren’t very sharp, you might need a small 10x magnifying glass.
- Rinse the leaves off outside. Mites in particular really hate water, and even just this can be effective on its own.
- Apply neem oil to the leaves (including the underside) and soil. Reapply in a few weeks to disrupt their lifecycle and kill off any eggs.
This should do it for most pests! A weakened plant is often a bit more susceptible to pests, so make sure to review the basic care principles for your Croton plant.
You can sometimes avoid these issues completely with a bright flashlight and careful inspection of any new plants you’re bringing into the house.
Root rot
Root rot is unfortunately a very common problem for Croton plants, caused by overwatering or soil that isn’t draining. You’ll notice wilting and yellow leaves.
Root rot is caused by anaerobic fungi, which are fungi that thrive in waterlogged soil that’s compacted and with minimal airflow (yup, soil has airflow!). These fungi break down organic material and release toxins as they do. The plant isn’t able to take up nutrients or water as effectively, which in turn keeps the soil even moister, creating a feedback loop of… issues.
Diagnosing root rot is pretty easy. Pull the plant out of its pot and inspect the roots. If they are slimy and brownish, that’s rot.
You’ll want to cut off any affected roots with sterilized shears and repot in fresh soil. Make sure your new pot has plenty of drainage, and that your soil is also fast-draining. Consider adding a bit of perlite or horticultural charcoal to help with this.
Conclusion
Now you’re armed with all the knowledge you need to grow croton plants for yourself and your friends. Just remember: looooots of light! Those pretty autumnal leaf colors deserve it!
Croton plant care summary:
- Croton plant varieties do well in lots of light. Like more than you expect. So place them in front of a south-facing window (covered with a sheer curtain, of course) or close to another window in your house. Avoid full sun.
- Like most plants that love water, Croton plants will do best in soil that’s able to drain pretty quickly. Check soil moisture before watering and make sure it’s just turning dry.
- Most issues with your Croton leaves will be related to water or light, so if they’re dropping them or the leaf color seems a bit off, really make sure to re-read those sections.
If you found this article useful, send it to a fellow plant pal. Also, feel free to send us pics of the plant you chose — we’re always happy to ogle.
And ask us any questions on Facebook or Instagram —we’re also always happy to help!
FAQ
Are Crotons indoor or outdoor plants?
You can keep them in either place, as long as the temps outside don’t go down below 50 degrees. But if you want to move an indoor croton to the big wide outside world, you have to acclimate them first with a process called hardening.
Are Crotons hard to care for?
Not particularly, as long as you give them a ton of light and water, and pay attention to the way they react to their environment.
Do Crotons like sun or shade?
These babies love light, light, and more light. Their colors won’t be as vibrant in less of it. They may burn in too much direct light, though, so keep an eye on them to make sure you know how much is too much.
