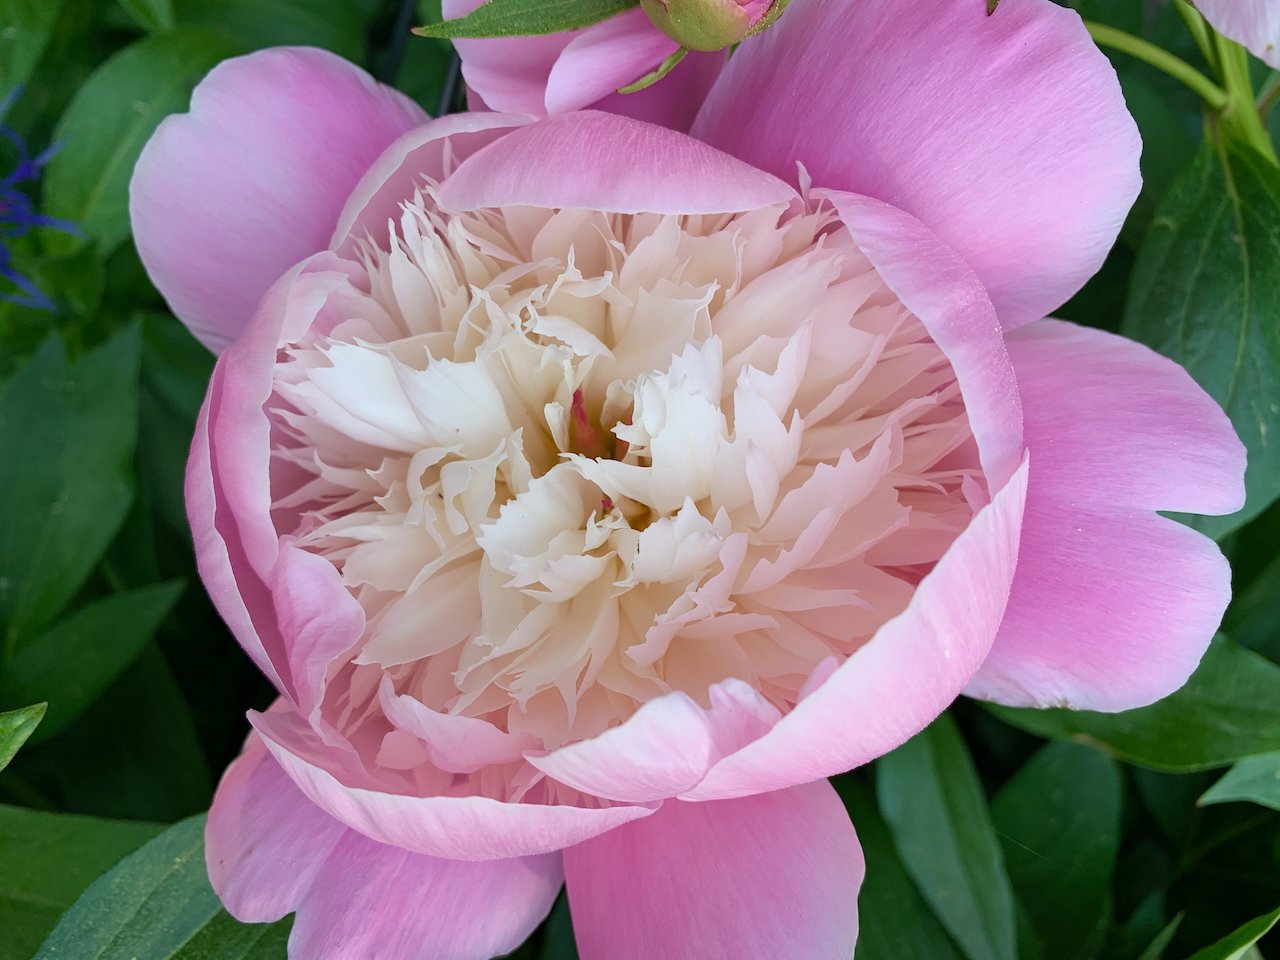
Gardening in March: 10 Things You Can Do to Prepare for Spring

With temperatures climbing this week, the feeling of spring is in the air. While I know that true spring is still a ways off, the desire to get outside and work in the garden is getting strong. Luckily, there are a few garden tasks that should be done now, before the soil warms up, the trees leaf out, and the rapid growth of bulbs and perennials begins.

1. Prune deciduous trees and shrubs

Late winter is prime pruning time for deciduous trees and shrubs, while they are still dormant. Always use sharp tools to make clean cuts, and let the wounds heal naturally. Remove dead, damaged, or diseased wood, suckers and water sprouts. This is the ideal time to prune fruit trees and summer-blooming shrubs such as weigela, butterfly bush, redtwig dogwood, and spireas.

2. Pamper discolored evergreens

Evergreen foliage may become brown or bleached during winter due to excessive transpiration, sun exposure, or cold temperatures in early fall. Injured plants should be fertilized in early spring and watered well throughout the season. It’s best to wait until mid-spring before pruning out injured foliage. Although brown foliage is most likely dead, the buds, which are more cold-hardy than foliage, will often grow and fill in the shrub. If the buds have not survived, prune dead branches back to living tissue.

img_2640.jpg

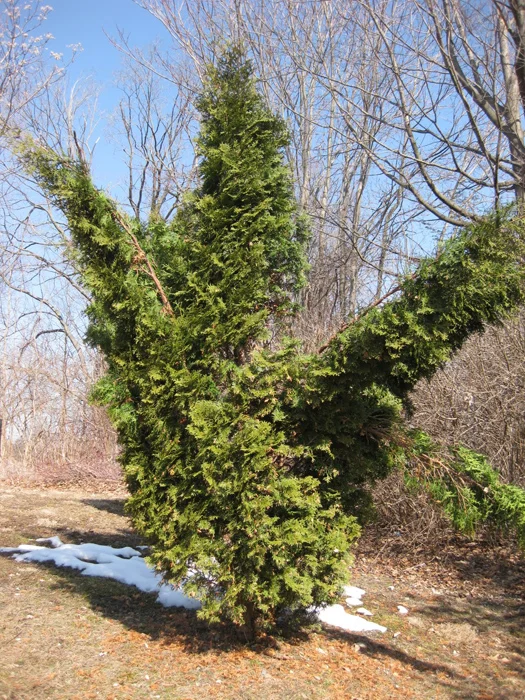
3. Remedy snow and ice damage on multi-leader trees

Heavy snow and ice storms cause damage by bending and breaking branches. Multiple leader, upright evergreens, such as arborvitae and juniper, and multiple leader or clump trees, such as birch, are most subject to snow and ice damage. Small trees can be temporarily wrapped together or the leaders tied with strips of strong cloth or nylon stockings to correct the splaying that occurs in winter. Large multi-stemmed trees should be cabled together by a professional arborist.
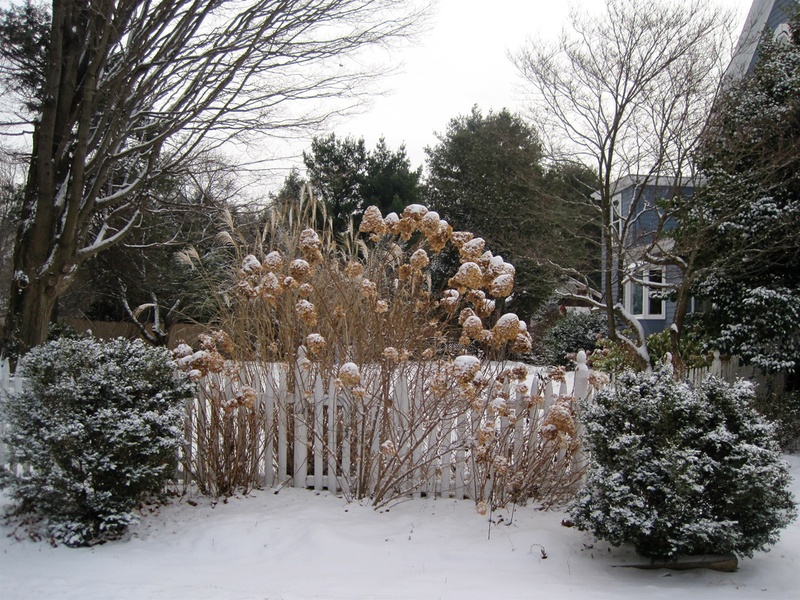
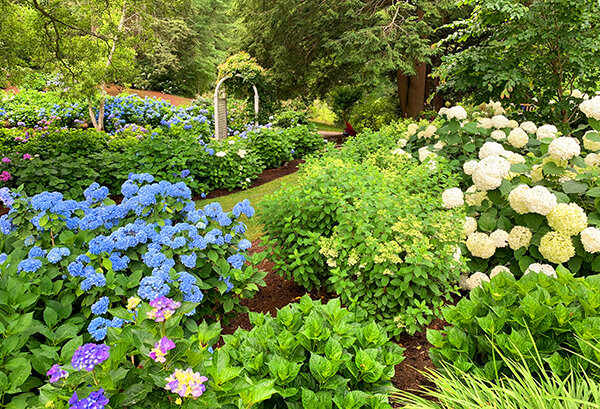
4. Prune hydrangeas

I like to leave most of my hydrangea blooms for winter interest in the garden, but now is the time to prepare the shrubs for spring growth. I carefully remove any dead branches from all my plants, cutting down gradually on each stalk to make sure that I don't remove a branch that looks dead, but is green half way down the stem. I reduce my mature paniculata hydrangeas to about half their height to keep them in scale with their garden location. My hedge of ‘Annabelle’ hydrangeas is cut back to 2’ in height. This keeps the hedge at a compact height, and the plants produce stronger stems to hold up those giant white mopheads. My ‘Endless Summer’ hydrangeas receive a very light pruning to remove the dried flowers and restore a rounded shape.

5. Trim roses and remove winter mulch

Winter pruning should be done when the season begins to warm up and the small buds begin to swell. It is best to wait until the worst of the frosts have passed - early April in Massachusetts. I remove any dead or weak stems and last year’s flower buds, and reduce shrub roses to about half their size, aiming to create a nice rounded shrub. I also gradually remove my winter mulch of compost or shredded leaves.

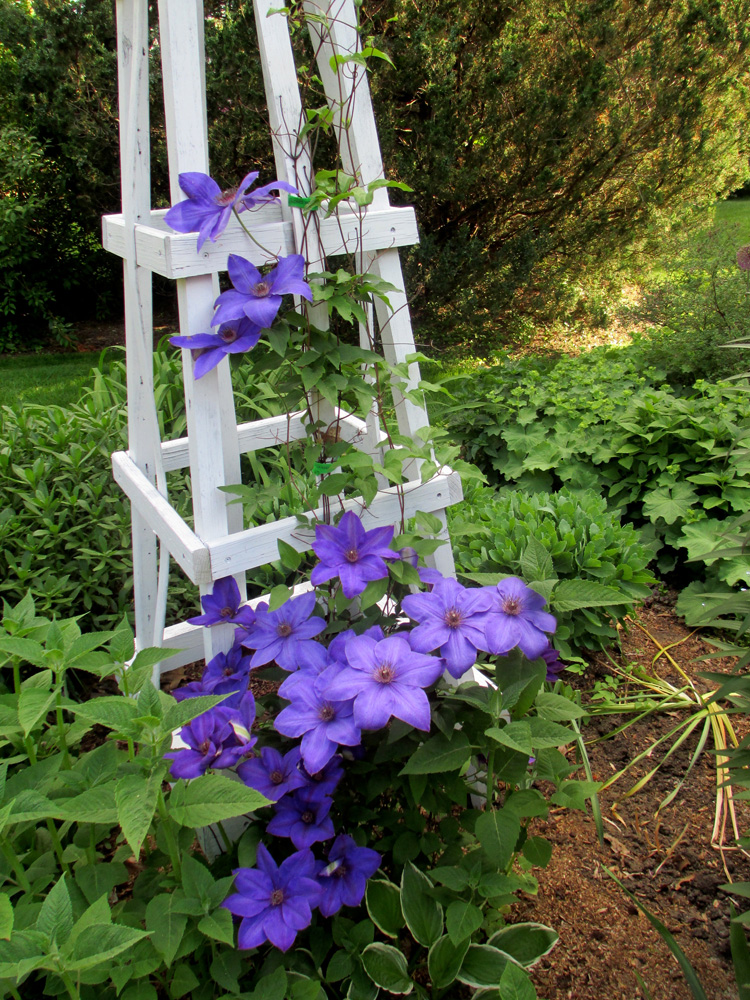
6. Prune Group 3 (or Type C) clematis

These are the summer blooming varieties such as the viticellas, Jackmanii types, texensis, the herbaceous species such as integrifolia and recta that bloom on new wood and the late bloomers such as Sweet Autumn Clematis (C. terniflora) and orientalis types. Clematis in Group 3 mainly flower on new wood produced in the current year and should be pruned back severely every year in late winter, when they are completely dormant, to about 12 - 14 inches. Leave at least two pairs of buds (4) on each stem of the plant. Most Group 3s are very fast growing and will reach their full height before blooming every summer. If you fail to prune these, they will develop long 'legs' that get woody and will be devoid of foliage and blooms.

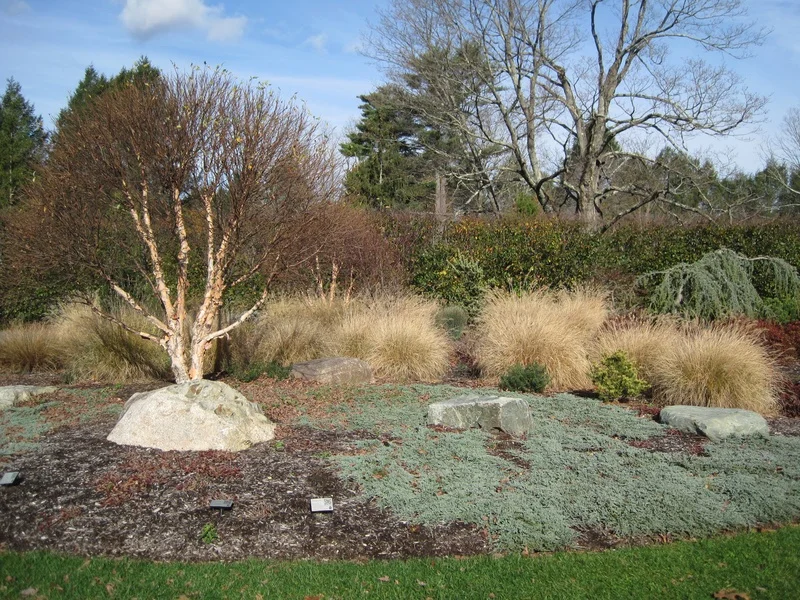
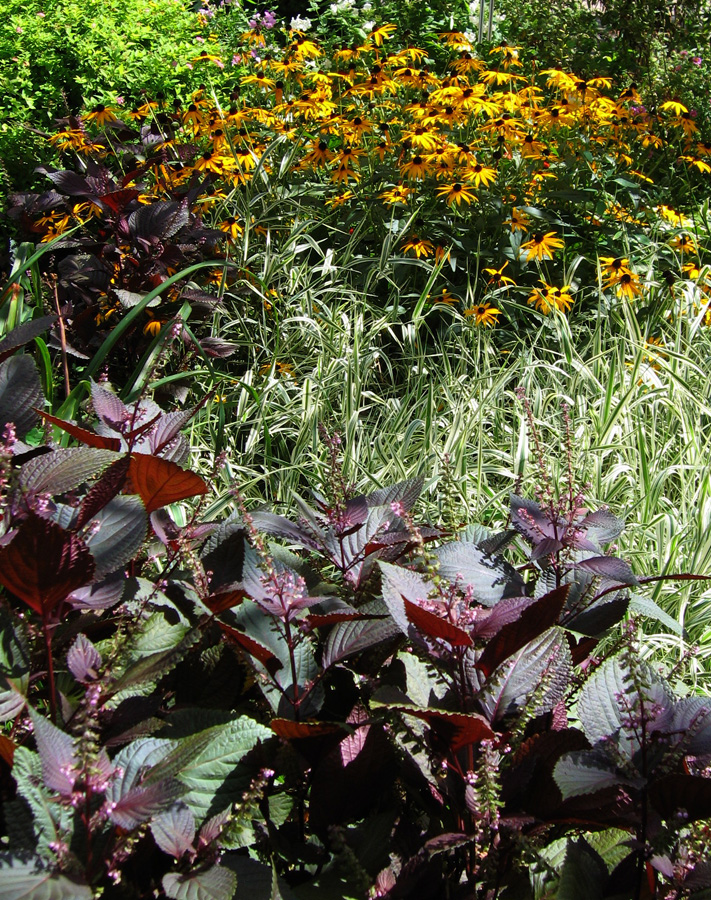
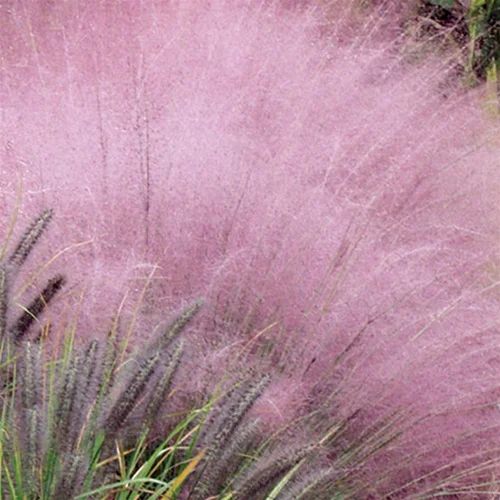
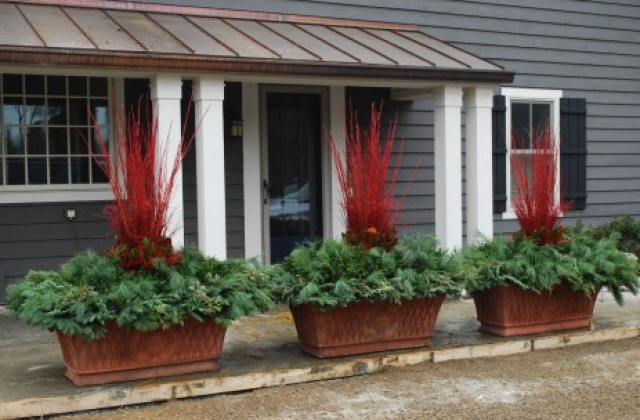
7. Cut back ornamental grasses

I like the look of ornamental grasses in early winter, but by late January, they have collapsed into a mess of tangled stalks. This is a great time to clean up the grasses before new shoots appear in the spring.

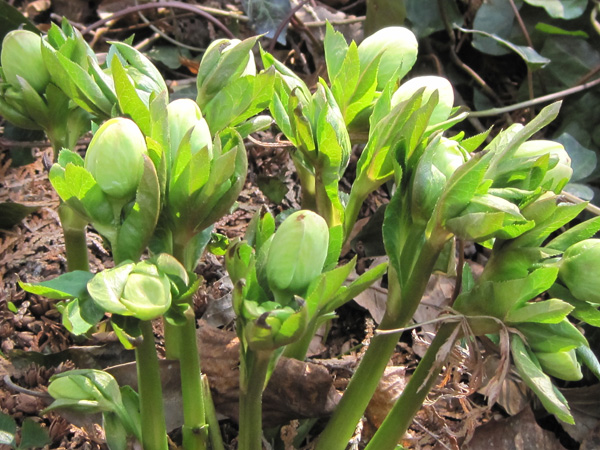
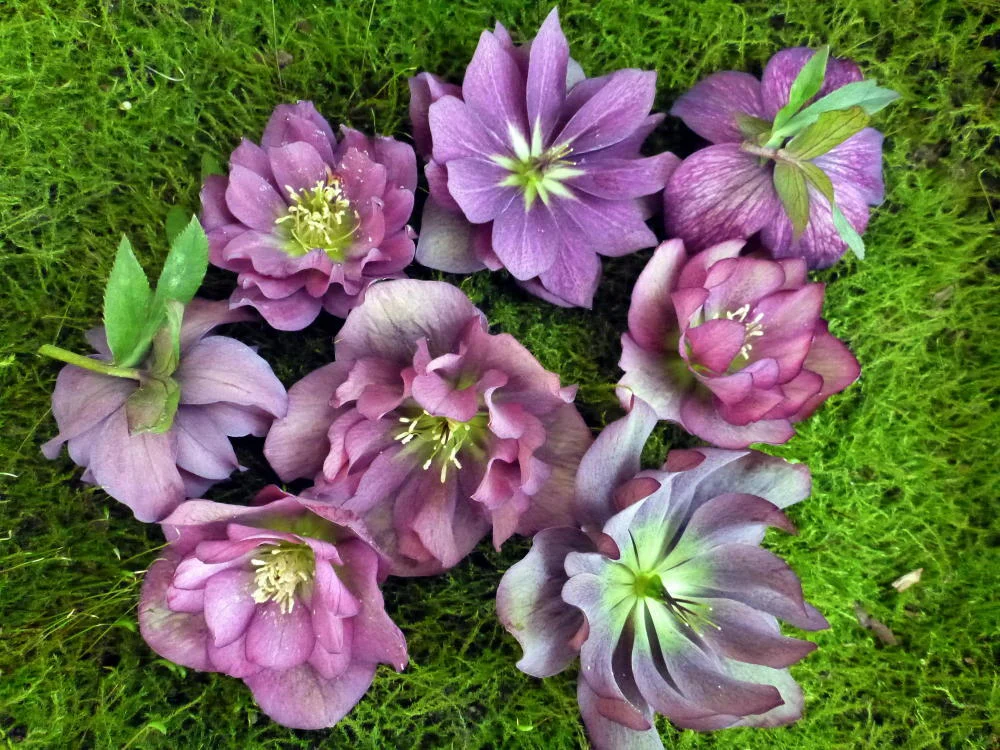
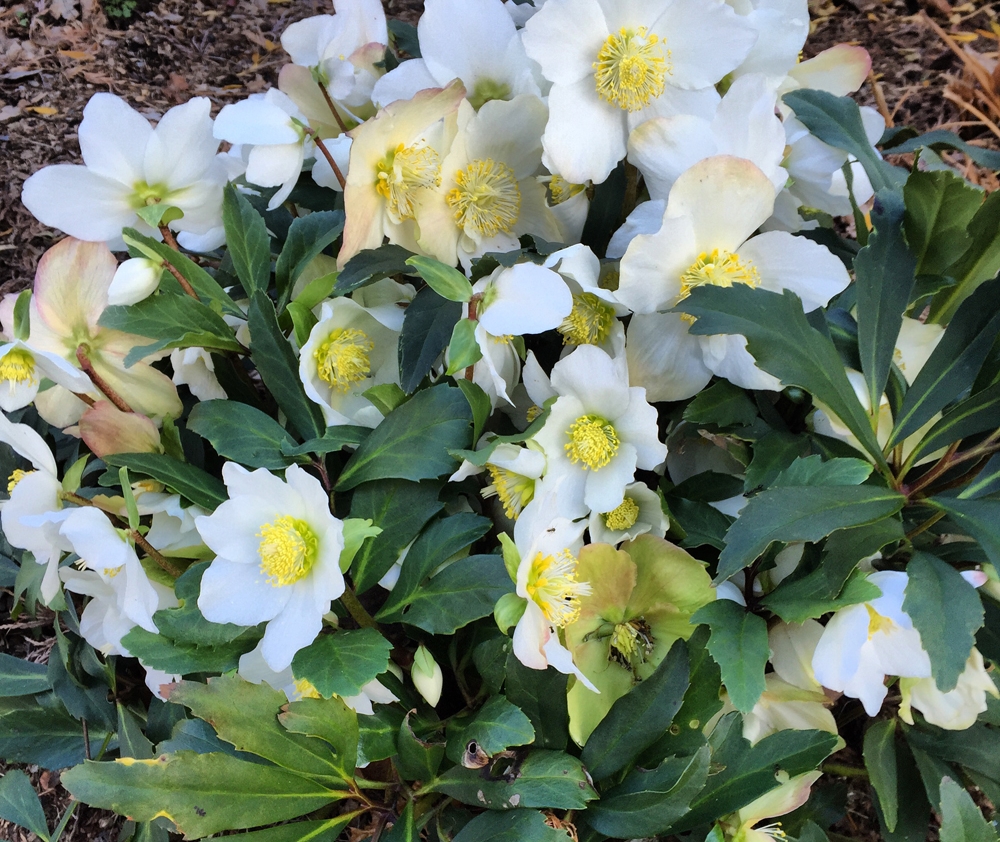
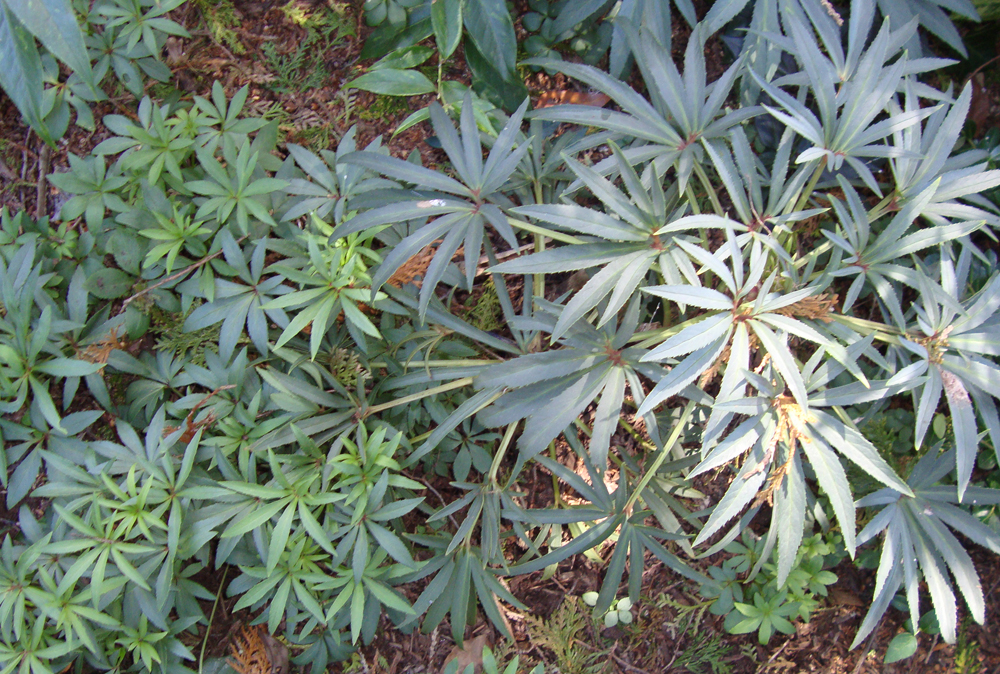
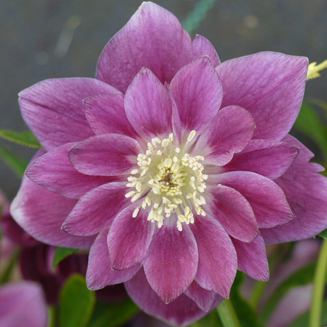
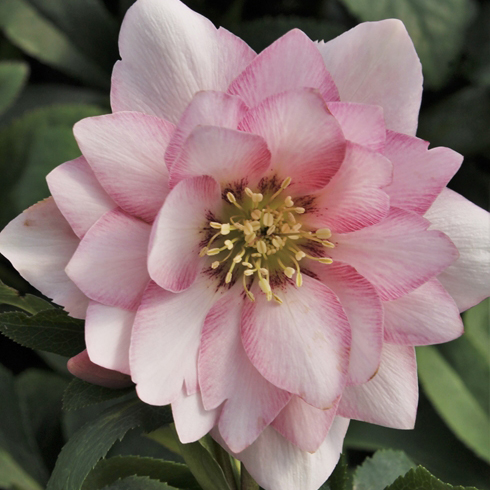
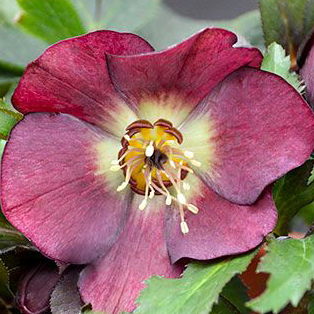
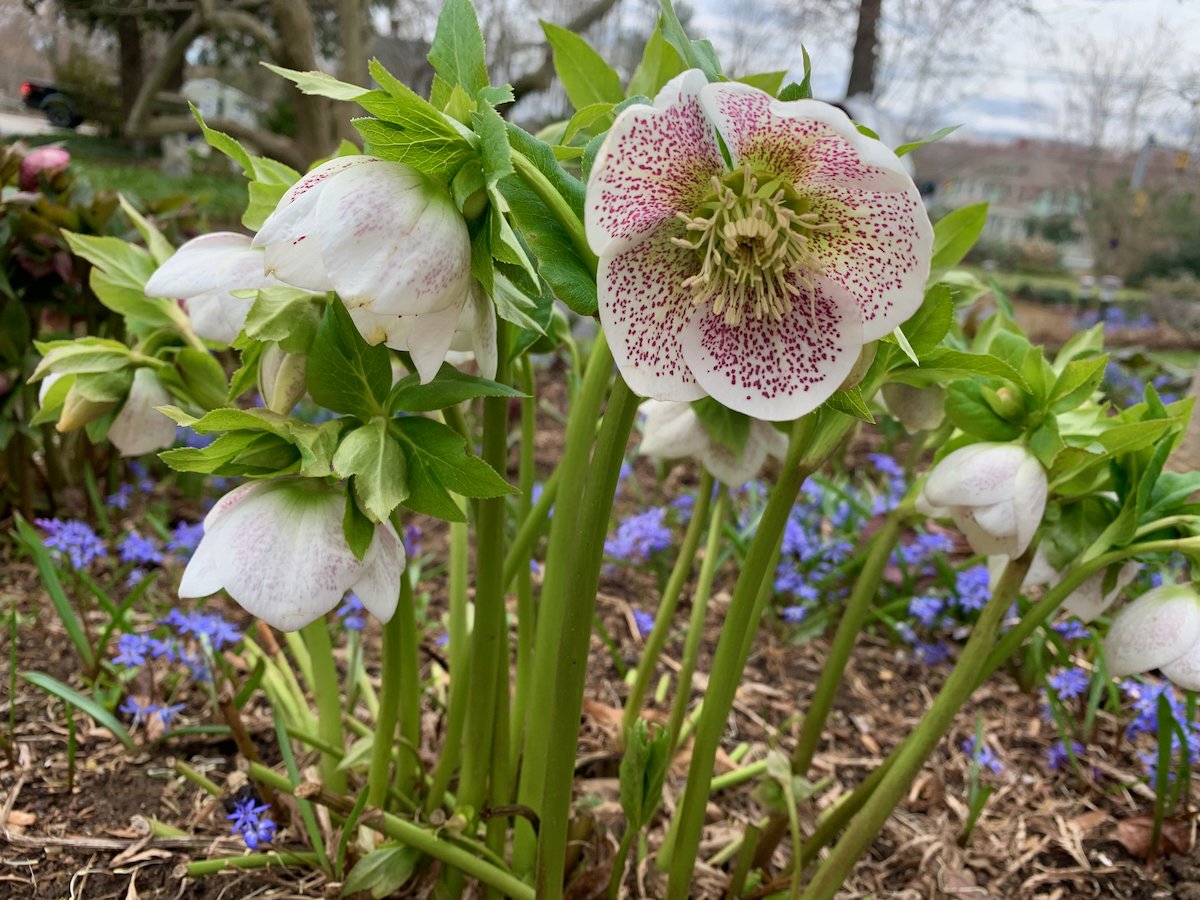
8. Cut back foliage of persistent perennials

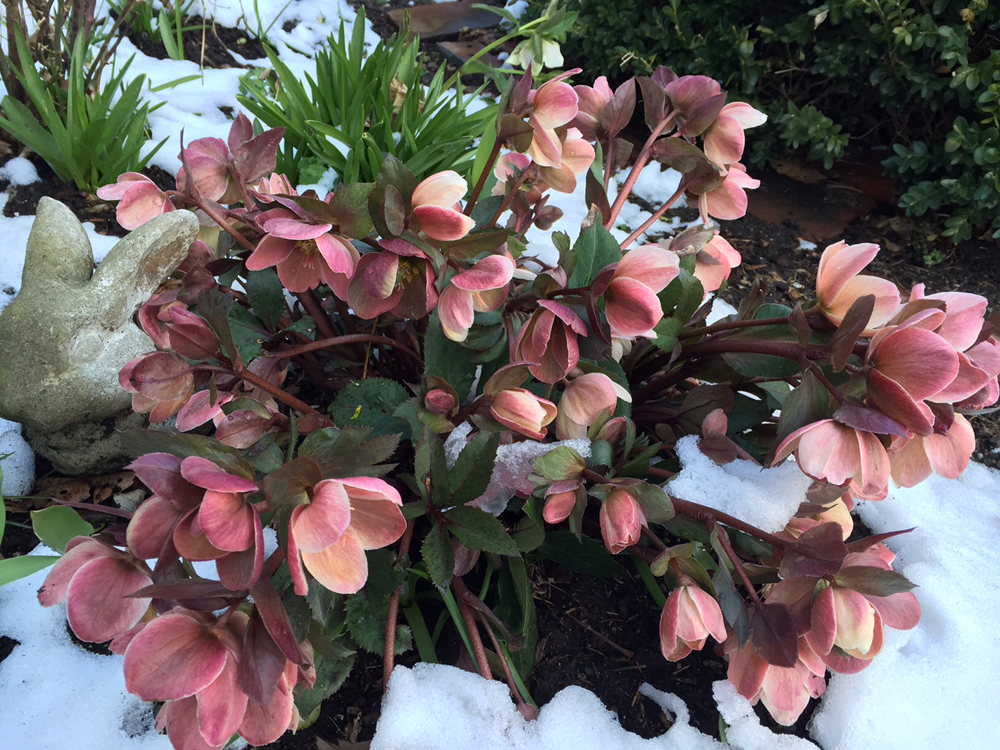
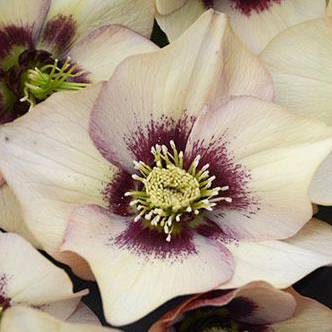
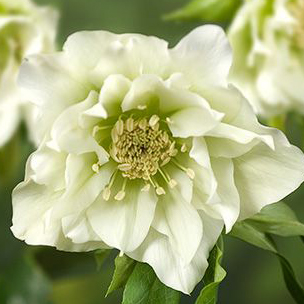
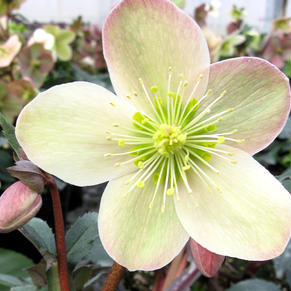
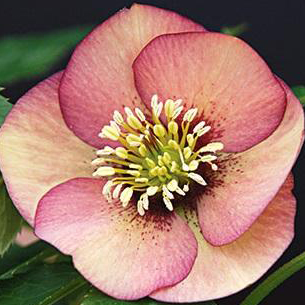
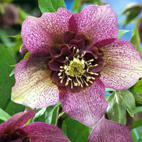
Perennials with evergreen foliage, such as hellebores, epimediums, and ginger will soon start sending out new growth or flowers. Late winter is a great time to remove last year’s tattered foliage without harming the emerging new shoots or flower buds. To fully enjoy the blooms of your Orientalis hellebores, make sure that you remove all of last year’s foliage. Hellebore Foetidus grows as a single stalk, so should NOT be trimmed in this way.

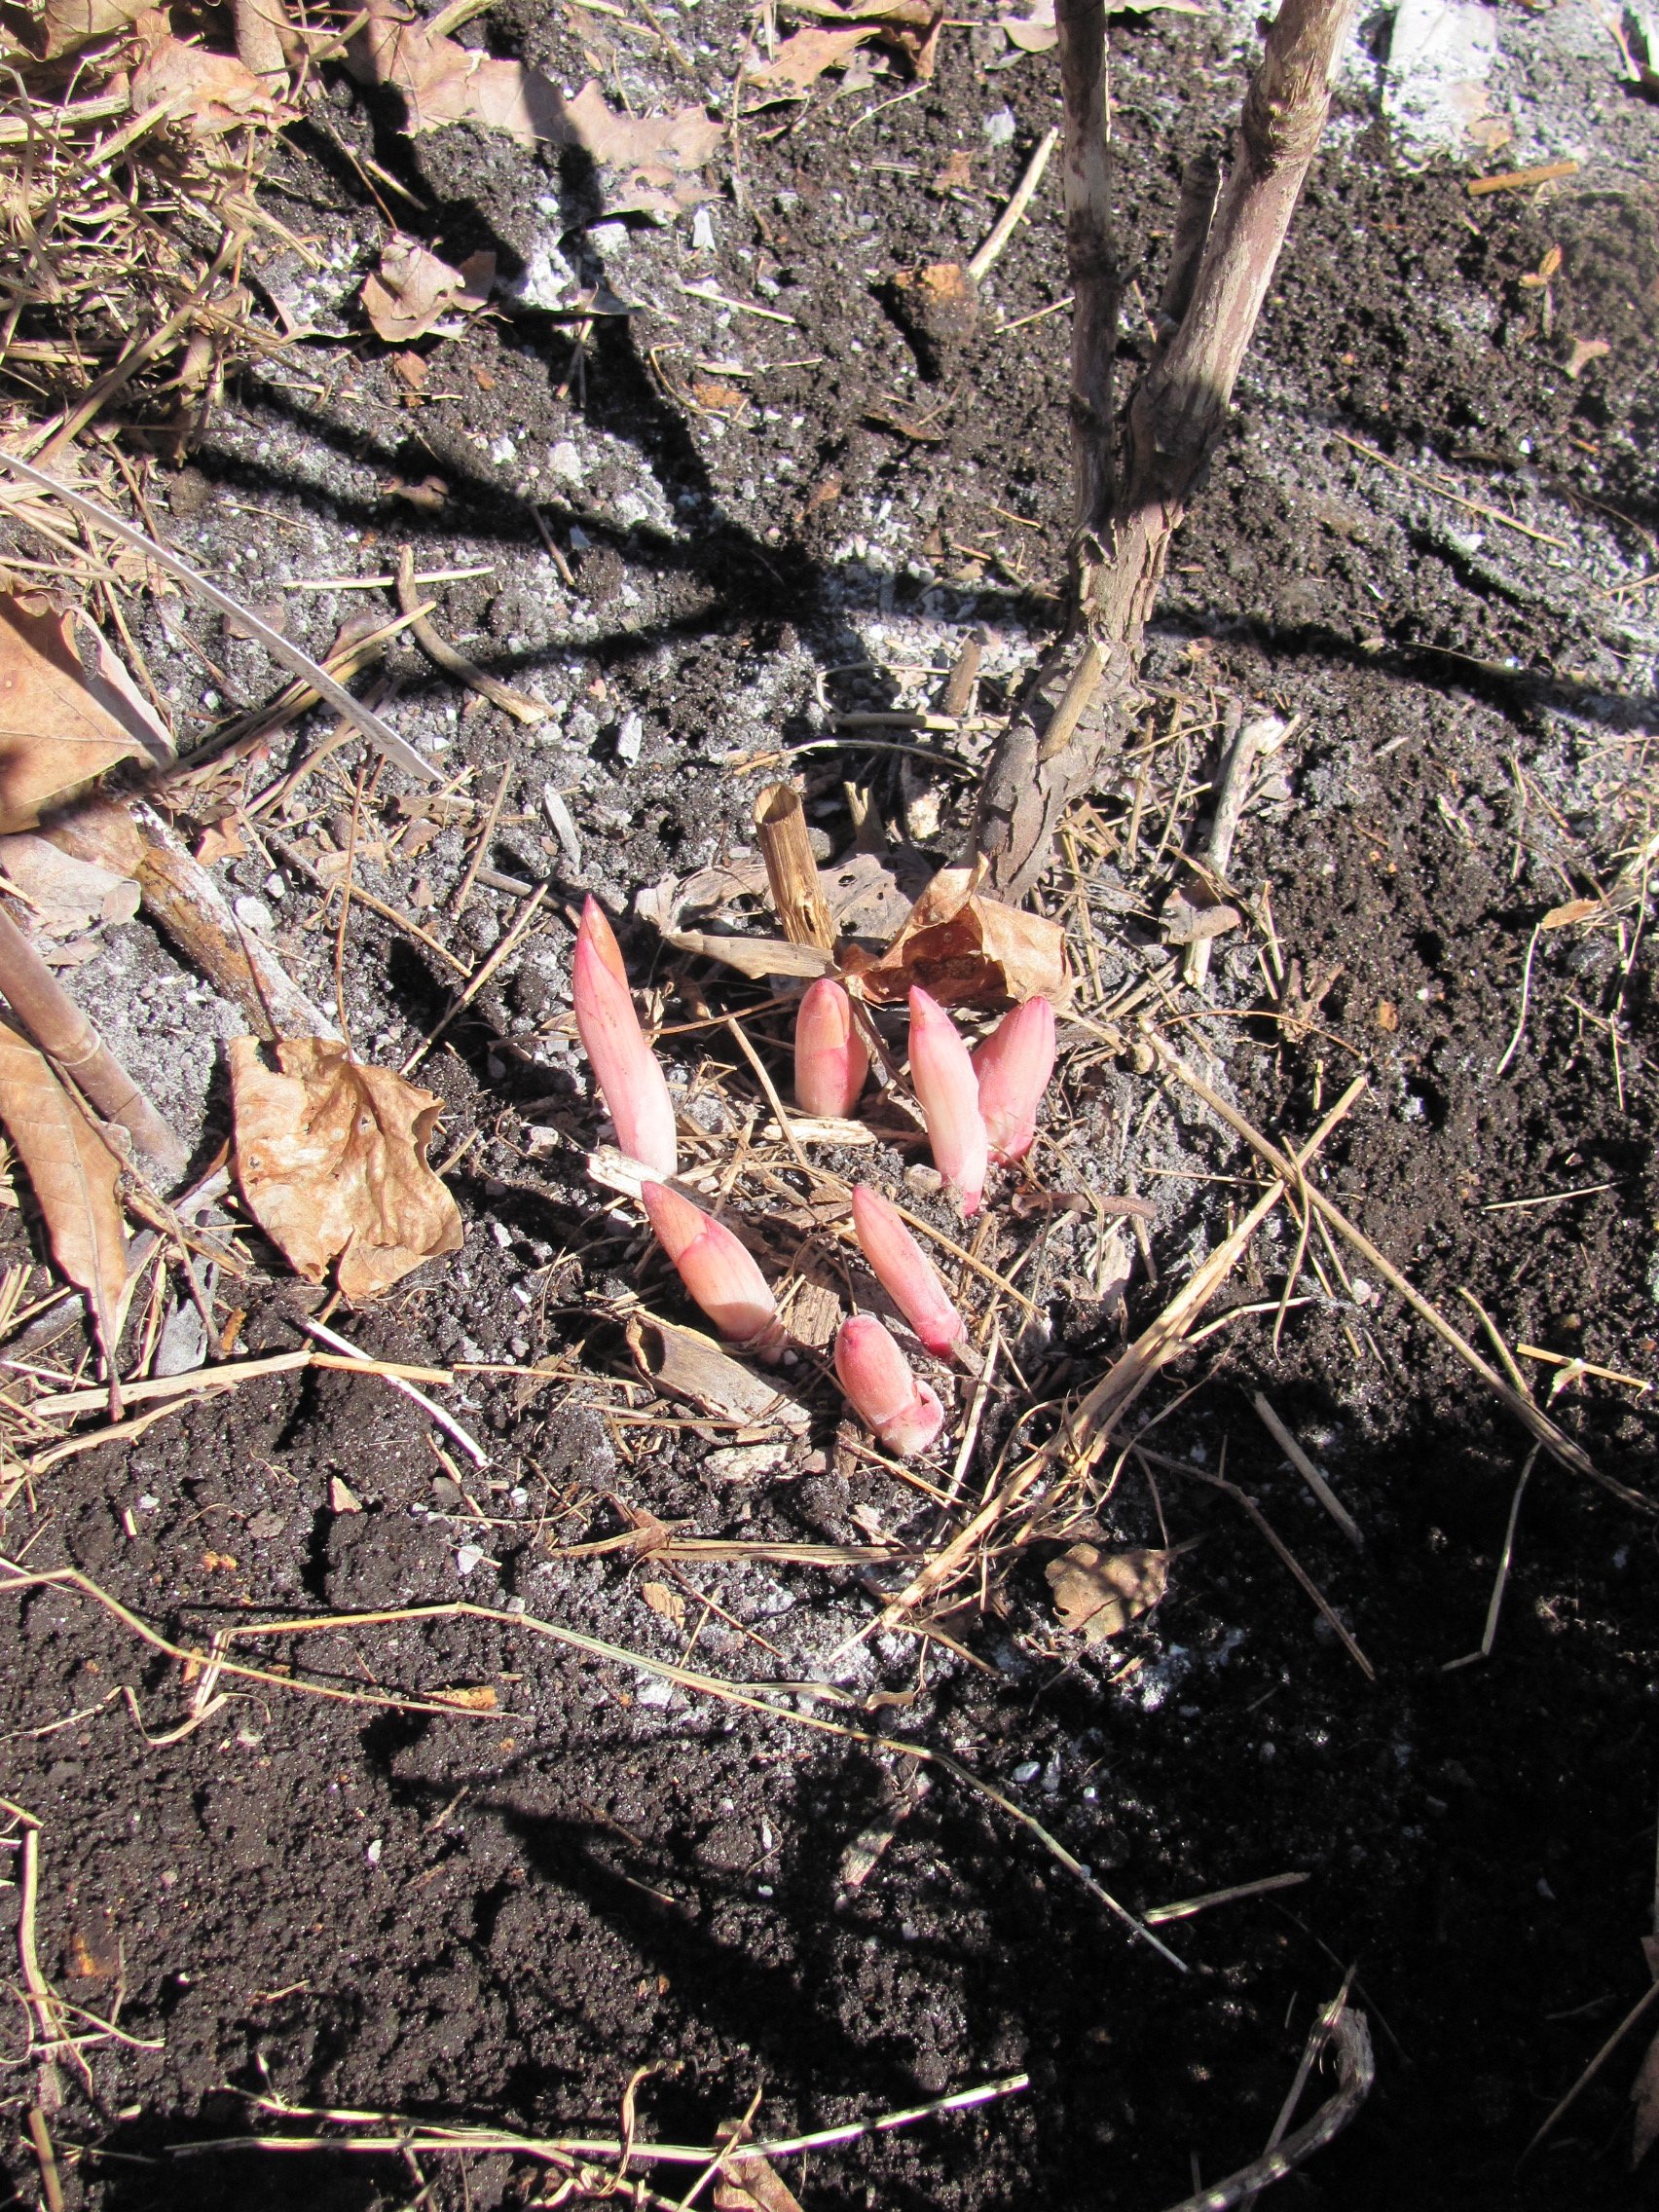
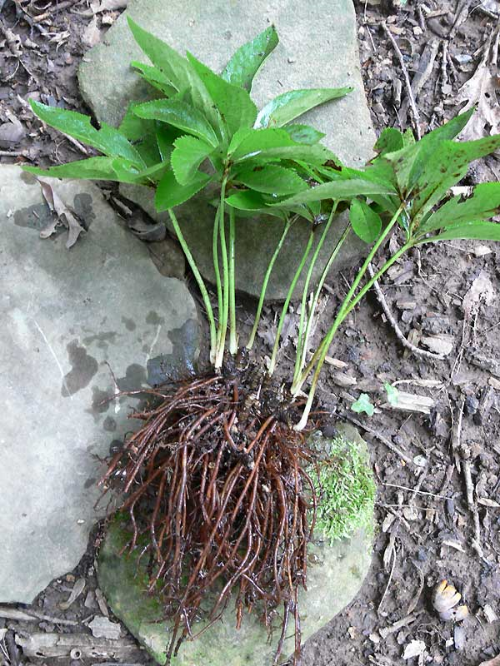
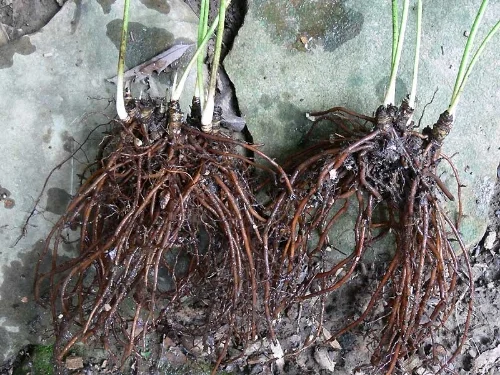
9. Replant heaved plants

The freezing/thawing cycles of early spring sometimes lift entire small plants out of the ground. Check your garden for any heaved perennials and gently replant and water them as soon as possible. Heucheras, astrantias and newly planted perennials are susceptible to heaving. A layer of winter mulch or evergreen bows remedies this problem by keeping the soil at a more even temperature through the winter.

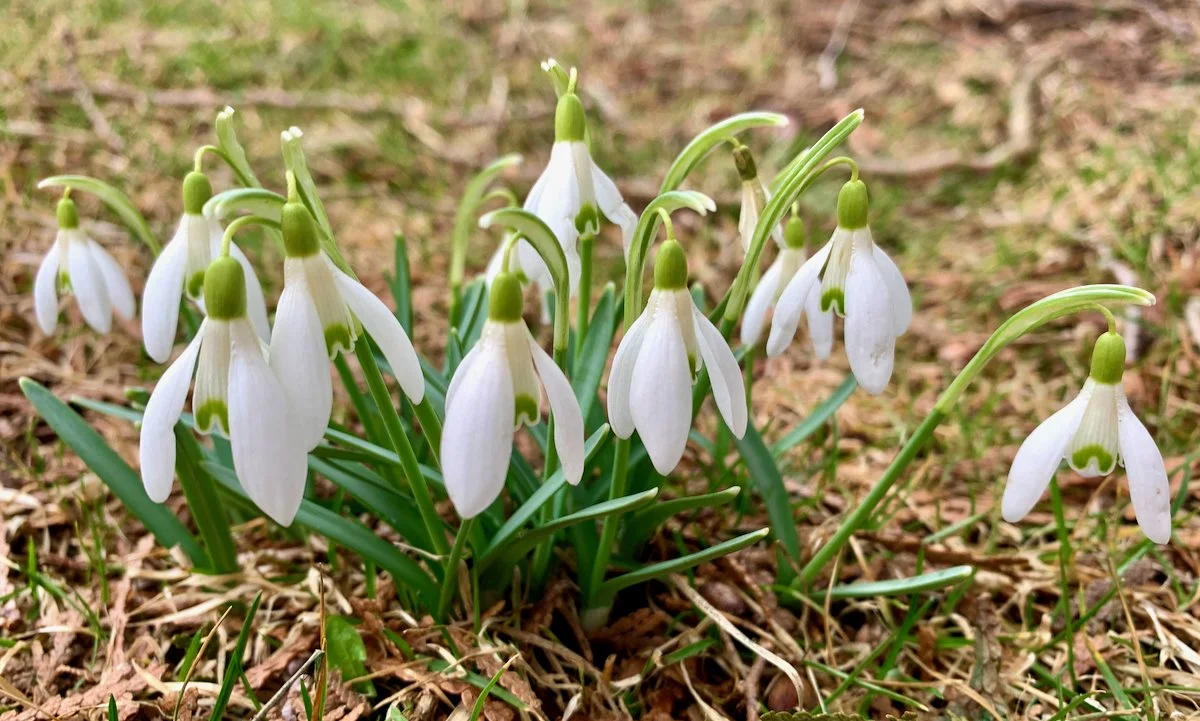
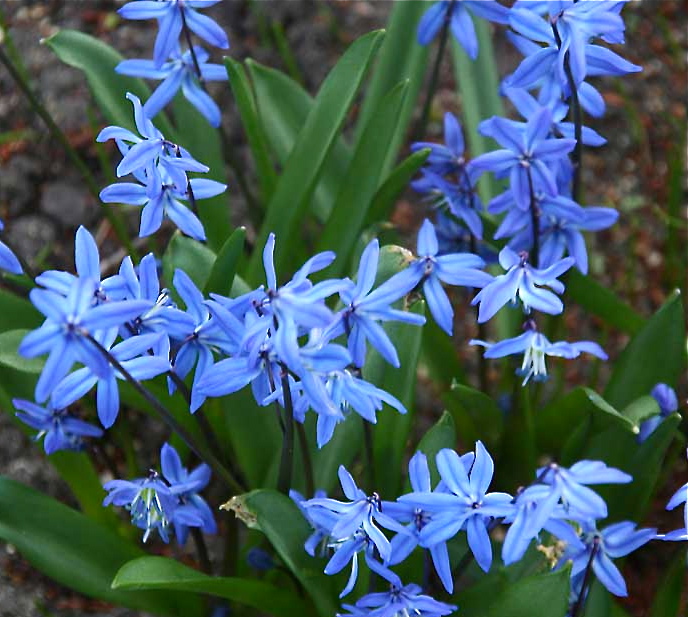
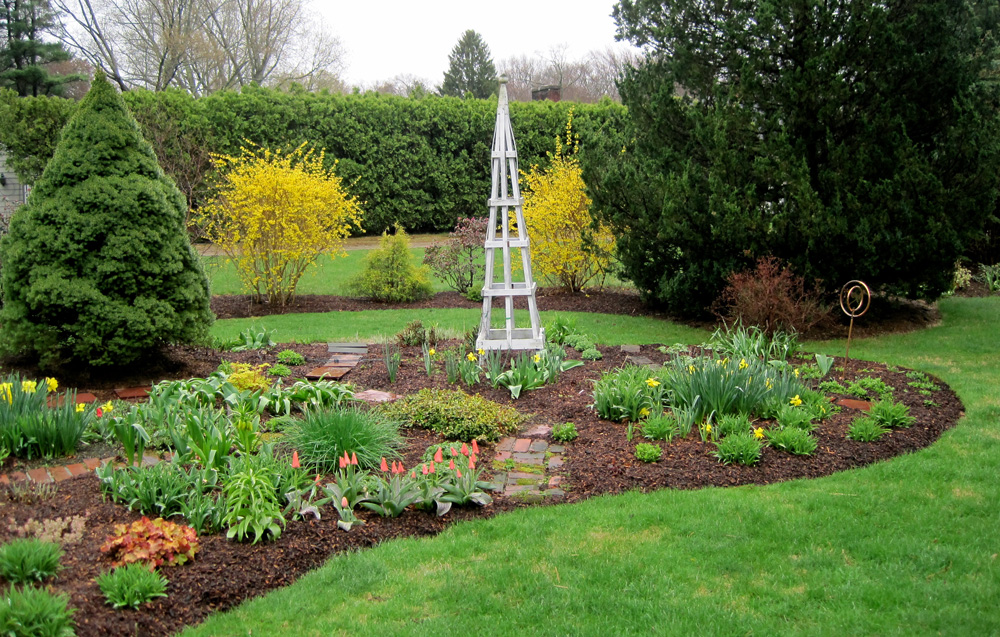
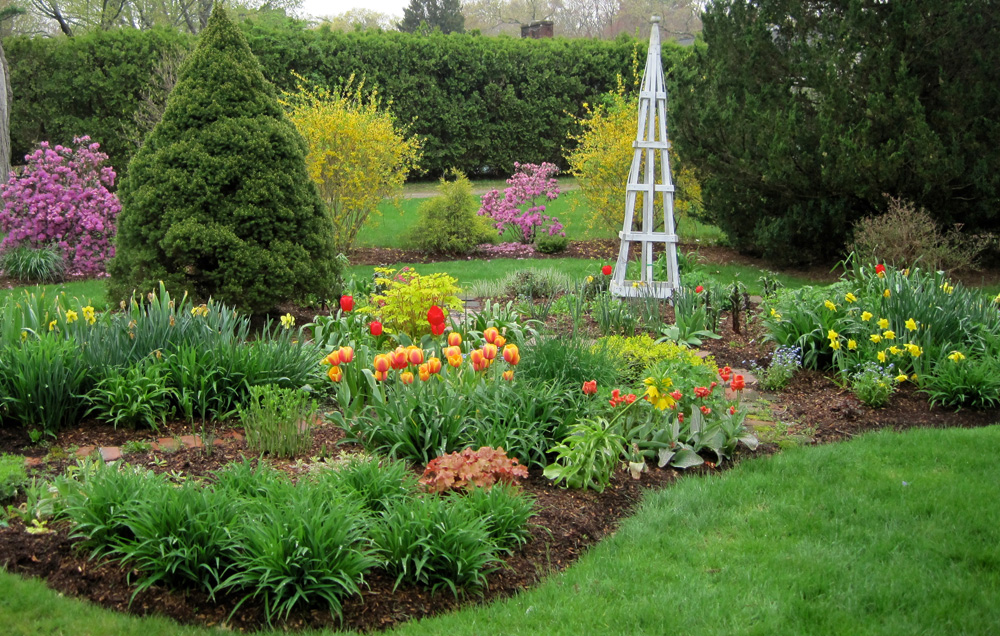
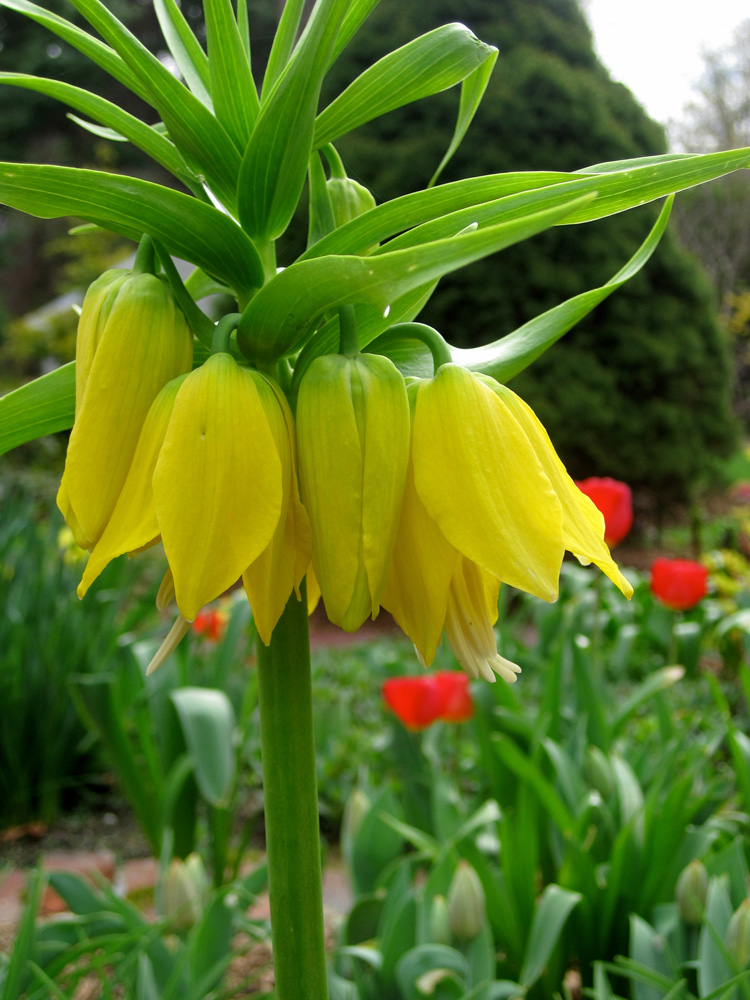
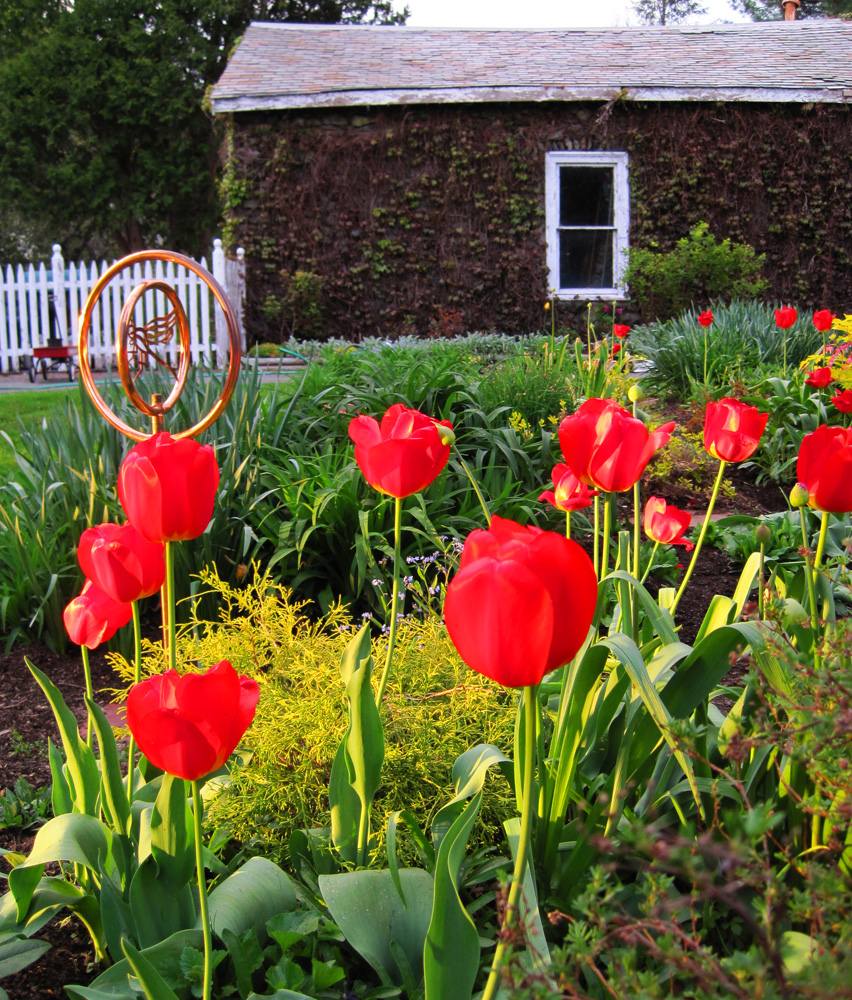
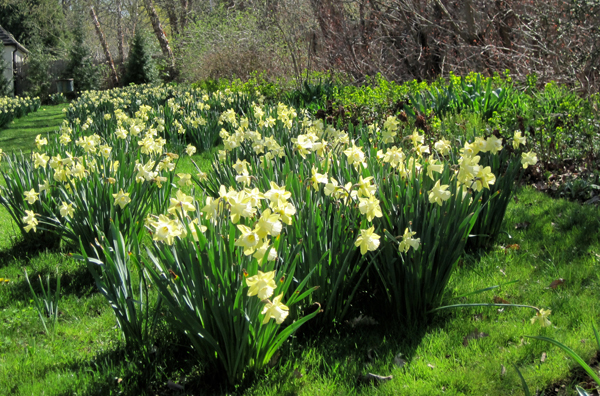
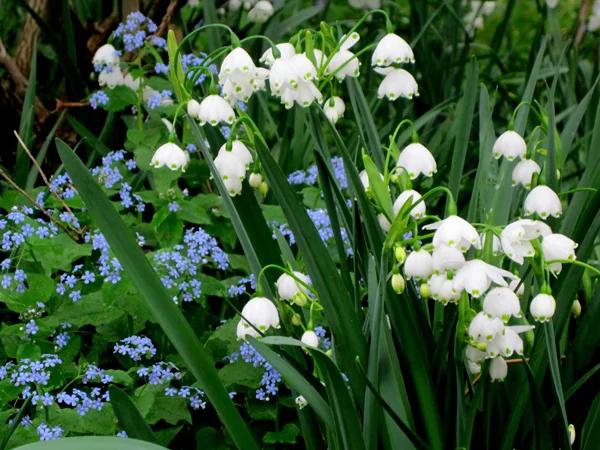
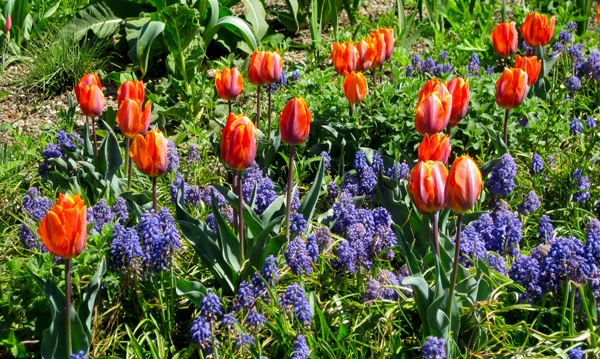
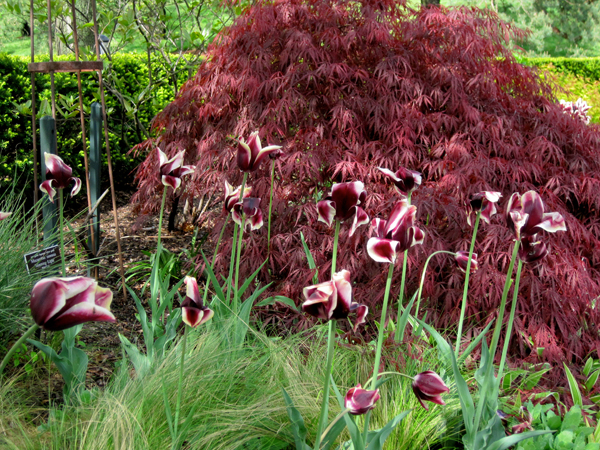
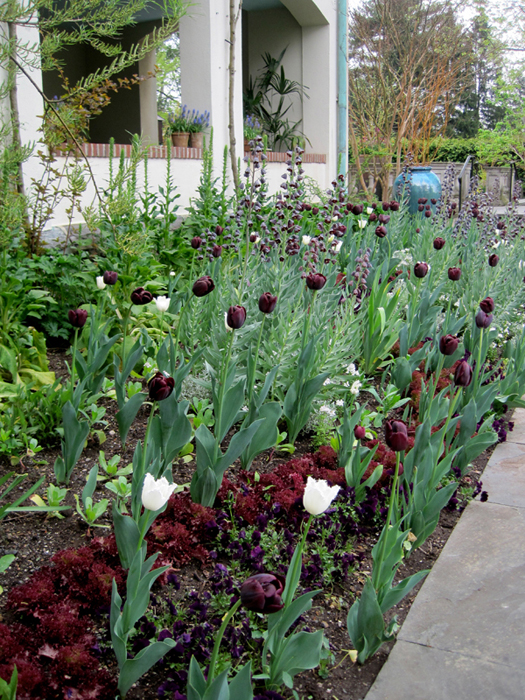
10. Feed spring bulbs

Spring bulbs will benefit with a dose of an all-natural organic fertilizer as their green tips push through the ground.

Prepping your Peonies for Spring

By Dan Furman, Owner, Cricket Hill Garden

Spring is here and we in the northeast are just about a month away from peony season. All types of peonies have a well deserved reputation as tough, long lived perennials that put on ostentatious displays of colorful blossoms year in and year out. A little annual basic maintenance of established peonies will help ensure that they remain healthy and vigorous for years to come. Here at Cricket Hill Garden we have thousands of plants growing in our display garden, stock plant blocks and nursery. Here is what we do ensure that our plants are off to the best possible start.

peonies at cricket hill nursery

Clean up any old foliage from left over last year which can harbor disease. It's best to dispose of old peony foliage in the fall at the end of the growing season, but as with many things, better late than never. Since fungal pathogens can survive for long periods on old foliage, if possible discard old foliage outside of the garden unless you have a compost pile that gets hot.

fertilizer ring: a 'ring' of granular soil amendments including lime, azomite, and pro-gro fertilizer are applied around the drip line of a peony in early spring

All peonies like a slightly acidic to neutral pH. Many areas of the Northeast have acidic soils. Lime is used to ‘sweeten’ the soil and raise the pH. If you are in an area with acidic soils and it's been a while since you added any lime to your peonies, spring is a great time to do so. Sprinkle one cup of garden lime around the drip line of established peonies. Use less for younger plants. 

Depending on your soil, you may also want to fertilize your plants for increased blooms. Some are blessed with rich soil which delivers all the nutrients peonies need to grow and bloom well without any fertilization. At Cricket Hill Garden, we are not so lucky. Adding compost to the soil in your garden is an investment in the long term fertility of your garden. Like many good investments, it can take a few years to pay dividends as the nutrients filter down to the root zone.

For a more immediate boost, we like to apply a granular organic fertilizer in the early spring such as Pro Gro 5-6-5. We apply 1-2 cups of this fertilizer around the base of the plant and lightly scratch it into the soil. We also use Azomite, a crushed volcanic rock powder, contains 70 different minerals and trace elements. These micro-nutrients help facilitate healthy plant growth. We have found to be an excellent supplement for our peonies, other perennials as well as in the vegetable garden. Bone meal is high phosphorus fertilizer which is also good for peonies, but is best applied in early summer after the bloom. 

The soil amendments are lightly worked into the ground. This final step of ‘scratching’ the soil amendments and fertilizer into the ground is very important. If simply left on the surface, they will cake and not break down into the soil as quickly.

One green growth has commenced, we will begin fertilizing the peonies with Neptune’s Harvest. For area where fungus is an issue for us, we apply the organic fungicide Actinovate. This is only effective when the air temperature is above 40° F.  

Pruning Cut: cutting a stub of dead wood from above live buds waking up in early spring

For tree peonies, early spring is the best time to do any necessary pruning. First remove any crossed or damaged branches. Next weak and interior growth can be pruned out. Some tree peonies are prolific in sending new shoots from the ground. While some of these can be kept and allowed to grow, allowing all to grow will sap too much energy from the established stems. Thin out all but the strongest of this new growth. Many tree peonies are grafted onto herbaceous rootstock, which is liable to sucker. If you see a herbaceous peony incongruously growing right next to your tree peony, this is the sprouted root stock. Remove these suckers. Leaving them will weaken the tree peony.

suckering rootstock: the eyes of a suckering herbaceous rootstock emerging next to a tree peony stem. These should be removed.

One of the great debates around peonies is whether or not to mulch. It has clear benefits, but if done incorrectly can also have negative effects on the plant. The best materials are double ground wood chips, bark mulch, chopped leaves and ‘clean’ compost which is free of weed seeds. Wood Chips are less than ideal but actually the material we use most here at Cricket Hill Garden. The benefits of applying a 1-2” layer of mulch around your peonies are many fold. It will suppress weeds and retain moisture in the soil as well as build soil health as the material breaks down. The dangers of using mulch are that they can build up to too heavy a layer overtime, making it difficult for the new shoots of herbaceous and intersectional peonies to emerge in the spring. Another potential pitfall is to apply too much directly around the stems of the peony. This can cause this area to retain too much moisture and lead to disease problems. It is best to keep the ‘drip line,’ the area underneath the foliage of the plant, free of mulch. Beyond the drip line the mulch will serve all of its beneficial roles in the garden without posing a danger to the peony.

Wood chip mulch: A layer of wood chip mulch helps suppress weeds around a woodland herbaceous peony

Now that you have your peonies all prepped for the coming season, it is time to actually stop working for a little while and enjoy the fleeting beauty of spring in your garden!

Cricket Hill Garden offers tree peonies, herbaceous peonies and fruit trees by mail order and in their nursery.

Cricket Hill Garden, 670 Walnut Hill Rd. Thomaston, CT 06787, 860-283-9393, treepeony.com. Open Tuesday to Saturday 10 am-4 pm.

Winter Sowing for a Bountiful Harvest

I love to test new gardening techniques, and for the past two years I tried winter sowing. The technique was popularized by Trudy Davidoff, once a novice, thrifty seed starter, who was challenged for space. Her small home in New York state did not have room for grow lights and seed trays. After some research, Trudi discovered that many seeds need a chilling period to trigger germination, so she decided to mimic what happens naturally. She sowed seeds in containers in late winter and left them outdoors to germinate naturally, without supplemental water or fertilizers. The technique was a success, and Trudi spread the word through a website and Facebook group (Winter Sowers).

After experimenting with winter sowing, I am a convert. The technique is simple, inexpensive, and fun, and allows you to do some gardening during the winter. You don’t need grow lights, heat mats, or seed trays. Your seedling will not be killed by “damping off,” and you do not need to “harden off” the seedlings before planting them outside.

 When to sow

Most winter sowers recommend starting after Christmas. I sowed seeds over a period of several weeks last year. For seeds that need stratification or scarification, late January to mid February gives them enough of a chilling time to trigger germination. Seeds that don’t need it can be started later – I started some in March in my Zone 6a garden.

Photo from Joegardener.com

How to Winter Sow

In nature, cold hardy seeds can withstand freezing temperatures, but they are insulated by fallen leaves and plant debris. In winter sowing, that protection is provided by your container, which become a mini-greenhouse. Most of us already have various options to use at home: one gallon plastic milk jugs, 2-liter soda bottles, restaurant take-out containers, and plastic containers that greens and salad mixes are grown in. I used all these options last year, and also purchased some aluminum pans with plastic lids from the Dollar Store, which worked great. It’s best to have 3” of depth for the soil.

Once you’ve got your container, you need to create holes for drainage, air and venting. You can use a Phillips-head screwdriver for this. Heat up the tip of the screwdriver and touch it to the plastic. It melts a good-sized hole without much effort. Make many holes for both drainage and venting. If you’re using a milk jug or a soda bottle, slice around the circumference about 5-6” from the bottom. Don’t cut it completely off. Instead, leave about an inch to work like a sort of hinge for the lid.

For sowing, I recommend a good quality potting soil. Seed starting soil is not necessary, and also provides zero nutrients, so you will need to fertilize if you use it. Dampen the soil, and sow your seeds to the depth specified on the seed packet. Trudi recommended a “mass planting” where you scatter the seeds on the soil instead of carefully spacing them out. This works well for small seeds. Water gently, replace the lid, and label with a paint pen or permanent marker. Tape the milk jugs and soda bottles closed with duct tape, and any other lids that may fly off in a strong wind.

 Where to place containers

Your winter sown containers need the warmth of the sun, and access to rain. They should also be protected from animals and foot traffic so they don’t get knocked over and heavy winds. I placed mine close to the back door so that I could easily keep an eye on them.  As the temperatures start to warm in the spring, check the containers often for germination. It’s so exciting to see the seedlings emerge! Once they begin growing, you can cut larger openings in your container for air circulation or remove the lids. Make sure that the soil remains damp–water as needed! When the seedlings are tall enough to reach the top of the container and have a sturdy root system, they are ready to transplant into the garden.

 Plants that can be winter sown

Annuals: alyssum, calendula, celosia, cleome, cosmos, dahlia, emilia, gaillardia, helianthus, lavatera, linaria, four o’clocks, morning glory, nasturtium, nicotiana, pansy, petunia, portulaca, rudbeckia, snapdragon, sunflower, viola

Perennials: asclepsia, bellis, coreopsis, digitalis, echinacea, flax, gaura, grasses, heuchera, inula, lewisia, liatris, malva, nepeta, oenothera, poppy, red hot poker, salvia, yarrow

 Herbs: basil, chamomile, chives, dill, hyssop, marjoram, mint, oregano, parsley, sage, thyme

 Veggies: Arugula, beets, broccoli, brussel sprouts, cabbage, cauliflower, chard, carrots, celery, hot peppers, kale, kohlrabi, leeks, lettuce, onions, radish, pumpkin, spinach, winter squash

 See my article “12 Terrific Seed Companies for 2022” for seed company recommendations.

I hope that some of you will try winter sowing this year! With 70,000 members, the Winter Sowers Facebook group is a great resource for ideas and information. Trudi has retired, so her Winter Sown website no longer exists, but there are other online sources as well.

Irrigation is Irregular

By Antonia Hieronymus

We just experienced the driest summer ever. The weather shows no signs of abating. Grass is brown, streams are just piles of rock and the reservoir has retreated, uncovering piles of dank stinking mud. Gardens are suffering, plants are struggling to survive.

Irrigation systems protect the  garden from the effects of drought. They are relatively affordable and dependable, offering stressed gardeners peace of mind that their hard work will not shrivel up and die, and offering them the chance to get on with other tasks.

So why don’t I have an irrigation system?

I spend hours watering by hand, in this time of drought an average of two hours a day.

It feels like I don’t have the time for so much labor, and yet still I resist an irrigation system.

The truth is that watering by hand is one of the most effective things I do in the garden. Not because I’m better with a hose than an inground system could be, but because it gives me time with my plants.

When I am watering I go around each bed, each tree and shrub.  I’m keenly aware of how much water each item needs and exactly how much it has received in recent days. I look at every plant individually, to see how it is faring. If it needs staking, or is getting diseased, I will notice. If its flowers are particularly splendid, I will rejoice, and equally if it is languishing, I will figure out why.  The beds which don’t quite work from a design standpoint I will transform. I get all my best ideas when I am watering.

I give a shout of joy when it rains, as gardeners I’m sure we all do. But if it rains for days I am already disconnected.

The reason I garden in the first place is that I love the connection to the earth, feeling the soil between my fingers. I make this huge investment of time, money and soul because it is my self-expression, my art.

Giving up the watering feels like being a parent and having someone else raise your kids—sure someone could do it, even raise them well, but the parent is the one missing out. Missing out on the highs and lows, the  victories and disappointments.

For my garden I want to be that parent who never misses a parent- teacher conference and who chaperones every field trip. I don’t want to miss a single minute of the growing up.

I’ll keep my hose.

Antonia gardens in Wayland, Mass.

Entering Rhododedron Trusses in a Flower Show

The following advice on preparing a truss for showing was written in 1983 by Evie Cowles for the Mass. Chapter of the Rhododendron Society Newsletter. It is a useful guide for those who wish to enter a rhododendron truss in a flower show.

1. Perfect condition is essential. This means healthy, unblemished foliage to set off the florets.  If you think of the leaves as a frame for a picture, you will appreciate how insect bites or browning reduces aesthetic appeal.  The large-leaved variety, ideally, is presented as a truss sitting on a perfect circle of leaves.

2. Blossoms should be open, but not over-mature.  One with a still-closed bud is preferable to another with florets on the point of dropping.  This particularly applies to the selection of azaleas. 

3. As with most cut flowers, rhododendrons benefit from a 24-hour hardening-off period to prevent wilting during the show.  The stem is trimmed before plunging the truss up to its neck in lukewarm water. Set the truss in a cold, draft-free spot for 24 hours. If a heavy rain is predicted before the show, cut your perfect trusses and extend this for a few days.

4. Before the truss is placed on display, it’s a good idea to make a fresh cut of the stem base. 

5. Very early rhododendron varieties can be shown out of season if they have been kept in cold storage.  The truss is stored dry in a sealed plastic bag in a refrigerator until the day before the show.  (It is also helpful to inflate the bag by blowing air into it, as if it were a balloon.  This will prevent the plastic from damaging the tissues of the truss).

 6. All the care in the world up to this point is useless if the trusses are bashed en route to the show.  For a short drive, it’s fine to lay them in shallow boxes.  For a longer distance, it’s better to put them upright in water in pop bottles or cans that are braced to prevent tipping or crowding.

7. If you have a truss of an unusual, difficult, or particularly beautiful variety, even if the foliage is in poor condition, enter the truss and you will likely get at least an Honorable Mention.  Many times, your newest plants are still quite small so that if gypsy moths or weevils chew the foliage, there are not a lot of other trusses to choose from – and these are the very cultivars that others are eager to see.  So be brave and enter your new or unusual less-than-perfect trusses.

Leave the Leaves!

By Joan Butler

I am very lucky to have a mature red oak, Quercus rubra, and an Eastern Red Cedar, Juniperus virginiana, in one corner of my property. The cedar produces beautiful berries that provide food for birds in winter, and for flocks of migrating birds, such as cedar waxwings and robins.

While I have planted a perennial garden beneath the cedar, the area under the oak has been left “messy”. Fallen leaves stay in place year-round. Many creatures require this type of undisturbed leafy environment for part of their life cycle. Wooly bear caterpillars overwinter here, as do many butterfly and moth pupae such as the pupae of the hummingbird moth. Bumblebee queens dig burrows here in autumn, staying safely underground until spring. And fireflies require this environment for every stage of their life cycle, except for the 6-8 weeks when they are in flight.

As I learn more about the ecological benefits of undisturbed “natural” areas in the home garden, I am transitioning other areas in my landscape into “habitat zones”. The concept does tend to conflict with our neat-and-tidy suburban ethos. But I have found that a number of our native plants serve as excellent groundcovers that bring order to “untidiness” while providing the benefit of added diversity.

Foamflower, Tiarella cordifolia, is a clump forming perennial that spreads fairly quickly by stolons and will also set seed. The lobed leaves are heart-shaped and are often delicately patterned with red. Beautiful spring blooms of white flowers are profuse and are held upright like small bottlebrushes on wiry stems above the leaves. Foamflower will grow in dense shade, but flowers best with some sun. Semi-evergreen, hardy to Zone 4, 7-10” tall.

The heart-shaped foliage of wild ginger, Asarum canadense, adds wonderful texture to the garden. This vigorous, rhizomatous spreader simply covers the ground, even in dense shade. Inconspicuous brownish flowers are held close to the ground, beneath the leaves, where they are pollinated by ants and crawling beetles – and interesting adaption. Deciduous, hardy to Zone 3, 8” tall.

Woodland geranium, Geranium maculatum, grows from a woody rhizome and will self-sow, flinging its seeds 10-20 feet from the mother plant, which is of great benefit in woodland settings. Also known as spotted geranium, its attractive lobed leaves are held in loose clusters. It blooms for about a month in late spring-early summer, with flower colors ranging from white to lavender to dark pinkish-purple. The flowers are followed by seed pods that, when dry, resemble tiny delicate candelabra. Woodland geranium will not grow in dense shade, and flowers best in part sun. Deciduous, hardy to Zone 3, 12-18” tall.

Bloodroot, Sanguinaria canadensis, is an absolute delight. Its early spring blooms (white petals with gold anthers) are followed by rounded, greyish-green lobed leaves that last well into autumn and provide bold texture to the garden. Bloodroot spreads by rhizomes, and by seed. Seeds are often relocated by ants that store them for winter consumption, when they will dine on a fleshy appendage attached to each seed – an interesting relationship for seed dispersal. Deciduous, hardy to Zone 3, flower stalks: 4”, leaf height: 12-15”.

I also have had success with Allegheny Spurge, Pachysandra procumbens, with its delicately mottled evergreen leaves. It spreads easily by rhizomes and is quite tolerant of dry shade. White, scented flowers appear in late April, before the new leaves expand. It is well-behaved groundcover unlike the more commonly planted aggressive Japanese species. Evergreen, hardy to Zone 4-5, 8-12” tall.

 If you have areas of your property that can transition into leafy habitat zones, have a go at it! The benefits are many. Reduces fall clean-up time! And the leaves that are left in place will return nutrients to the soil as they decompose – nutrients that are otherwise removed. Many insects, reptiles, birds and other creatures use undisturbed areas in ways we are only now exploring. We are beginning to learn about the importance (and joys!) of mimicking the natural world in our gardens.

We would love to hear about native plants you are using in your gardens that could be included in “leafy habitats”. Please leave a comment below.

 Local Seed is the Heart of Local Food

fruition2019-58.jpg

By Petra Page-Mann, Co-Founder of Fruition Seeds, Farmer, Storyteller

I absolutely love watermelons! However, as a child in the Finger Lakes, I thought watermelons were an absolute waste of valuable garden space. It’s true, practicality has never been a quality I've cultivated, but nonetheless, with long, trailing vines yielding a single fruit and sometimes none, my anticipation was almost always unrequited. Every few years we’d give them another try, only to reach the same conclusion by September: next year we'll sow more tomatoes, more lettuce, more beets, less watermelon.

I could not have been more wrong.

Like our reticent red peppers and unenthusiastic eggplants, I simply needed different seeds to have different experiences. 

Regionally adapted seed makes all the difference. At Fruition Seeds, we’ve dedicated our days to these seeds that grow us more than we'll ever grow them, right here in the Finger Lakes, so every little girl can enjoy watermelon straight from her garden.

A Brief History of Seed

Each seed tells the story of an entire life history, millions of years in the making. A few seeds, in a single generation, may travel the globe. But most will stay within their watershed and, most likely, their microclimate. In this way, seeds become profoundly adapted to place.

Agricultural seed tells an additional story--one of human relationship. For the last 10,000 years, these seeds have slowly adapted to place, spreading first on our backs, then by camel, then by boat. Fast forward to 2019: most seed companies offer seed from all over the world and nearly 80% of the agricultural seed sown globally is controlled by two companies. How did this happen?

FruitionSeedsSummer2020-51crop.jpg

From Commons to Commodity

If “regional seed” is seed adapted to a bioregion, then most seed before World War I was regional. Each generation selected varieties to meet the shifting conditions on each farm, in each region. Farmers largely would share their seeds as a commons—like clean water and fresh air—as precious resources to be honored and shared, not to be owned or restricted.

After World War I, F1 Hybrid corn was introduced. Met with resistance from wary farmers, the transition was slow but it came to dominate the market within 40 years, due in large part to government subsidies during World War II. In a single generation, farm-grown seed was replaced by seed from other bioregions that would not grow true-to-type in future generations, if saved. As a result, seed became just another commodity, like fertilizers and pesticides, that farms purchase annually, reflecting an industrial, one-size-fits-all mentality rather than a commons reflecting the unique values and needs of each region.

Sown Locally, Grown Globally

Most of us share a blind faith that our seed is produced by the companies selling them. This is most often not the case.

Today, most seed is grown where the climate favors commercial industrial dry seed production, such as the Central Valley of California. Unless you grow in the Central Valley, the seeds you sow are not likely to be well-adapted to your climate. We know Trader Joes doesn’t have a farm behind their stores. Most seed companies are distributors of seed rather than growers of seed, making much of the seed on the planet regionally adapted to the long, dry climates where seed is commercially grown rather than where you might sow it.

Does Regionally Adapted Seed Thrive Outside its Bioregion?

 In a word, yes!

One of our most frequently asked questions is if our seed with thrive outside our bioregion. I’m thrilled to report that though we focus on regional adaptation for our short seasons here in the Northeast, we have friends and family growing and loving, sharing and saving our seeds from our farm all across Turtle Island, from Alaska to Florida and many well beyond our borders.

This is not surprising, since seeds are impressively driven to adapt, thriving and indeed making life possible in every ecosystem on the planet, including our gardens and farms, as well.

Let's zoom out: The vast majority of us have only sown seeds from long, dry seasons where the climate is more conducive for commodity production, centered largely in China, the mid-East and American West. These seeds seed the world! One-size-fits-most has worked for several generations, though we are, individually and collectively, finding its growing edges. Decentralization of currently concentrated control, wealth and power, including seeds, is critical for our species to survive.

Here it’s vital to share that regional seed companies often share seed from outside their bioregion (we do, it's true! more soon!) and large companies often trial extensively to dial in varieties for bioregions, making it challenging (impossible!) to draw clean lines around which seeds will thrive where. But we're here to ask deeper questions rather than share conclusions, right?

fruition_seedpackets-11crop.jpg

Food for Thought

Friends, there are key crops where regional adaptation is particularly important for each bioregion. For example, I grew up thinking our season was too short to grow watermelon; I simply needed to sow better-adapted seed to be successful. Advantages are not always advantages, disadvantages are not always disadvantages. What are the key growing conditions in your garden?

As you're considering seed sources, keep in mind that seeds adapted to shorter seasons thrive more easily in longer seasons than the other way around.

Also, if you grow in short seasons like us, be sure your long-season crops (tomatoes, winter squash) have realistic days to harvest. If you don't have consistent heat in your summers, like the coastal Pacific Northwest, be sure to source heat-loving plants (tomatoes and eggplants) adapted to those conditions. If you have ludicrously hot summers, source lettuce that is well selected to resist bolting in heat.

The root is this: these selections can be made outside your bioregion and you can still be successful, but if you can find them within your bioregion, resilience is possible on many more levels. 

We’re seeding so much more than seeds, indeed.

Cultivating Questions

Knowing that seed companies are predominately distributors rather than growers, asking questions of your seed companies allows your dollars to amplify your deepest values. Where are your seeds grown? By what size farm? Are farmers paid to select seed or only by weight? Be kind, curious and critical as you reach out to us, Friends. Seed companies are as fabulously flawed as the humans who are their flesh, bone and soul.

This includes seed companies focused on regional adaptation:

For example, Fruition grows 60% of our seed on our farm in the Finger Lakes. Another 25% is grown in our Northeastern bioregion by an incredible network of organic seed growers (more on this to come, too!). The balance of our seed is grown in those long, arid seasons, especially for those crops we struggle to grow high quality seed of. Carrots, for example, cross with Queen Anne’s Lace up to one mile! We are grateful to source seed from an incredible network of seed growers, including about 5% from large seed companies, it's true.

And Friends, though we founded Fruition with the vision of regional adaptation, organics and sourcing transparency, we have failed with the latter. After year two we didn't keep up with updating our website on our seed sourcing and are fabulously not proud of this fact. This winter, as we're redesigning our website, we're committed to this transparency, so misleading and problematic when not present. Again, stay tuned!

Our seed system is as nuanced and problematic as our food system, exploitive and extractive by design. We’re here to grow ourselves as well as extraordinary seeds, our deepest teachers, adapting to all the ways the world is changing. Thanks for joining us on the journey!

Amid the questions, concerns and fraught constructs, we are grateful to grow acres of organic, regionally adapted seed each season to share with people we love, confident these seeds grow us so much more than we are growing them.

Hope to see you on the farm one day, when the watermelons are ripe and the dahlias are in bloom!

Until then...

Sow Seeds and Sing Songs,

Petra

Fruition Seeds, fruition seeds.com, 585.374.8903, 7921 Hickory Bottom Road, Naples, New York 14512

All photos courtesy of Fruition Seeds

Winter Pruning Tips

IMG_8716.JPG

By Jen Kettell |Radiant Leaf Consulting

There are those winter days when the air is so deeply cold that it nearly takes your breath away. On many winter days, though, the sky is a deep blue expanse around the bright sun, and the crisp air cleanses with each breath. On those days, I eagerly gear up in several warm layers and grab my coffee mug for the drive to share hands-on pruning lessons with my clients. Winter work in horticulture is very different from the growing-season madness. It’s quieter, strategic, and when it comes to pruning – more efficient. 

Pruning, it has been said many times, is both an art and a science. This is likely why I fell in love with arboriculture and pruning techniques. Pruning is not simply cutting any branches any where to make a plant smaller. True pruning technique requires an artist’s eye to sculpt a woody plant (tree, shrub, or vine) into a beautiful form that maintains its natural, species-driven habit. It also requires a scientist’s understanding of plant biology and mechanics to increase its strength and guide future growth. Pruning is a necessary task in caring for our landscapes. Most importantly, skilled pruning increases the health and lifespan of our urban canopy - keeping us healthy!

Photo by Sara Maida

Photo by Sara Maida

Getting started

Before beginning your next pruning project, take a moment to inspect your tools. By using a sharp pair of bypass pruners and a professional-grade pruning saw, you can easily and precisely prune away unwanted branches. Be sure to always wear safety glasses and gloves, too. (Stay safe by knowing your limits! Find a professional arborist here.)

By winter, deciduous trees and shrubs have shed their leaves to reveal their underlying architecture. Believe it or not, you should spend as much time looking and assessing as you do actively cutting branches. Think about what your goals are prior to making that first cut. Are there branches reaching over the driveway that need to be shortened? Does the plant only need some light shaping?

Next, start scouting for the kinds of branches you’ll consider removing. Prune away all dead branches any time of year, regardless of plant species. Dead branches don’t come back, and no longer serve your plants. Look for broken and crossing branches. From now through March, these branches are much easier to spot than when they are full of foliage. Stand back and look again. Things are looking better already! There’s much more to cover than a blog post allows, so please download my short guide here!

Photo by Sara Maida

Photo by Sara Maida

Timing

I often hear great concern over the timing of pruning, especially about plants that set their flower buds on old wood (download a handy list here). As I’ve said many times before, I will go to my grave - hand pruners held high – hollering, “HOW you prune is more important than WHEN you prune!”

What?! Why, you ask? 

The short answer…because pruning is pruning and hedging is hedging.

Through natural, selective pruning, we’re carefully selecting specific branches for removal; we are not giving a buzz cut.  While we’ll certainly remove flower buds via the cut branches, we won’t have denuded the whole plant. So, if you’re contemplating that tiny lilac you planted just last year, maybe hold off on pruning until right after flowering. However, for that lilac that hasn’t seen a sharp saw in twenty years? Prune.It.Now

Are there plants that I never prune in winter? Absolutely! Here are a couple that come to mind: roses (Rosa spp.), big leaf hydrangeas (Hydrangea macrophylla), and dieback shrubs like Russian sage (Perovskia atriplicifolia).

Photo by Sara Maida

Photo by Sara Maida

Practice

Pruning skills are only honed by practicing pruning—so bundle up! Sharpen those tools and start tackling your garden favorites. Once you get in the groove, I know you’ll catch pruning fever!

Join me for my next webinar hosted by the Massachusetts Horticultural Society: https://radiantleaf.com/thisseason

 To learn more: Jen Kettell |Radiant Leaf Consulting Radiantleaf.com jen@radiantleaf.com

Photo by Sara Maida

Photo by Sara Maida

In Defense of Weeds

1400945145878.jpeg

By Joan Butler

One summer day a few years ago, I noticed a very large spotted white moth resting on a leaf in my crabapple tree. I was amazed by its size and distinct markings, unlike anything I had ever seen before. Eventually, I tracked down its name – it was a Giant Leopard Moth. And I learned that in its caterpillar stage, it dines on broad leaf plants such as plantains, dandelions and violets. These are usually considered weedy plants, and are aggressively eradicated from lawns and gardens. But here was a creature that relied on them as a food source!

Giant Leopard Moth

Giant Leopard Moth

This past summer, I had two new types of butterfly visit my garden. Once again, I had to do some research to figure out what they were, and what their larvae fed upon.

Red Admiral

Red Admiral

The first were Red Admirals. They busily worked on the pink coneflowers in my backyard – what a joy! When I read what their caterpillars ate, though, I was puzzled: nettles and hops, which were not plants I had growing in my gardens, nor did my nearby neighbors.

clearweed

clearweed

I did, however, have a weed that had gone crazy in one corner of the yard. I don’t use herbicides, and I was too busy to contend with it manually. I finally identified it as Clearweed, and learned that this eastern US native is a non-stinging member of the nettle family! The hand of Mother Nature seemed clear in the relationship between the Clearweed growing out of control and the appearance of Red Admirals in my gardens.

Common Buckeye

Common Buckeye

The second new visitor arrived just as my Sedum ‘Matrona’ was entering its prime, and it busily worked the flowers alongside scores of honeybees and native bees. I came to learn that this newcomer was a Common Buckeye, but there was nothing common about it as far as I was concerned - I was thrilled. I’m sure you have already guessed that, once again, one of the preferred foods of the larval stage is a weed: plantain.

plantain

plantain

Every summer, I await the reappearance of Fritillary butterflies. They seem especially fond of the nectar of Verbena bonariensis and coneflower, but they also require the presence of violets. The female lays eggsin late summer on or near violets. The eggs hatch in fall. The young caterpillars overwinter until spring, when they begin dining on violet leaves. Without violets, which are the only plant the caterpillars consume, there would be no Fritillary butterflies.

Fritillary butterfly

Fritillary butterfly

common violet

common violet

Over the last decade, there has been a surging interest in including native plants in our gardens, as we have come to recognize their vital role in our ecosystem. A functioning food web is created by using plants that evolved with our native animals - and insects. And we probably should allow some weeds in the mix.

Garden Cocktails

IMG_1364.JPG

As my husband and I drove for five hours to visit the beautiful gardens of Mount Desert Island, Maine, we listened to an Audible rendition of Amy Stewart's The Drunken Botanist to pass the time. Like many gardeners, I have become more interested in cultivated and foraged edible plants in the past few years. How could I put my sage, lavender, lemon balm, mints, lemon verbena, basil, rosemary, blueberries and peaches to better use?

A collection of new botanical cocktail books caught my eye, from The Drunken Botanist, to Adriana Picker's The Cocktail Garden, Amy Zavatto's Forager's Cocktails and C.L. Fornari's The Cocktail Hour Garden. After years of drinking nothing but wine, I was intrigued by the promise of "drinks for long hot summer afternoons spent among flowers in the garden; wine spritzers for breezy evenings on the back porch; champagne cocktails for celebrations under the apple tree; and fruity party punches for that garden party gathering with style."

The Drunken Botanist delivered a fascinating mix of botany, chemistry, history, etymology, mixology, gardening know-how and drink recipes during our journey north. When we arrived at the Asticou Inn, we were delighted to find a long porch where you could spend an afternoon with a Blueberry Mojito or a Porch Sipper and watch the boats sail in and out of Northeast Harbor. The recipe for a Porch Sipper and other delicious garden cocktails follow.

dfd3b3816b0cf051d9d7e8780bb7405d.jpg

English Garden

Ingredients:

2 lime wedges
5 mint leaves
1 1/2 Tb Belvoir Elderflower Cordial
2 oz white rum
2 oz apple juice

Mix in a highball glass with cubed ice, garnishing with a mint sprig.

belvoirfruitfarms.co.uk

2742193bbf5d19a8b6194eac59ecd218f8164934.jpeg

Strawberry Gin Smash

Ingredients:

1/2 tsp granulated sugar
1 lime wedge
3 fresh strawberries, 2 hulled and sliced, 1 for garnish
3 oz gin
Club soda
Fresh mint

In a tall glass, combine the sugar and a squeeze of juice from the lime wedge. Muddle with the back of a spoon to dissolve the sugar. Add the sliced strawberries and lightly muddle. Fill the glass with ice and add the gin. Top with a splash of club soda and garnish with the last strawberry and a sprig of mint.

thekitchn.com

Lavender-soda-recipe-made-with-beautiful-homemade-simple-syrup.jpg

Lavender Gin & Tonic

Ingredients:

3 oz gin
4 oz tonic water
1 Tb fresh lime juice
Lavender simple syrup to taste (see recipe below)
Sprig of lavender for garnish
 

Mix in a highball glass with cubed ice, garnishing with a lavender sprig.

garden therapy.com

kiwi-margs-I-howsweeteats.com-3.jpg

Kiwi Margarita

Ingredients:

2 oz Grand Marnier
1 1/2 oz Tequila
2 oz lime juice
2 1/2 oz kiwi simple syrup

lime + fresh kiwi slices for garnish
coarse salt for the rim

Trace the rim of your glass with a lime wedge and dip in a mix of coarse salt. Fill the glass with ice. In a cocktail shaker, combine the tequila, grand marnier, kiwi simple syrup and lime juice with ice, and shake for about 30 seconds. Pour over ice and squeeze in lime slices and garnish with kiwi slices

Kiwi Simple Syrup

4 kiwi fruit
1/2 cup sugar
1/2 cup water

Combine the sugar and water in a saucepan and bring to a boil, whisking until the sugar dissolves. Turn off the heat and let the mixture cool. Puree the kiwi fruit in a food processor or blender. Add the cooled sugar syrup and blend. 

hotsweeteats.com


Belvedere-Cucumber-Spritz-house-19jul16-pr_b.jpg

Cucumber Spritz

Ingredients:

1 oz vodka
1 oz dry vermouth
2 cucumber ribbons (created with potato peeler)
2 oz sparkling water
2 oz tonic water

Combine all the ingredients in a long glass filled with ice and stir.

houseandgarden.co.uk

Herb-infused Simple Syrup

Ingredients:

2 cups sugar
5 cups water
2 Tbs. fresh herb

Add all of the ingredients to a saucepan and bring to a boil while stirring to dissolve the sugar. Turn down the heat to low and let simmer for another 10 minutes. Turn off the heat and allow the syrup to cool. Once cool, strain the herbs, then pour through a coffee-filter-lined strainer to remove any particles. Store in the refrigerator for up to 3 weeks.

grapefruit-cocktail-1050x700.jpg

Asticou Inn Porch Sipper

Ingredients:

1 oz lemon juice
3 oz grapefruit juice
2 oz vodka
2 Tb rosemary syrup (see recipe above)
rosemary and grapefruit slice for garnish

Mix in a tall glass with cubed ice, garnishing with a grapefruit slice and rosemary sprig.

Sit back and enjoy the view!

25348942.jpg


10 Ways to Beat the Winter Blues

AAEAAQAAAAAAAAlUAAAAJGIyMzg3MDhhLWViNTktNGNmYi1hOWNhLThhMmU5N2EzODJiMQ.jpg

Tired of winter already? It's only the beginning of February, and we still have two months of snow and frigid temperatures here in Massachusetts. Here are ten ideas for coping with the winter blues for gardeners.

buxton begonia society

buxton begonia society

1. Get involved!

Local garden clubs and plant societies offer a wealth of programming for their members. Joining a plant society is an excellent way to deepen your knowledge of a particular plant family, meet experts in that field, and make new friends! There are New England branches of the Hosta Society, Rhododendron Society, Dahlia Society, Hydrangea Society, Daffodil Society, Herb Society and many more!

snug harbor farm valentine bouquet workshop

snug harbor farm valentine bouquet workshop

2. Learn and create

Even if you are not a member, you have access to excellent gardening lectures, classes, and workshops offered by local nurseries and organization such as Mass Hort, Tower Hill, Trustees for Reservations, Arnold Arboretum, Berkshire Botanic Garden, and New England Wildflower Society to name just a few. See the events listings offered on their websites.

boston flower and garden show

boston flower and garden show

3. Attend a flower show

With exuberant landscape displays, floral design competitions, lectures, and gardening vendors, flower shows offer a rich preview of spring. Here are the 2018 dates:
Connecticut Flower Show: Feb 22-26
Boston Flower and Garden Show: March 14-18
Maine Flower Show: March 22-25

garden-book-club.jpg

4. Become a bookworm

Organize a monthly Garden Book Club with your friends,  garden club, or library. For book suggestions, see the Books page. Learn, discuss and enjoy!

succulent-dish-garden.jpg
better homes & gardens

better homes & gardens

5. Create an indoor garden

Get your creative juices flowing by planting a miniature indoor garden. Whether it's a bowl garden of succulents or a basket of miniature houseplants, the possibilities are endless. Transform an old aquarium into a terrarium, add miniature accessories for a fanciful fairy garden, or create a hanging kokedama planting!

5829575c1e13f3c805e8164b0da94ffd.jpg

6. Swap and share

Have your houseplants outgrown their space or are you just tired of them? Organize a houseplant swap with your garden club, friend or neighbors and enjoy growing a new plant for free!

my variegated African violet cuttings 

my variegated African violet cuttings 

7. Propagate the plants you love

Many houseplants including African violets, begonias, and pepperonias are easy to propagate from leaf cuttings. Cut the leaf stem, dip in a rooting hormone, plant into a container of potting soil, water and cover. New leaves usually appear in 4-6 weeks. Restaurant take-out containers with clear lids are great for this purpose. 

cymbidium florals, portsmouth, NH

cymbidium florals, portsmouth, NH

8. Surround yourself with flowers

One of the things that I miss the most in winter is the sweet scent of flowers and blooming shrubs. Visit your local florist for a quick olfactory pick-me-up, purchase some flowers, and create an arrangement that will fill your home with beauty and fragrance.

fine gardening

fine gardening

9. Force flowering branches

February is a great time to force branches of spring-blooming trees and shrubs. Cut the branches, split the ends with a knife for maximum water uptake, place in a bucket of water in a cool room out of direct sunlight, and mist frequently. Buds open in 2-4 weeks depending on the variety. Great plants for forcing include forsythias, bodant viburnums, cherries, crabapples and magnolias.

mike's backyard nursery

mike's backyard nursery

10. Try winter propagation in the garden

Many deciduous shrubs can be propagated in winter from hardwood cuttings. I tried this last winter and had good success! Shrubs best suited for this technique include abelias, hydrangeas, red-twig dogwood, pussywillows, forsythia, spires, deutzias and more. Ask your friends if you can take cuttings from their shrubs and try this easy technique! For more information, see this blogpost at Mike's Backyard Nursery.

Any other ideas for beating the winter blues? Please leave them in the Comments section.

Creating a Layered Garden

Every gardener wants a lush, colorful garden that brims with excitement and interest throughout the year. But how do you achieve this? By creating a "layered garden" - one in which the plantings are carefully selected to provide a succession of interesting combinations (or layers) from spring through fall.

61bnObi7YEL._SX335_BO1,204,203,200_.jpg

In his excellent book, The Layered Garden, David Culp illustrates this concept with stunning photographs of his gardens at Brandywine Cottage in Bucks County, Penn. As he writes in his book:

"The key to creating a many-layered garden is understanding and taking advantage of the ways plants grow and change through the seasons and over the years, providing different textures, colors, and effects and evoking a variety of feelings. Garden layers are made up of a variety of plants, some with complementary or contrasting colors, other with interesting shapes and textures." 

I created my layered perennial garden so that I would have a nice view from my kitchen windows. I wanted to use bright, "hot" colors somewhere on my property, and this location seemed ideal since it was a little further from the house. This kidney-shaped island garden was originally planted around a lone small apple tree that later succumbed to disease. It was replaced by the white tuteur, made for me by my brother-in-law. The shape of the tuteur echoes the dwarf Alberta Spruce on the left and provides a focal point for the garden in all seasons. Although the garden has gone through many changes, the concept and some of the plantings have not changed in 24 years.

The kidney garden has grown over the years to its current size of 28' long and 24' deep. It has  always had small access paths so that I would not have to step on the soil.

The first blooms of early spring are daffodils and species tulips. I moved and divided my forsythia bush so that it would be a colorful backdrop to the blooming daffodils. The daffodils are interplanted with daylilies, so as the daylilies grow, their foliage hides the foliage of the daffodils.

The species tulips bloom in April. Unlike most tulips, they are short in stature and truly perennial. They also have beautifully mottled foliage.

In early May, Darwin tulips and forget-me-nots begin to bloom, along with the PJM rhododendrons in the background. The forget-me-nots self-sow from year to year. Once they are done blooming, I remove most of them so make room for emerging perennials.

The fritillary, also called "Crown Imperial", is a regal bulb.

Darwin tulips are more hardy than many other varieties and return year after year. I add more bulbs every 4-5 years to keep my spring show going.

One of the joys of the layered garden is that it allows for flexibility, letting me change the predominant colors of the garden several times during the year. By early June, the color scheme of the garden has transitioned to blue and yellow.

Bulbs are key to achieving a layered look. They take up little space, and their foliage completely dies back later in the season, making room for other plants.

Baptisia produces tall spikes of bright blue flowers and handsome blue-green foliage. It is now the size of a shrub, and I stake it to keep it upright all summer long.

Allium 'Globemaster' produces giant purple globes on sturdy tall stems. It's especially vibrant next to the 'Goldheart' bleeding heart.

I purchased these 'Johnson's Blue' geraniums from Bluestone Perennials more than 20 years ago. They have been divided several times, and continue to form a cloud of blue in June.

My tuteur sports clematis 'HF Young' - a variety with giant flowers. Climbing vines are another asset to a layered garden - they add height, but have a small footprint.

Centaurea montana, or perennial Bachelor's Button has beautiful azure flowers.

In late June, the garden turns to gold and green with the prolific blooms of daylily 'Stella de 'Oro'. I try to plant the perennials in large swaths so that they have impact in the garden from a distance.

Several self-seeding plants weave through the perennials. I remove some in the spring, and leave the others to create an informal English cottage look. Golden feverfew, one of the self-seeders, provides bouquets of tiny daisy flowers and bright chartreuse foliage.

Coreopsis 'Zagreb', also known as Tickseed, is a long bloomer in full sun.

Daylilies begin their show in July. 'Margaret Seawright' is a gorgeous bi-colored variety.

Daylily 'Bloodline' complements its neighbor, scarlet Bee Balm.

The feathery gold foliage of Spirea 'Ogon' and Amsonia contrasts with the strappy foliage of daylilies.

Purple Perilla is another self-sower that adds drama to the late summer garden.

Several varieties of helianthus and rudbeckia create great cut flowers for the house.

These Orienpet lilies add a wonderful fragrance to the entire garden. They came as a set of 25 unnamed bulbs from White Flower Farm.

I grew aster 'Nova Anglie' from seed 24 years ago, and if the woodchuck does not get it, it provides armloads of flowers in September.

Rudbeckia, zebra grass and perilla in the autumn garden. I like the planting to be full - no mulch visible.

Sedum 'Autumn Joy' and Michaelmas daisy welcome autumn.

IMG_8472.jpg

Always consider your garden's backdrop.'Karl Foerster' grass, variegated sedum, a golden cypress and burgundy Witherod Viburnum provide a lovely background for the garden in late fall as the perennials die back.

10 Favorite Mail-Order Nurseries

February is a terrific time to choose new plants for the garden. Here are some of my favorite mail-order nurseries for perennials, trees and shrubs. Do you have other favorites? Please share them with others in the comments section!

Slideshow_ARRE.jpg

Bluestone Perennials

Bluestone Perennials was one of the first mail-order nurseries that I purchased perennials from when I began gardening. Most of those perennials -geraniums 'Wargrave Pink' and 'Johnson's Blue', lobelias and astilbes, to name a few, are still growing in my garden 20 years later. Bluestone carries a huge selection of perennials, as well as bulbs and shrubs, from reliable standbys to exciting new hybrids. If you need help with plant combinations, you can order pre-planned theme gardens, such as a Butterfly Garden, Cutting Garden or Lamp Post Garden. Robust plants are shipped in 3-1/2" x 4" plantable pots. The nursery has been family-owned and operated since 1972, and provides excellent customer service. Catalog available. bluestoneperennials.com

Brushwood Nursery

If you are looking for clematis or other climbers, Brushwood Nursery is an excellent source. Brushwood offers hundreds of clematis varieties as well as honeysuckles, trumpet vines, passion flowers, wisteria and jasmines. The informative website is a virtual encyclopedia of clematis - you will have a hard time narrowing down your choices! I was inspired to try clematis after hearing Cheryl Monroe's lecture, and she recommended Brushwood. Since then, I have ordered plants for myself and as gifts for friends, and they have all done beautifully. Owner Dan Long takes great care in selecting, growing and shipping healthy, vigorous plants. They now sell all the vines in one-gallon pots with free shipping. brushwoodnursery.com

Flowers by the Sea

I love the spiky form and delicate flowers of salvias, but you rarely find any varieties other than 'Caradonna' and 'May Knight' at local nurseries. Luckily, there is a California nursery called Flowers by the Sea, which specializes in beautiful salvias and has 52 varieties that are hardy to Zone 6. Last year I added salvias in periwinkle blue, soft pink, magenta and white to my perennial border and they bloomed until November! Plants are large and healthy and the website offers a wealth of information about growing salvias. If you sign up for their newsletter, you receive weekly Salvia deals. fbts.com

Santa Rosa Gardens

Santa Rosa Gardens offers an extensive selection of perennials with an emphasis on ornamental grasses - there are 182 varieties of grasses on offer! Most of the plants are sun lovers, and you will be pleased with the number of varieties to choose from - 13 types of agastache, 32 varieties of coreopsis, 14 Gaillardias, 44 Sedums, and more. In addition to standard 3-1/2" pots, you can also order perennials in flats of 72 if you are doing a mass planting. Santa Rosa Gardens is family-owned grower that has been in the horticulture business for four generations and offers excellent customer service.

Santa Rosa Gardens has also started a new subscription service called My Garden Box. The nursery assembles a custom crafted collection of plants and gardens goods that you can receive on a monthly basis or send as a gift. The plants are beautifully packaged and arrive as a lovely surprise.  santarosagardens.com

Pine Knot Farms

Hellebores have a special place in my heart, and there is no better place to look for new varieties than Pine Knot Farms. Judith and Dick Tyler have been breeding hellebores for more than 25 years, with stock plants from the UK, the Balkans, Japan, Australia and New Zealand. The couple authored a comprehensive book on Hellebores in 2006. I hope to visit their North Carolina nursery someday, but in the meantime, I try some of their new offerings every year. pineknotfarms.com

Palatine Roses

When I replanted my rose bed last year, I was determined to use hardy, disease-free roses. I ordered bare root rose bushes from several sources, and the best plants came from Palatine Roses in Ontario. The roses had well-developed root systems and strong canes, and flourished during the entire season with no signs of black spot or other diseases. I had blooms through November. Palatine has a minimum order of 3 roses, and the mail order deadline is March 15 for spring shipping. palatineroses.com

High Country Gardens

If you are looking to develop a drought-tolerant perennial garden, look for plants at Santa Fe's High Country Gardens. The nursery has been dedicated to improving the environment "one garden at a time", and has been a pioneer in the concept of xeriscaping - gardening with plants that need minimal water once established. Founder David Salman has introduced unique hybrids for water-wise gardens, and all plants are grown neonicotinoid-free. This nursery is a great source of sun lovers such as liatris, agastache, lavender, coreopsis, monarda and more! The site is also rich with plant description and gardening advice. highcountrygardens.com

700400211.jpg

Geraniaceae Nursery

One of my earliest "favorite plants" were the hardy cranesbill geraniums for their long-lasting dainty blooms and ease of care. I recently discovered a book devoted to this family of plants written by Robin Parer which led me to her specialty nursery in Marin County, Cal. While local nurseries sell less then 5 varieties, Geraniaceae offers close to 170 hardy geraniums hybrids, as well as erodiums and pelargoniums. If you love this family of plants, there is no better source! geraniaceae.com

Mason Hollow Nursery

If you have a shady garden or just love to collect hostas, you will enjoy ordering from Mason Hollow Nursery in Mason, New Hampshire. Owners Sue and Chuck Anderson opened the nursery in 2001, and offer an impressive array of more than 800 hosta varieties, as well as ferns, epimediums and other perennials. Plants arrive with good sized root systems and are ready to be planted in the garden. You can also visit Mason Hollow and see their lovely display gardens. masonhollow.com

Lazy S's Farm Nursery (now closed)

A family-owned nursery in Virginia, Lazy S's Farm offers a huge range of perennials as well as many hard-to-find hybrids of shrubs. Do you like callicarpa? You can find 13 varieties at Lazy S. All plants come in quart pots, so it is an inexpensive way to purchase an unusual shrub if you have the patience to grow it on for a few years before it makes a significant presence in the garden. When delivered, plants are healthy and vigorous and ready to take their place in the garden. lazyssfarm.com

For more nursery recommendations, see The Garden Tourist, and The Garden Tourist’s New England books in the Shop.


Growing Mushrooms at Home

Winter is a great time to focus on the tender tropicals, citrus trees, herbs, and other plants that can thrive indoors, and to do some horticultural experimentation. If you love mushrooms, it’s a wonderful time to try growing mushrooms at home.

I had ordered a mushroom growing kit as a gift for my husband many years ago. It was a total failure, so I was skeptical about investing in another one. At the same time, I was still intrigued by the idea. I visited the booth of MoTown Mushrooms at the Conn. Flower Show last winter, and spent a long while learning about their products and asking a lot of questions. MoTown Mushrooms is a small husband and wife mushroom farm in Morristown, Vermont, that is trying to educate New Englanders about the benefits of “applied mycology” and introduce them to delicious gourmet mushrooms.


A month later, I took the plunge, and bought their FungiPail at the Boston Flower Show. Mushrooms need a damp environment to grow, and I happen to have a very humid basement with a 100 year old stone foundation that stays at an even 55 degrees year round. MoTown Mushrooms sells 12 pound FungiPails that come spawned with several different types of mushrooms. Given my growing environment, they recommended Blue Oyster mushrooms, which prefer a temperature of 40 – 65 degrees F. Though I wasn’t familiar with this variety, I decided to give it a try and purchased the bucket.

blue oyster mushrooms

blue oyster mushrooms

Cooking and eating mushrooms is in my Czech blood. Hunting for wild mushrooms is a national sport in the Czech Republic — a drive in the country to forage for mushrooms is a favorite weekend activity. The most prevalent mushroom is the Boletus edulis, or porchini mushroom.

When we emigrated to the US, my parents tried to indulge their mushroom hunting hobby here. Driving on country roads, we were always on the lookout for wild mushrooms. I remember a couple of very bountiful and memorable mushroom hunts, particularly during vacations on Martha’s Vineyard. I have fond memories of fresh mushrooms made with scrambled eggs, and the rest of the bounty carefully sliced and left to dry on sheets of newspaper on the backyard picnic table.

My dad and brother after a successful mushroom hunt on Martha's Vineyard

My dad and brother after a successful mushroom hunt on Martha's Vineyard

So I was excited to try my hand at growing mushrooms at home. I placed my new FungiPail in the basement, and carefully monitored it for signs of life. The FungiPail is filled with a spawned substrate in a plastic bag, and has several openings cut into its side. Several weeks passed, and nothing had happened. I was beginning to think that I had wasted my money, when the first little bulges appeared in the cut openings of the bucket. I began misting twice a day. The mushrooms grew at an incredible pace. Within a week, the bucket looked as if it had exploded with mushrooms and I began harvesting. The blue oyster mushrooms were delicious sautéed with butter and onion. I enjoyed their earthy flavor, and dried some for future use in soups and stews.

First fruiting

First fruiting

Once the mushrooms were fully harvested, it was time for the Intermission, a period of about 3 weeks when the bucket rests before fruiting again. Sure enough, about a month later, more mushrooms burst forth. The second fruiting was smaller than the first, but equally delicious. The bucket fruited a total of 4 times with virtually no effort on my part except for the daily misting during fruiting. I definitely harvested the 3 lbs. of mushrooms that were promised, and will purchase a bucket refill at the Conn. Flower Show in February.

Third fruiting

Third fruiting

MoTown Mushrooms sells FungiPail kits inoculated with Pearl Oysters, Blue Oysters, Gray Oyster, Pink Oyster, and King Oyster, and Chestnut Mushrooms. In addition to FungiPails, they feature a cute tabletop kit, jars of glow-in-the-dark mushrooms, and inoculated logs and spawn plugs so that you can make your own mushrooms logs or stumps – my next project! 

Tabletop mushroom kit

Tabletop mushroom kit

The plug spawn can be ordered with other types of mushrooms, Shitake, Lion's Mane and Chicken of the Woods.

There are many other mushroom vendors online as well– Mushroom Mountain is another great source. You can also find mushroom growing kits at retailers including Amazon and William-Sonoma. If you have other mushroom vendor recommendations, please leave them in the comments below. Give mushroom-growing a try – it's easy, fun, and very satisfying!

Mushroom Log from William-Sonoma

Mushroom Log from William-Sonoma

The Aftermath of the Drought

Most parts of Massachusetts and, in fact, much of the Northeast experienced a summer-long drought. This affected many perennials, trees, and shrubs, both in the wild and in our gardens. As our cities and towns enacted strict water bans, we gardeners watched helplessly as our new plantings and even established plants yellowed and then browned. Although the drought seems to be finally over this month, what can we expect in the coming year as a result?

I have been pondering this question for several weeks, and did some research on-line and in conversations with several local experts. If you are wondering what next year may bring, here is what I learned:

Water bans may continue

Hydrologist David Boutt of UMass Amherst writes: “One reason this year’s drought is so noticeable is that it has come largely in the growing season, so everyone from farmers to homeowners and gardeners has felt its effects. It also follows an almost 15-year period of higher-than-normal precipitation. As a region we were blessed with abundant rainfall in particular from about 2005 to 2010, a bonus situation. Since then, conditions leading to this current drought started to be felt as early as 2013.”

Contrary to popular perception, droughts are seldom one-year events. “Droughts are multi-year events; they take some years to develop. And like the others, this one will be felt for longer than one season. When soils are so dry, even with the recent rainfall, it will take time for the hydrologic system to recover.” This means that even though we may see closer to normal rainfall next year, water bans are likely to continue since it will take several years our groundwater supplies to be replenished.

Droughts are particularly detrimental during the growing season

Ron Kujawski of UMass Extension explains: “With respect to influence on plant growth and health, it is the amount and frequency of rainfall received during the growing season that is of greater significance than the total amount of precipitation in a given year. When defining a drought year, the pattern and frequency of rainfall are clearly more important than the total amount of rain.”

Don’t be too hasty to replace plants

During the severe droughts, trees and shrubs will exhibit wilting leaves, marginal leaf scorch and premature leaf loss. Don’t be too hasty to replace plants that appear to have dried up, however. Plants that look dead may actually have living tissue underneath the bark or in the ground. You can check on woody plants by scratching the bark to see if there is green tissue underneath, and wait until next spring to see if these plants leaf out.

Long-term effects of drought on woody plants are not immediately visible

Keep in mind that it may take several years for a woody plant to completely recover from drought stress.  You may see plants with less vigor, increased dieback during winter, and more susceptibility to pests and diseases.

Damage occurs where you cannot see it

Robert Childs of Fine Gardening writes: “One common long-term effect of drought is stem dieback, which is a result of the loss of fine feeder roots. As soils become dry during the hottest summer months, the fine roots in the upper soil surface may be stimulated to increase in number to get what little water is available. However, they will begin to die if soils remain dry, thus putting the root system out of balance with the amount of foliage found aboveground. When rain does return, the plant may not be able to take full advantage of this much-needed water because of its reduced root mass. The result is a resizing of the canopy through branch die-back. If drought persists into the next growing season or recurs before the tree can fully recover, it may die.”

Spring blooms may suffer

“Many woody and herbaceous perennials that bloom early in the season set their buds the previous year. These include lilacs, forsythia, peonies, and many daylilies. Even the later bloomers may have less growth next year as a result of the stresses this year. So, keep an eye on these and, if they are not at their best this coming year, don't despair but have patience!” writes Dr. Leonard Perry, Horticulture Professor Emeritus at UVM. So if your plants do not exhibit their usual spring glory, pamper them a bit and wait patiently until the following year.  

Smaller perennials

Some of my perennials such as astilbes dried to a crisp this summer, and I was afraid that I may have lost them permanently. The recent rains have revived them, and fresh green growth has reappeared. Bob Sohlberg, hosta breeder and owner of Green Hill Farm, warned that next year’s hostas and other perennials may be smaller in size due to this year’s drought. He recommended a foliar feed of tomato fertilizer to bulk up hosta leaves next year.

Fewer self-seeders

Mark Richardson, Director of Horticulture at Garden in the Woods, noted that plants produced fewer seeds due to the drought this year. The New England Wildflower Society propagates many of its plants through seed collection, and seed gathering was much less successful this year. If you have self-seeded foxgloves or other beauties in your garden, you may see less of them next year. My weeds did not get the drought message however – they have been as bountiful as ever.

Less gypsy moths?

This was the second year in a row that a lack of springtime rain triggered an explosion of voracious gypsy moth caterpillars in Massachusetts. Drought conditions impeded the spread of a fungus that usually keeps the number of gypsy moth caterpillars under control. If we have normal springtime rain next year, the gypsy moths should decline in number.

Looking ahead

2017 may be a challenging year in the garden, but I am already looking forward to spring as I plant my bulbs and put the garden to bed. And by next April, every blossom and green leaf poking out of the ground will be a miracle, no matter how small!


More Hellebores, Please!

Hellebores have become one of my favorite plants since I began growing them about 10 years ago. They bloom at a time when the garden is mostly dormant - from late fall to early spring - and bring a smile to my face every time I see them bravely holding up their blossoms against the harsh weather. They are easy to grow, virtually care-free, and there are wonderful new varieties introduced every year.

This hellebore Niger began blooming in early December due to our warm winter this year.

This hellebore Niger began blooming in early December due to our warm winter this year.

Hybrid hellebores are expensive to purchase (about $17 for a one-gallon pot) because it takes three to five years for them to bloom, and growers generally only sell blooming plants. You can buy smaller plants through mail order. But the most economical way to increase your collection is to propagate your own plants. You can divide all hellebores except the caulescent varieties (H. argutifolius, H. livius and H. foetidus).

Unlike other perennials, hellebores are long-lived plants that do not need to be divided to remain vigorous. In researching hellebore division, I have found a range of recommendations as to when to divide your hellebores - from dividing them in early spring, to mid spring while they are still in bloom, to waiting until mid-summer, to early fall (September to October). Since opinions on this vary so widely, I think that it is safe to do the division in any of these seasons. I have done it successfully in early summer, while the flowers were still visible on the plant, but after their beautiful display in early spring. The keys to successful division seem to be:

  1. Make sure that there are flower buds in each division
  2. Divisions should not be allowed to dry out after replanting
  3. Divisions should have enough time to establish a healthy root system before winter 

To divide a hellebore, dig up the entire plant, wash the crown free of soil in order to better see what you are doing, and then cut between the growth buds with a sharp knife. Try to leave at least three buds in each division so that the plants will recover quickly.

For your first experience, select a plant that has 5-10 flowers on it. Older plants are very woody in their center. Make sure that you have a very sharp knife. I keep a small pruning saw with a serrated blade just for the purpose of dividing perennials. Make sure that each division has a portion of the center along with the newer growth from the edge of the plant. 

Plant your divisions in full shade to almost full sun. Add compost to the planting hole, firmly tamp down the soil, water, and mulch. I also water with a high-phosphorous fertilizer to encourage good rooting. Divisions should be kept moist throughout their first growing season until frost.

One of my hellebore gardens with divisions from my own plants.

One of my hellebore gardens with divisions from my own plants.

Another way to add hellebores to your collection is to grow on any seedlings that have rooted around the mother plant. Not all hellebores produce seeds - some are sterile hybrids. But many of the orientalis type do set seed every year, and if you look carefully, you will see little seedlings growing around the mother plant. These seedlings should be moved to a nursery location after they have developed a true set of leaves, so that they will not be shaded out by the mature plants. I grow them on for about two years in a nursery bed, and then plant them out in the garden, eager to see what these babies will look like when they bloom.

Seedlings with fully formed leaves at the base of the mother plants.

Seedlings with fully formed leaves at the base of the mother plants.

Two-year old seedlings in the nursery bed where they enjoy beautiful soil and no competition from other plants.

Two-year old seedlings in the nursery bed where they enjoy beautiful soil and no competition from other plants.

Hellebore foetidus produces many seedlings in my garden, and I find them in random places where they have planted themselves. Since foetidus is not a long-lived plant, you should keep some seedling growing by the mother plant so that you continue to have hellebores in that spot. Because they have finely cut foliage, these hellebores do not shade out their babies.

Hellebore foetidus seedlings

Hellebore foetidus seedlings

I have so enjoyed slowly collecting new cultivars, dividing my plants and growing on hellebores from seed, that I now have about 50 hellebore plants throughout my garden. And when I see them blooming every winter, I know that I will add more!

New Hellebores available to purchase this year

(From top left): Berry Swirl (Plant Delights), Cotton Candy (Plant Delights), Honeymoon Rome in Red (White Flower Farm), Honeymoon Sandy Shores (White Flower Farm), Double Ellen White (White Flower Farm), Love Bug (Pine Knot Farms), Mango Magic (Broken Arrow), Tutu (Pine Knot Farms)

Sources: White Flower Farm, Pine Knot Farms, Plant Delights, Broken Arrow


Favorite Nurseries in New England

Joan and I love to lecture about gardening and are often asked about where we obtain our plants. The short answer is “everywhere” – from specialty nurseries, local nurseries, plant swaps, big box stores, friends, mail order sources, plant societies and special plant sales. We both seek out nurseries when we travel, and almost always come home with souvenir plants. Some of my plants journeyed home with me from Cape Cod, Philadelphia, New York, New Mexico and Seattle. Some of the best nurseries in New England are destination nurseries with beautiful display gardens. Others are small home nurseries that grew out of a passion for a certain plant.

Here is a list of some of our favorite sources for plants in New England. 

Cochato Nursery

Cochato Nursery

Cochato Nursery

Specialty nursery featuring unique plants and incredible display gardens. Great selection of unusual perennial shade plants (including hundreds of hostas), plus a variety of unusual trees and shrubs for all gardens. Owners Chuck Doughty and Sue DuBrava are welcoming and knowledgeable about all aspects of the plant world. Open May 2, 2015 to Labor Day, Thursday-Sunday. 373 North Franklin St, Holbrook, MA.  www.cochatonursery.com

New England Wildflower society

New England Wildflower society

New England Wildflower Society

NEWS offers a wonderful range of native plants--with the genetic traits that make them hardy in the region and perfect for native wildlife--for home gardeners. Plants are available for sale at Garden in the Woods, 180 Hemenway Rd., Framingham, MA and Nasami Farm Nursery, 128 North Street, Whately, MA www.newfs.org

katsura gardens

katsura gardens

 Katsura Gardens

Specialty nursery featuring rare trees, unusual conifers and specialty plants. Katsura Gardens is especially known for its large collection of Japanese Maples. 112 Carver Road, Plymouth, MA.  www.katsuragardens.com 

Weston Nurseries

Weston Nurseries

Weston Nurseries

With a history of rhododendron hybridizing, including the ubiquitous PJM rhodie, Weston Nurseries is a favorite for its extensive selection of rhododendrons, shrubs and trees. Weston has always been an excellent resource for horticultural information – from the knowledgeable staff, to their catalogs and online plant library. 93 Main St. (Rte 135), Hopkinton, MA. 508-435-3414; 160 Pine Hill RoadChelmsford, MA. 978-349-0055 www.westonnurseries.com

Russell's Garden Center

Russell's Garden Center

Russell’s Garden Center

With an extensive gift and garden accessory shop, Russell’s is a fun destination year-round. I especially like their selection of perennials and roses, as well as water plants and pond supplies. 397 Boston Post Road, Wayland, MA. 508-358-2283  www.russellsgardencenter.com

Bigelow Nurseries

Bigelow Nurseries

Bigelow Nurseries

Celebrating its 100 year anniversary this year, Bigelow Nurseries has a good selection of trees, shrubs and perennials at prices that tend to better than at other large local nurseries. 455 W. Main St., Northboro, MA. 508-845-2143 www.bigelownurseries.com 

Tranquil Lake Nursery

Tranquil Lake Nursery

Tranquil Lake Nursery

Warren Leach’s Tranquil Lake Nursery is the largest grower is daylilies and Siberian and Japanese Iris in the northeastern U.S. Visitors are always welcome to stroll through the display gardens and more than 10 acres of growing fields and to choose from more than 2,500 cultivars of daylilies and 200 cultivars of iris.  45 River St., Rehoboth, MA. 508-252-4000 www.tranquil-lake.com

Briggs Garden & Home

Briggs offers a beautiful selection of annuals and perennials in addition to shrubs and trees. The nursery has expanded to include garden accents and home décor, and there is a café on the premises. 295 Kelley Blvd., North Attleboro, MA. 508-699-7421 www.briggsgarden.com

o'Brien Nurserymen

o'Brien Nurserymen

O'Brien Nurserymen

Specialty nursery. Incredible selection and quality: hundreds of hostas, plus conifers, Japanese maples, shade perennials. Beautiful display gardens. Definitely worth the trip! Owner John O'Brien is friendly, knowledgeable and passionate about plants! Mail order for hosta plants only. 40 Wells Road, Granby, CT.  www.obrienhosta.com

 Mason Hollow Nursery

Mail order and specialty nursery. Top quality plants for everyone from the novice gardener to the collector. Huge selection of Heuchera, hundreds of hostas, unusual shade perennials, conifers and small trees. Owners Sue and Chuck Anderson are a delight - and so helpful! Beautiful display gardens. Opens for the season May 9, 2015. 47 Scripps Lane, Mason NH.  www.masonhollow.com

Broken Arrow Nursery

Broken Arrow Nursery

Broken Arrow Nursery

Broken Arrow is best known for its mountain laurel collection, and has been featured in several gardening magazines. It features an unparalleled inventory of off-the-beaten-track and brand-new varieties of woody plants. Open April to October 31.13 Broken Arrow Road, Hamden, CT; brokenarrownursery.com

Snug Harbor Farm

Snug Harbor Farm

Snug Harbor Farm

Lauded by Yankee Magazine as one of the top five nurseries in New England. Fantastic containers and topiaries created from uncommon botanicals elevate gardening to the level of fine art. Open year-round.87 Western Ave., Kennebunk, ME. 207-967-2414; snugharborfarm.com

Garden Sales

Conveniently located off of I-84 in Manchester, Conn., Garden Sales is a family owned nursery owned by the Turull family. Garden Sales has an excellent selection of hostas, as well as hard to find perennials, daylilies, roses, peonies, ornamental grasses, dwarf conifers and ornamental trees. 308 Oakland St., Manchester, CT  860-649-9406 www.gardensalesllc.com

Off the Beaten Path

Completely Clematis Nursery

As the name says, a small nursery specializing in all types of clematis, both retail and mail order. Completely Clematis focuses on small-flowered species and hybrids that are easy and rewarding to grow. 217 Argilla Road, Ipswich, MA. (978) 356-3197  www.clematisnursery.com

Boulderwoods Nursery

Boulderwoods Nursery

Boulderwoods Nursery

Boulderwoods is the home nursery of Joe Bruso, an active member of the Rhododendron Society and rhododendron hybridizer. His nursery is a wonderful place to visit in May, when hundreds of rhododendrons throughout his property are in bloom. Joe also propagates other woody shrubs and trees, including the native big-leaf magnolias. Available by appointment. 61 S. Mill St., Hopkinton, MA. 508-435-8217

Garden Vision Epimediums

Garden Vision Epimediums

Garden Vision Epimediums

Garden Vision Epimediums, also known as the “Epi-center of the Universe”,  is a small, retail mail-order nursery located in rural central Massachusetts. The plants offered represent the work of Epimedium expert Darrell Probst, who has discovered many of these plants through numerous collecting expeditions to China, Japan and Korea. The nursery is primarily mail order, but open to the public for only a select few weekends in May, during bloom season. 10 Templeton Rd., Phillipston, MA. 978-249-3863  www.epimediums.com

Do you have a favorite nursery? Add it in the Comments section!

Recovering from an Epic Winter

This year’s winter broke many records here in the Boston area, and the effects of it are evident both in my home and in my garden. Of course, I am not alone – most homeowners have broken trees and shrubs due to this year’s heavy snow.

Here are a few tips on how to remedy the damage, and what to do in the garden right now.

This cypress "heather bun' has so many broken branches that it is probably beyond repair.

This cypress "heather bun' has so many broken branches that it is probably beyond repair.

1. Prune broken branches on trees and shrubs

Broken branches on trees and shrubs should be pruned off below the break. Most damaged shrubs will also benefit from heavy cut-back, allowing new growth to restore their appearance.

If they are not broken, branches on many shrubs like boxwood, holly, azalea, yew and juniper that were bent by the heavy snow may recover. Gently pull them back up, and tie them into position with twine, velcro or old pantyhose. (I like to reuse the green velcro that comes on lettuce from the supermarket.) To prop up bent branches, you can use the single stem green wire perennial stakes that are sold at garden centers.

2. Examine woody plants for rodent damage

Rabbits and voles can injure trees and shrubs by eating their bark or roots. This damage may not attract your attention or you may attribute it to deer, but during winters with heavy snowfall, voles will actually tunnel up through the snowdrifts and eat bark and evergreen leaves that are several feet off the ground. Carefully examine your woody plants for bark damage. Any branch girdled more than two thirds around should be cut off below the damage. If any plants are leaning at an odd angle, check to see if their root systems are intact. You may lift the shrub and see that its roots have been devoured by voles.

The edges of these species tulips were already nibbled by deer

The edges of these species tulips were already nibbled by deer

3. Keep deer at bay

The deer were especially hungry this winter, and found their way into many new gardens, including mine. While solid fences and deer fencing are ideal barriers, many gardeners believe that small measures may change the traffic patterns of the deer enough to keep them out of their gardens. Like other animals, deer are sensitive to certain smells, so you can try spreading the odorous Milorganite fertilizer in your garden to keep them away. Other gardeners hang bars of Irish Spring soap. You can also use repellent sprays such as Deer Scram and Repells All. Click here for a homemade spray repellent recipe.

4. Stay off the garden beds

Although it’s tempting to start actively gardening, stepping on wet garden beds and lawn areas is harmful to the soil. The soil becomes so compacted that when it finally dries out, it is a collection of rock-hard clumps. Plants will not thrive if their roots cannot penetrate these dense clods.

5. Wait on the mulch

Because its main purposes are to cool the soil, suppress weeds, and retain soil moisture, mulch is best applied in late spring or early summer. Applications made too early in the spring while the soil is still cool delay root expansion of newly planted perennials and annuals.

cut down ornamental grasses

cut down ornamental grasses

6. Get a head start on spring chores

Although it’s mid-April, keep in mind that this year’s spring has been delayed by 3-4 weeks. Focus on chores that you would normally do in late winter, such as general garden clean up, pruning, and cutting back perennials and grasses. This is the ideal time to prune fruit trees and summer-blooming shrubs such as weigela, butterfly bush, redtwig dogwood, and spirea. You can also start seeds and summer flowering bulbs and tubers indoors to give them a head start on spring.

Related:
Gardening in Late March: 10 Things You Can Do to Prepare for Spring

Homemade Deer Repellents

remove last year's hellebore foliage so that you can appreciate the new flowers

remove last year's hellebore foliage so that you can appreciate the new flowers

Tips for Winter Pots

As the temperatures drop and the garden tucks in for its winter slumber, containers step out of their supporting roles to take a star turn in the garden. Here are a few tips and inspiration photos for creating beautiful winter pots.

Jazz up your winter landscape with pots, hanging baskets and window boxes planted with evergreens or overflowing with assorted cuttings from conifers, berries, seed heads and dried flowers.

You can plant pots for winter interest as long as the plants are hardier than your growing zone. Here, early blooming snowdrops surround a planted red-twig dogwood. Black mondo grass adds the beautiful texture and dark color. Planted pots need good drainage in the winter, which is provided with this brick and pebble patio. If you site them on the driveway or other solid hardscape, elevate the pots with pot feet or bricks to let excess water drain out eaily.

Don’t be stingy with your outdoor containers! Empty urns just draw attention to what is missing.

Beautiful winter arrangements are not just for the holidays. You can use a combination of living and cut plants to dress up your pots from late fall through late winter.

Hanging baskets lined with moss are gorgeous when decorated with cut evergreens.

The same plants that bring interest to the winter landscape bring pizzaz to winter containers,  such as the red-twig dogwood pictured here.

Remember to keep your containers in scale with their environment. Most homeowners select a container that’s too small for their space.

If you live in a townhouse and condo, winter containers are a perfect "gardening outlet". These winter pots combine abundance and whimsy with their magnolia leaves, fruits, cones, dried hydrangeas, and a twig reindeer head.

Branches provide height, visual weight and texture for your containers. Birch, red twig dogwood, golden willow and harry's lauder's walking stick are particularly decorative.

Here twig balls add a whimsical flair.

By combining many different types of evergreens, you can achieve a rich "tapestry" look of contrasting textures in various shades of green.

Simple modern pots set off classic boxwoods and a voluptuous evergreen arrangement. 

Elevating your pots makes them more prominent. Here a formally centered classic urn on a plinth creates a beautiful front entrance.

ith a big snowstorm in the forecast on the day before Thanksgiving, I quickly ran through the garden with pruning shears to fill the 7 urns around my house. Yews, hollies, golden cypresses, leucothoe and winterberry holly received their annual trimming as I filled up my pots. What a great way to spend a few hours out in the winter garden!


Selecting Spring Bulbs for Your Garden

snowdrops.jpg

It's not too late to add spring bulbs to your garden! Here are some tips and design ideas to inspire and guide you this fall:

Snowdrops  

Snowdrops (above) may be naturalized in the lawn or planted close to the entryways to your home so that you can enjoy them in late winter. I planted mine in a bed of hellebores and hostas. They complement the hellebores in late winter, and their dying foliage is hidden by the hosta leaves unfurling in late spring. 

grape-hyacinths.jpg

Grape Hyacinths

Grape Hyacinths prefer full sun, but they can be naturalized in a woodland setting of deciduous trees where they will receive sun in the spring before the trees have leafed out. (Chanticleer Gardens)

Erythronium

Erythronium can be massed, planted with other spring bulbs, or with woodland wildflowers. 

Daffodils

Daffodils can be naturalized in the lawn, but the foliage must be allowed to die back naturally before cutting. A meadow area is best for this.

I interplant daffodils with daylilies. As the daylily foliage grows, it hides the yellowing daffodil leaves. I also moved my forsythia and PJM Rhododendron shrubs so that they back my spring garden, and echo the yellows, blues and violets of the perennials and bulbs.

Leucojum

The white dangling bells of Leucojum are beautiful complemented by the dainty blue flowers of Brunnera. (Brooklyn Botanic Garden)

Species Tulips

Species tulips bloom in April, and last many years in the garden. They look fabulous massed, and  interplanted with grape hyacinths. In my garden, they are backed by chives, which provide spring blooms in the garden and are a staple in my cooking. 

Alliums

Alliums complement the blues, violets and yellows of my spring garden. I love the giant 'Gladiator' and 'Globemaster' varieties. As a bonus, they are not eaten by voles or rabbits. Above, Alliums provide spring color to the daylily border at the back of my house.

Tulips

With so many colors and varieties of tulips available, selecting a few for your garden can be overwhelming. Thinking about companion plants can help.

Above, variegated red-twig dogwood is beautifully accented by white and purple tulips.

Maroon and white tulips are breathtaking with a 'Crimson Queen" Japanese maple. (Brooklyn Botanic Garden)

​Deep purple tulips combine beautifully with Frittilaria Persica. The color is further enhanced by the addition of red-leaf lettuce. (Chanticleer Gardens)