Switch Theme:

Imperial Guard Destroyer Tank Hunter conversion  [RSS] Share on facebook Share on Twitter Submit to Reddit
»
Author Message
Advert


Forum adverts like this one are shown to any user who is not logged in. Join us by filling out a tiny 3 field form and you will get your own, free, dakka user account which gives a good range of benefits to you:
  • No adverts like this in the forums anymore.
  • Times and dates in your local timezone.
  • Full tracking of what you have read so you can skip to your first unread post, easily see what has changed since you last logged in, and easily see what is new at a glance.
  • Email notifications for threads you want to watch closely.
  • Being a part of the oldest wargaming community on the net.
If you are already a member then feel free to login now.


Made in se
Guardsman with Flashlight


Gothenburg

Hi guys!
Been working on an Imperial Guard Tank Hunter over the last week. I didn't use any Forgeworld sets. Only sprues from GW's new Leman Russ set (any of them works), Chimera set, the Baneblade cannon for the Laser Destroyer and various bits from 1/35 and 1/72 scale models. I've personallized it a bit to fit my up-coming Cadian armoured company blog. All for your pleasure!
I'm pretty much done with it, modelling wise. Might add backpacks and random equipment later on. Next up is painting!


CC and questions always welcome! Tell me what you like and dislike.

This message was edited 5 times. Last update was at 2010/07/22 16:20:37


Made in se
Guardsman with Flashlight


Gothenburg

Thanks!

Flinty wrote:The sand is a bit thick for my liking, but thats a personal taste thing.
It's meant to look like it's been out on the field for a very long time, hence the sand/mud/whatever to call it. Might eventually "trim" it down... or add more

Flinty wrote:The onyl other complaint I have is that the camo netting would get caught in the tracks when the thing re-deploys. They would either need a huge supply of netting for a prolonged campaign, or alternatively could you put small spacers to lift the netting above the tracks?
I thought someone would complain about that. I've ran out of track guards, and so I was too lazy to do anything about it. I'll see what I have in my bits box that can solve the problem.
Comments like these are good for me, becuase they make me want to improve my creation. Thank you!


Automatically Appended Next Post:
Been looking everywhere for track guards and lucky as I always am (not), I managed to find enough parts to cover the tracks where the camo netting is. Track guards. check!
Re-done sand/mud/dirt effect. check!
I have started making bullet holes and scrapes to give the tank that extra feel of being out in the field for a very long time. There will also be spots where the crew has done field reparations. Battle damage. in progress!
Equipping tank with equipment. in progress!

I'll keep working on the tank tonight and I'll post photos sometime tomorrow. Stay tuned!

This message was edited 3 times. Last update was at 2010/07/22 00:06:41


Made in se
Guardsman with Flashlight


Gothenburg

Thank you for the criticism and kind words.

Alpharius wrote:What 'other' kits did you end up taking stuff from?
There are some bits from old Imperial Guard vehicle sprues. Some of the really small parts are from the 1/72 scale AH-1 Z Viper Combat helicopter kit, made by Kitech. The rest are from random Imperial Guard sprues, if I remember correctly.

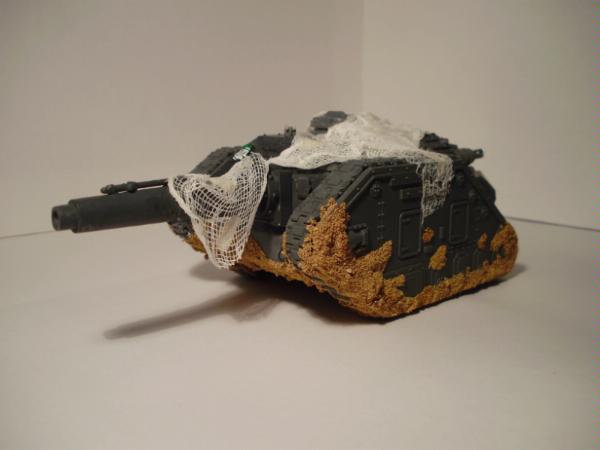
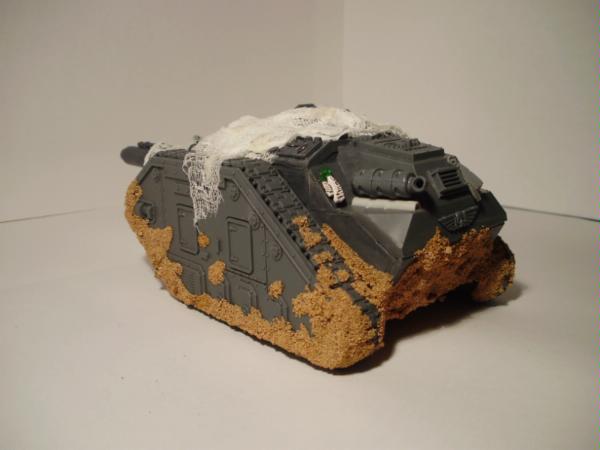
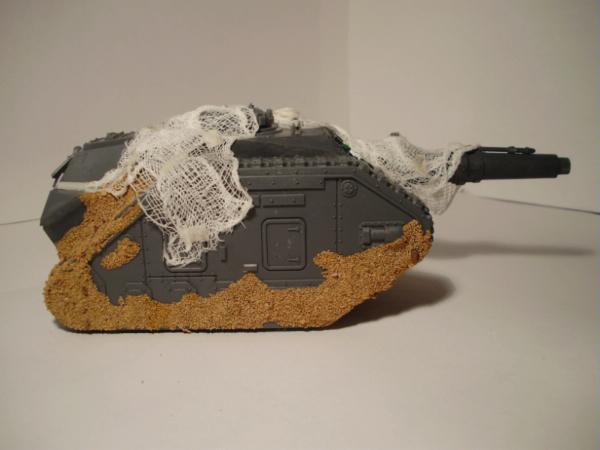
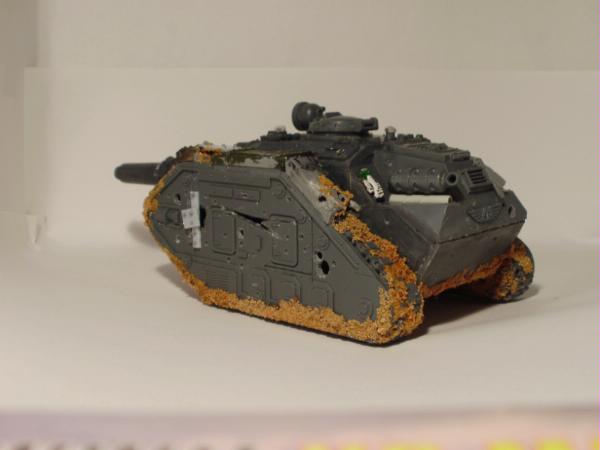
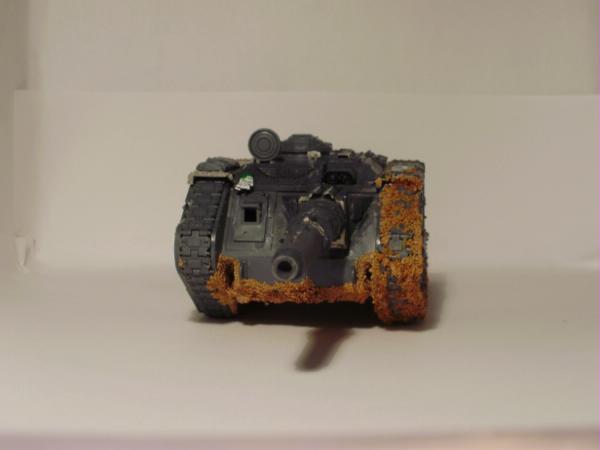
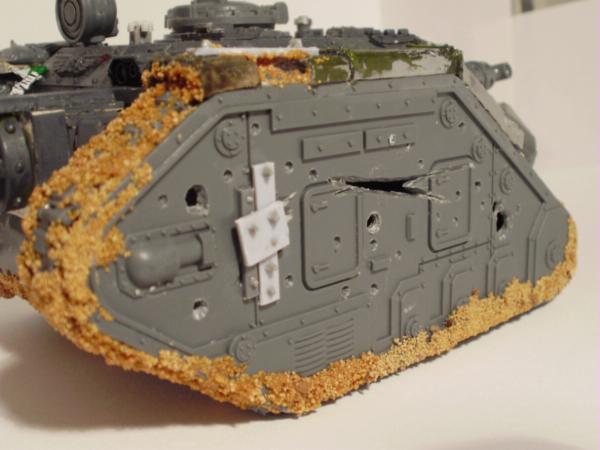
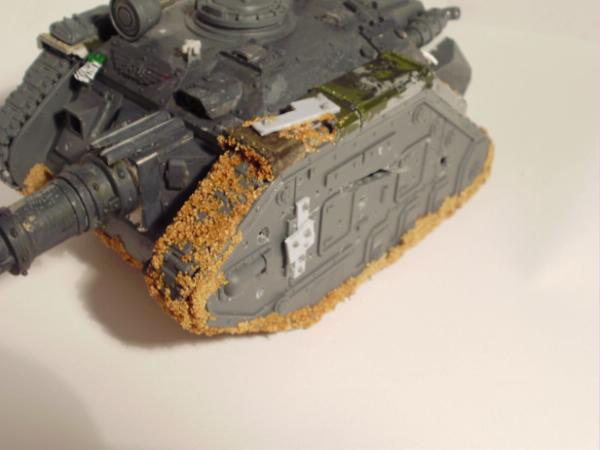
Ifurita wrote:I think the mud is too think and a bit unrealistic. Suggestion, find yourself a toy tractor and push it around through the mud a bit. You have very think mud built up on the tank, but very little on the tracks. IMO, the mud would be churn up by the tracks and thrown around on the front and rear fender guards as well as on the lower portion of the side skirts. Also, think about how the tracks throw mud onto the rear of the vehicle. Mud typically gets splashed linearly behind the tracks and on top of the mud guard, but not to the rear deck and not in the quantity htat you have one yours.
I just decreased the amount of mud on the side. I think it looks much more realistic now. I still have to fix the front, rear and tracks. Thanks for the tips, I'll put them to good use in the future.

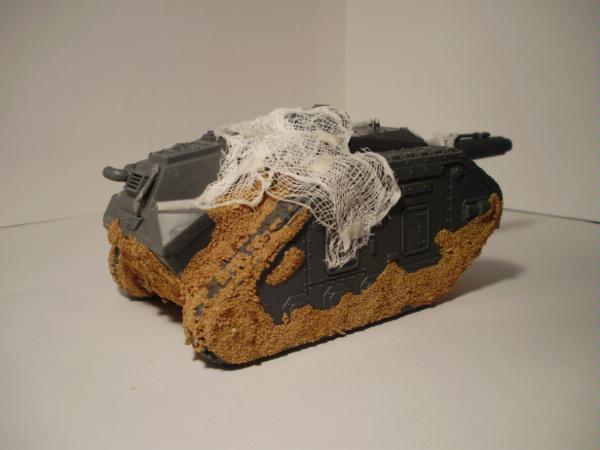
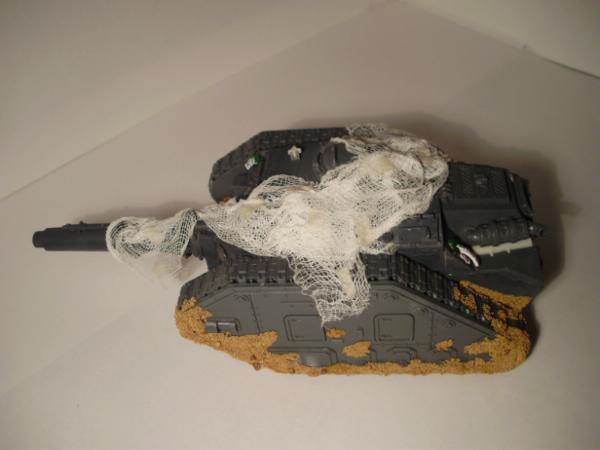
Ifurita wrote:Also, while it might be too late, I think you would be better off painting the vehicle and then laying the camo net on top of it, then painting the camo net. As is, there will be pieces of the vehicle you can't get to, but can see through the net, and priming it will be a PITA.
Yeah, good point... I was considering painting the tank before I put on the camo netting, but sometimes while I build I get carried away, and just want to finish the tank. *shrug* I might remove the camo and redo it, after undercoating/painting the tank. I wasn't too happy about the look of the camo netting anyway - first try.

Brotherjulian wrote:I've lost this bit now, but I made a camo net by spray painting part of a mesh onion sack. Not the newer type that are clearly plastic but one of the old stringy mesh ones. Then I made poles to hold it up like modern military camo netting and I could park whatever model I liked under it.
You just gave me a great idea for my Salamander Command Vehicle...

Brotherjulian wrote:Great Destroyer though, looks as good as a FW piece
Really? I'm honoured.
Made in se
Guardsman with Flashlight


Gothenburg

UPDATE! MUD AND BATTLE DAMAGE

So I've been working more on the Destroyer. Removed almost all mud and have redone it to look more realistic. At least I think it looks realistic.
I've only worked on the front, left side and rear. The right side comes later.
CC and questions still welcome!

Don't mind about the Laser Destroyer (cannon, duh). It's only blue taced to the hull, to ease the panting progress.

Left-side-rear view. I'm thinking of putting something on the rear of the hull, but don't know what. Any ideas?

Front

Close-up on the battle damage. Notice the hasty field repairs. The bullet holes have been made by slowly spinning the sharp end of a modelling knife to the hull.

Close-up on the track guards. Happy now, Flinty? Once again, notice the field repairs on the track guards.

So, I still need to add battle damage and mud to the right side, undercoat the whole chebang, paint it, add camo netting and then paint the camo.

This message was edited 5 times. Last update was at 2010/07/23 00:01:16


Made in se
Guardsman with Flashlight


Gothenburg

Hi guys, I'm just here to tell you that I cannot answer your questions now. You see, I'm attending to the Swedish nationel ultimate frisbee team's "camp" this weekend, so I'll have no access to Internet. Sorry! :(


Automatically Appended Next Post:
Ok, I have about 20min left until I'm off. I can answer some of your questions, really fast.

Ifurita wrote:I should have mention this earlier. Paint the tank and then apply the mud. When you paint the tank, you can seal the paint then weather it up.
Hmm, good tip. I'm too lazy to redo the mud again, so I'll try this out on my Salamander Command Vehicle. Thanks!

Orinoco wrote:can you tell us more about the rear of the chassis' construction? it's cool.
In due time. After the weekend, I promise!

Commissar Agro wrote:Battle damage looks great but IMO if a destroyer tank hunter is taking damage its in the wrong place.
The Destroyer is an ancient Imperial tank design, and the blueprints for it has been lost. There are only a couple of thousand (correct me) left. So they've been around for a long time. Hence all the damage.
Also imagine if a squad of Ork Kommandoes sneaked up behind the front lines and managed to get in range of the Destroyer. Sure, they'd probably get killed in a couple seconds, but they'd still be able to do some damage to the tank. I'm sure you can think of other "dioramas".
Wish I could explain more, but I have to prepare the final things for my trip. See you guys on Sunday night or Monday!

This message was edited 2 times. Last update was at 2010/07/23 16:50:30


Made in se
Guardsman with Flashlight


Gothenburg

So I'm back again. Thank you for your CC. I'll be "abandoning" this thread now. I'm starting a blog where you can follow my work on this Destroyer and many more tanks and troopers.
See you! Link will be included after I've started the blog.
 
Forum Index » Painting & Modeling
Go to: