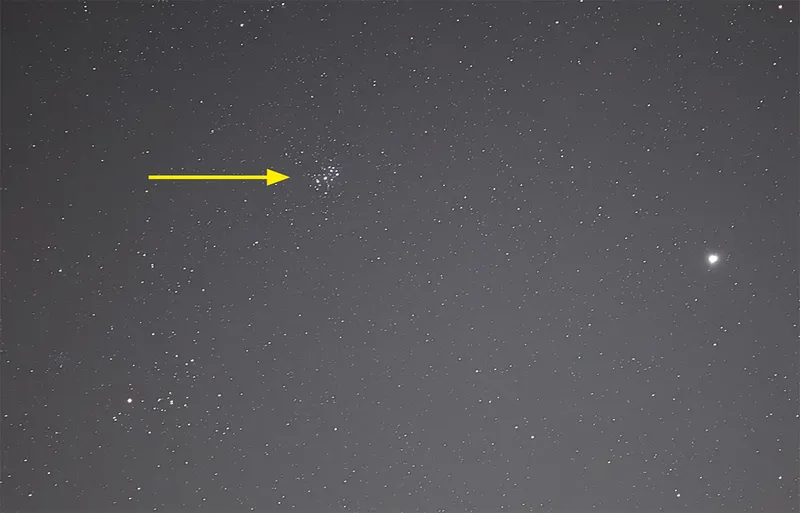
The Pleiades or Seven Sisters, also known as M45, is one of the most iconic open star clusters in the night sky and a great target to photograph.
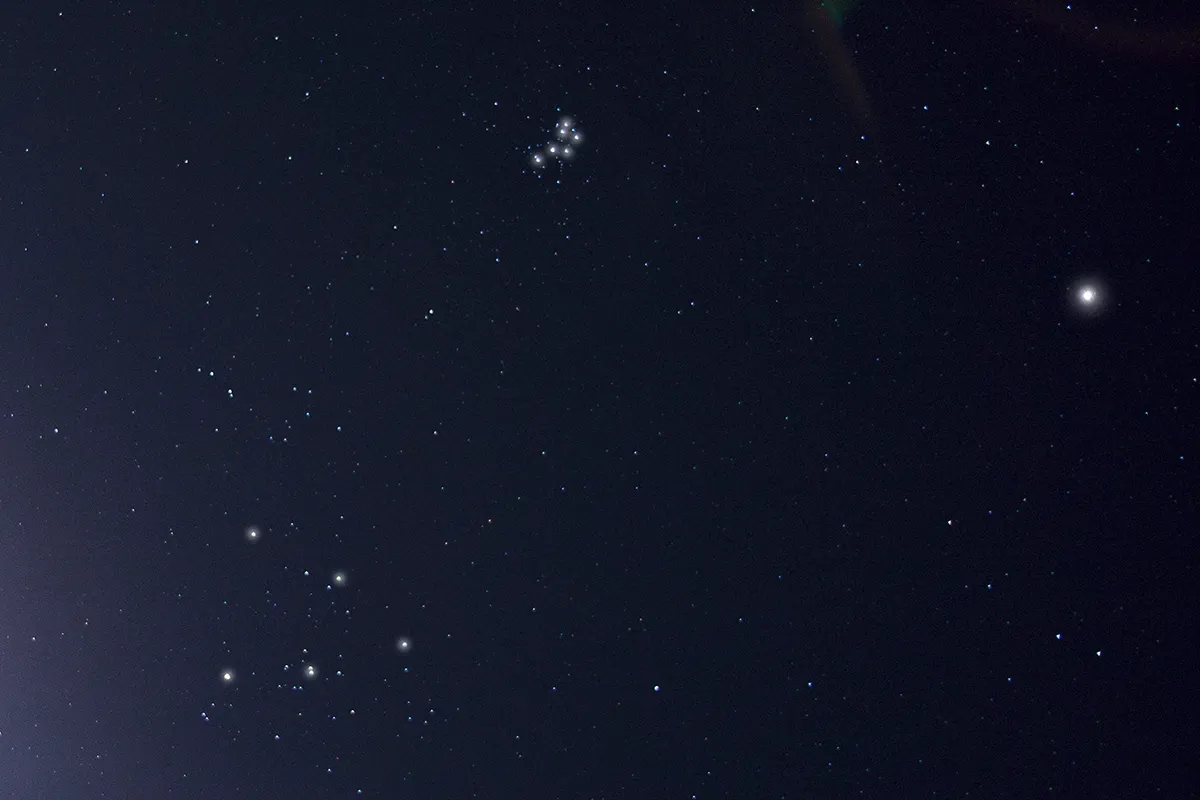
You can find the Pleiades sitting northwest of Orion’s Belt (up and right as seen from the UK), and it will appear as a bright smudge to the naked eye.
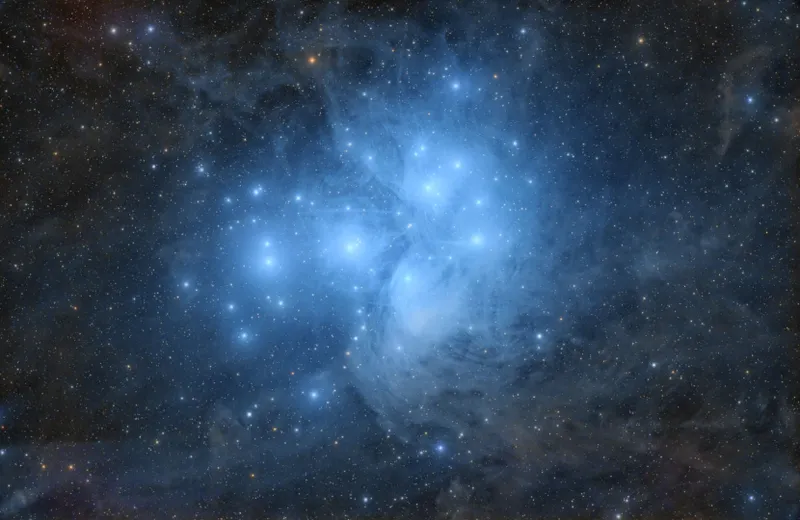
Photograph the Pleiades, however, and you've got a chance to capture its beautiful blue glow.
Consider the Pleiades' appearance
The Pleiades are around 444 lightyears distant or approximately three times further away than the more spread-out form of the V-shaped Hyades open cluster.
The relative compactness of the Pleiades is a result of it being both a young cluster and further away than the Hyades.
Being a young cluster, the Pleiades are hot, blue stars, another factor which aids their visibility.
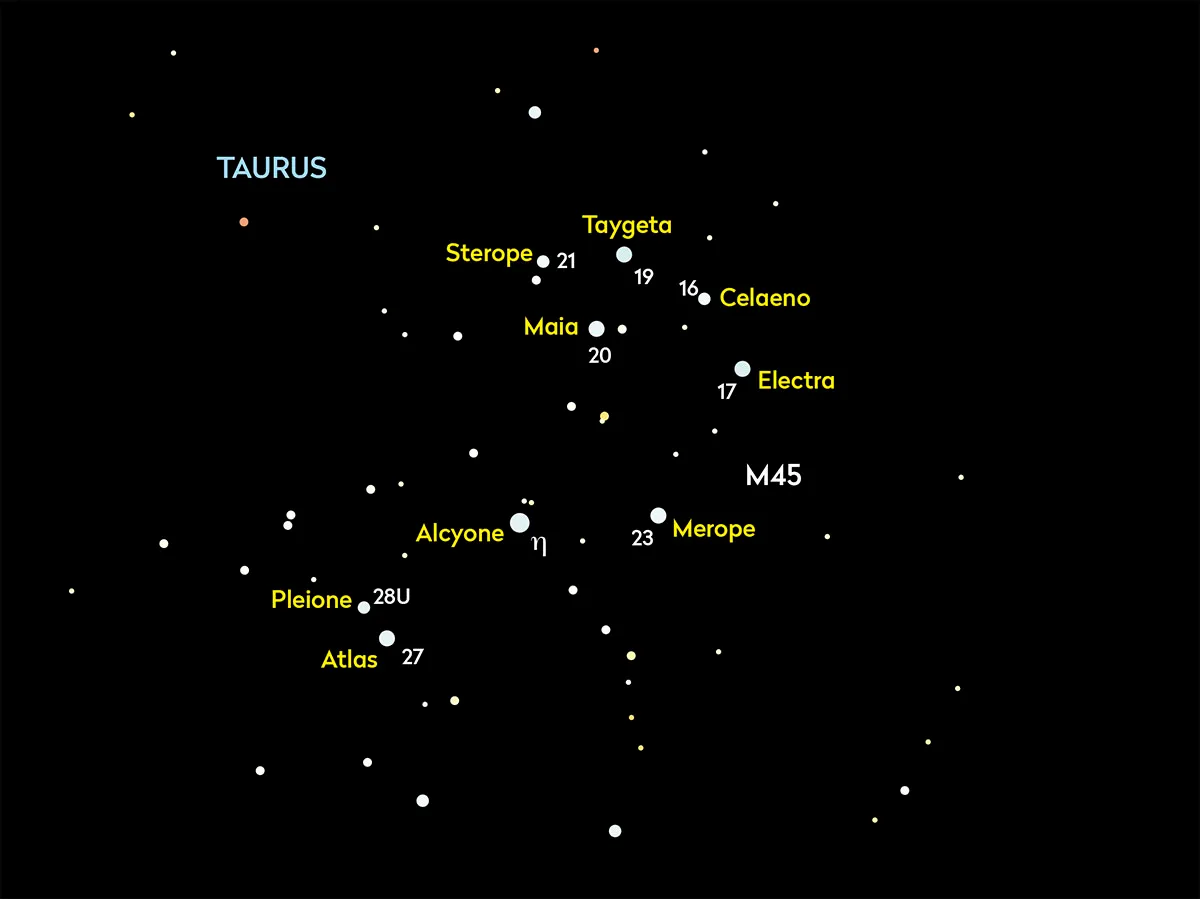
The main pattern appears like a box with a handle.
The stars forming this pattern are all named, the brightest also carrying the Bayer designation Eta (η) Tauri.
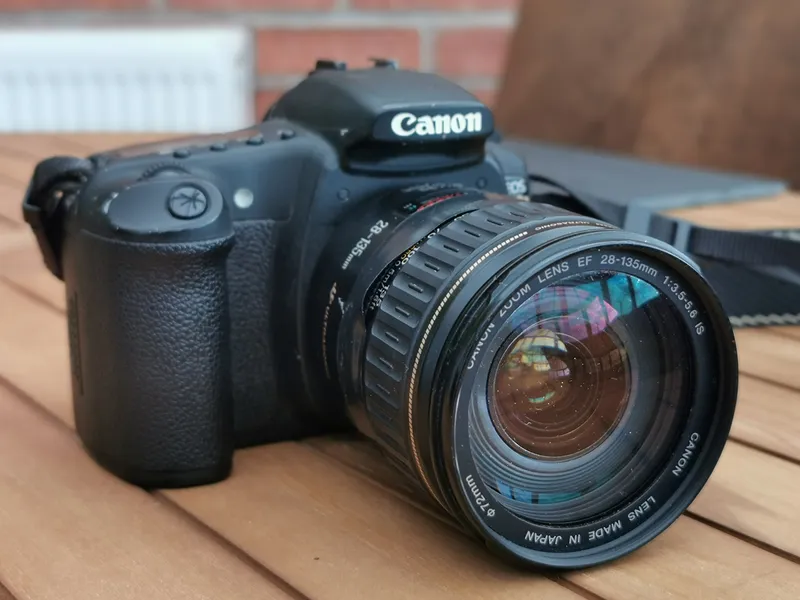
Photograph the Pleiades: equipment and settings
For a photograph of the Pleiades to look ‘natural’, you should include the entire box-handle pattern plus plenty of space around the cluster so it doesn’t feel cramped.
If you intend to use a wide-angle lens, or even a smartphone camera, it’s surprising just how identifiably resilient the cluster shape can appear at low image scale.
Low image scale allows you to be a little less precise with tracking, exposures up to 30 seconds showing no discernible star trailing below 16mm focal length.
A longer focal length will allow you to capture the cluster closer up, with more visual impact.
But a greater image scale will demand more accuracy from your tracking mount.
Capturing the Pleiades’ main stars isn’t too difficult because they are fairly bright.
Longer exposures will allow you to ‘drill down’ into the cluster, revealing more of the fainter members (the Pleiades contains in excess of 1,000 stars).
Capturing the nebula
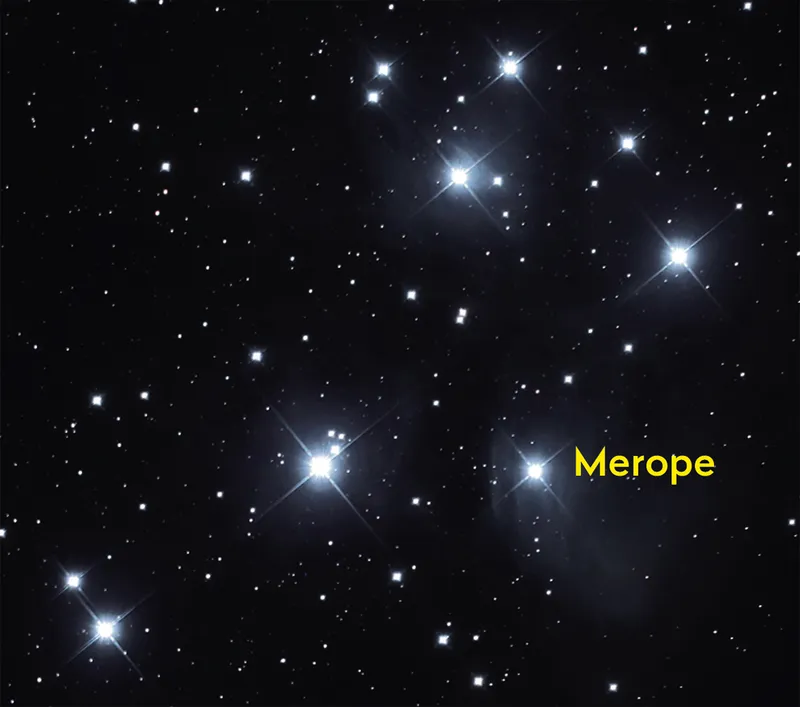
As the Pleiades' fainter stars appear, it becomes clear that there’s something else visible too: a beautiful blue nebula.
This is a reflection nebula, a type that typically consists of microscopic zinc and iron compound grains together with grains of carbon (diamond dust).
Very effective at scattering blue starlight, it’s most evident around the star Merope, the bright patch of nebulosity visible here being known unsurprisingly as the Merope Nebula, NGC 1435.
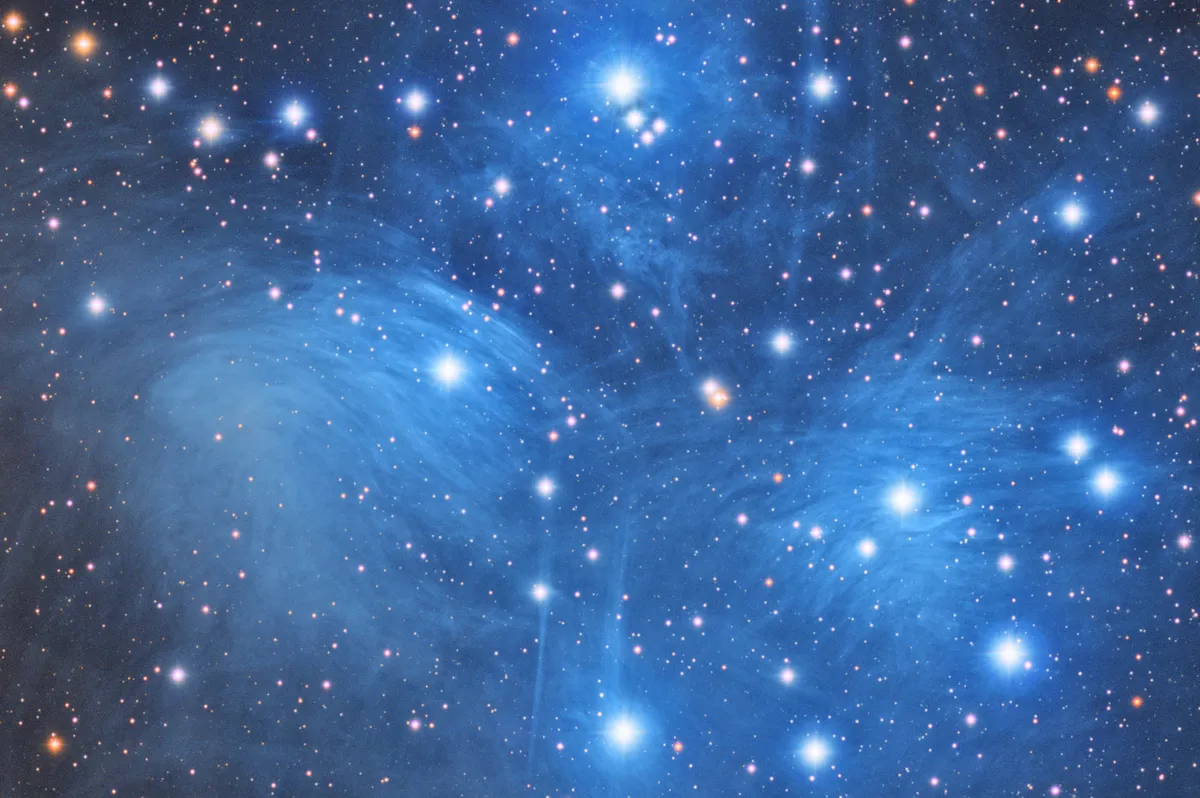
However, there’s much more that can be brought out using long-exposure astrophotography.
For a long time it was thought that the swirling nebula surrounding the Pleiades was residual material left over after the cluster formed.
However, detailed analysis of the nebula reveals that it has a different proper motion to the cluster stars.
The cluster is moving through a cloud of material, which has resulted in the nebula we see today.
It’s also now known that it’s not a single cloud, but two, each moving in independent directions.
Our step-by-step guide below looks at how to take a single shot photograph of the Pleiades.
Once you’ve mastered this, use deep-sky imaging processes like frame calibration and stacking of multiple frames to create a better result.
Equipment
- DSLR or equivalent
- Tracking mount
- Widefield telescope or 400mm or shorter focal length lens
Photograph the Pleiades, step-by-step
Step 1
If you have a smartphone, see whether it has a night capture mode.
It’s worth checking online how capable your phone is, as some have basic night modes that extend to longer exposures if you mount the phone securely.
It’s surprising how obvious the cluster’s shape is, even without a zoom lens.
Step 2
If using a DSLR or equivalent, as with a smartphone camera a relatively wide-angle lens will still capture the overall shape of the cluster.
If you intend to use longer focal lengths without tracking, use the ‘500 rule’ to decide how long an exposure you can achieve without seeing any serious star-trailing effects.
The 500 rule is: longest exposure(s) = 500 ÷ focal length (mm)
Step 3
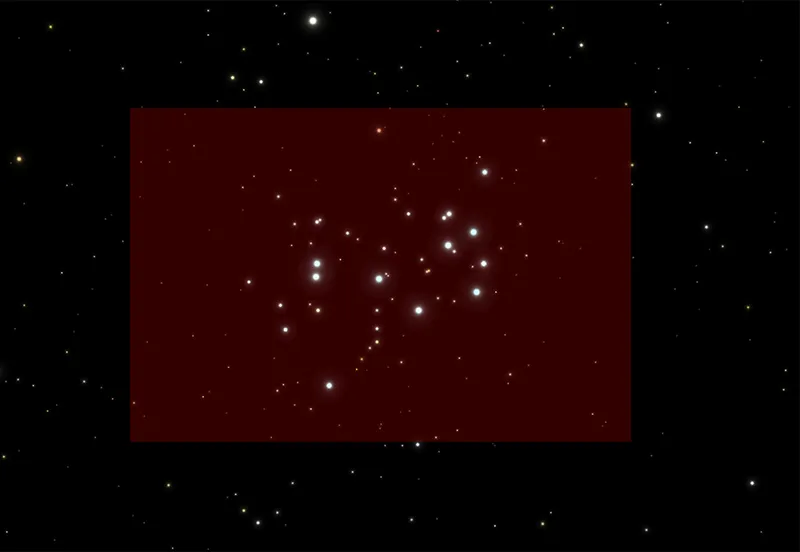
Use a focal length that captures the main pattern plus a decent area around it.
Zoom in too close and it’ll be obvious the cluster is cropped; the image will look too constrained.
A 3°-long axis width to the image is ideal, achievable using a 660mm lens on a full-frame sensor or 400mm lens on an APS-C sensor.
Step 4
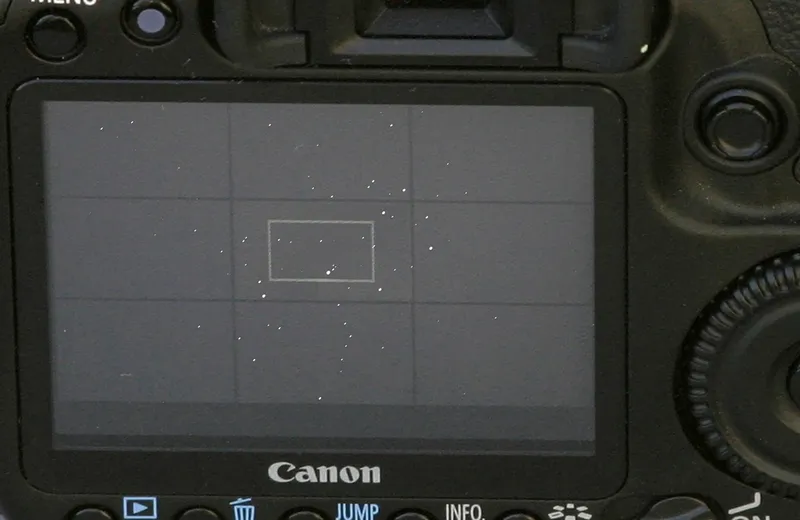
The cluster stars make excellent focus targets for live-view-enabled cameras.
Take your time to get the stars sharp. Aim for a lowish ISO, say 400–1600, for good tonal quality and low noise.
Experiment by upping the ISO and exposure time incrementally until you get a shot that looks pleasing and detailed.
Step 5
If you are using a tracking mount, consider increasing the exposure to a minute or two, depending on the accuracy of your mount.
Look for signs of the reflection nebulosity embedded in the cluster.
It’s common for the sky colour to brighten as you do this, something that can be fixed in processing.
Step 6
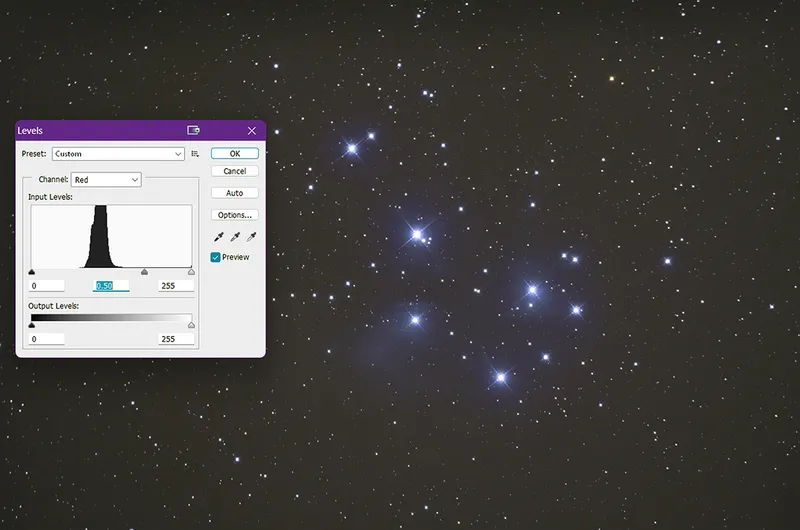
Using an image editor, adjust the mid-point slider for each colour channel, removing light pollution and darkening the sky.
Avoid making it too black though. A gentle S-curve can make the cluster pop.
Watch colour balance; the nebula should appear light blue to cyan.
For smoother results, stack and process multiple shots.
Have you managed to capture an image of the Pleiades? Don't forget to send us your images!
