

At one time I know this was a beautiful quilt, the fabrics, while tattered in places, are all just fabulous and vintage prints found here are wonderful. I found this quilt in an antique mall, probably paid too much for it but I was drawn to the still bright cheddar orange binding.
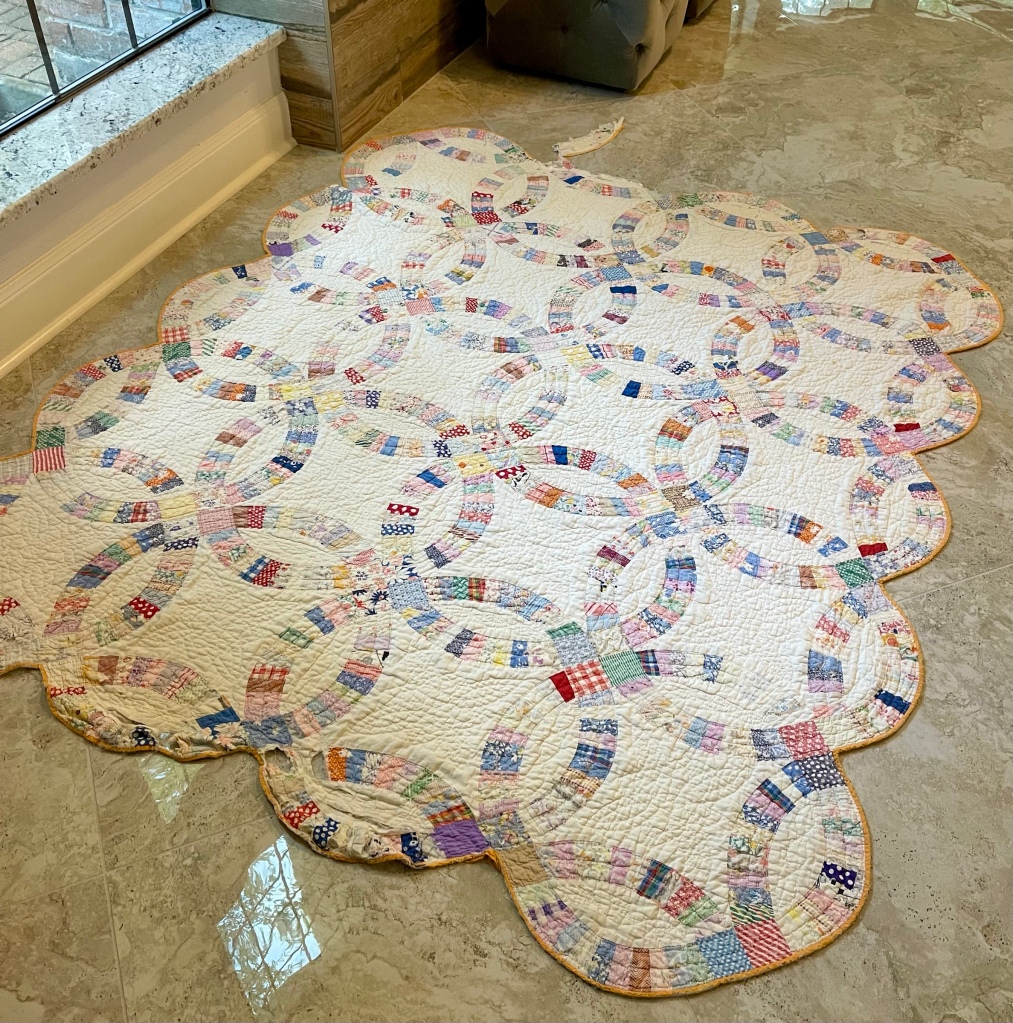
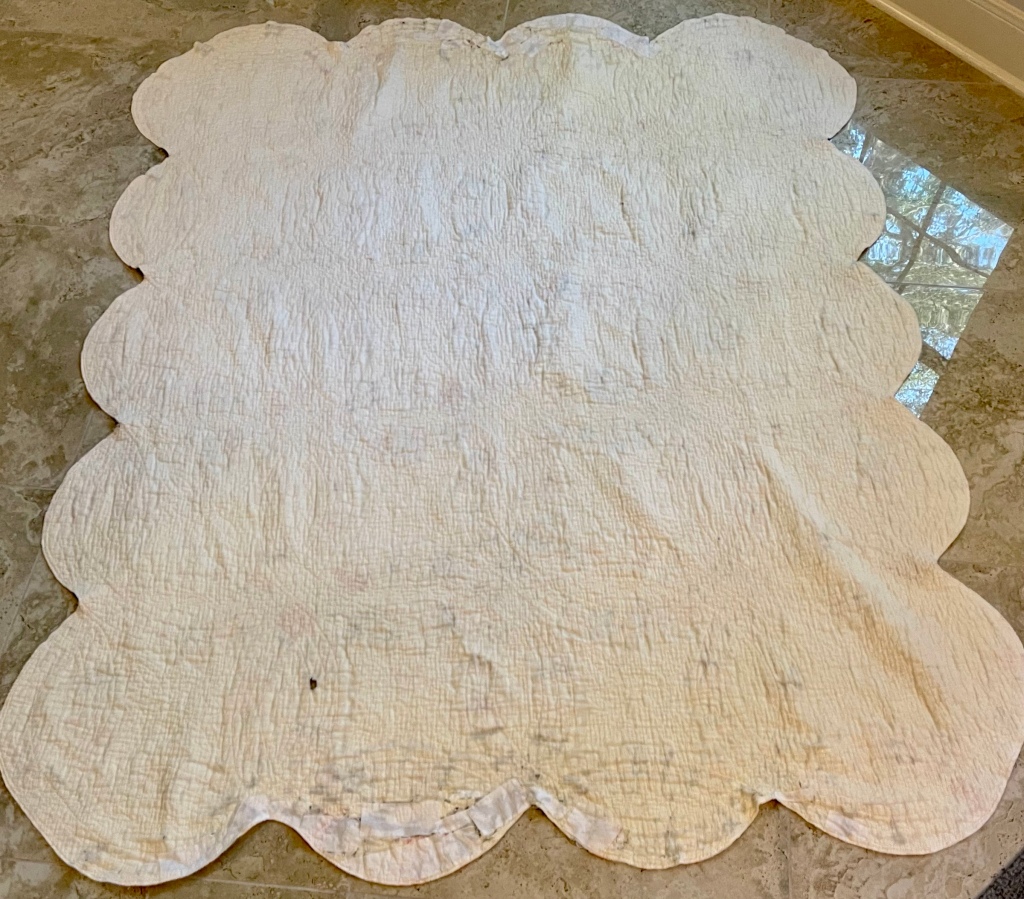
Layed out with the battered top and bottom edges tucked into place, this is the quilt as purchased. The next few pictures will show you up close how much work is ahead of me.

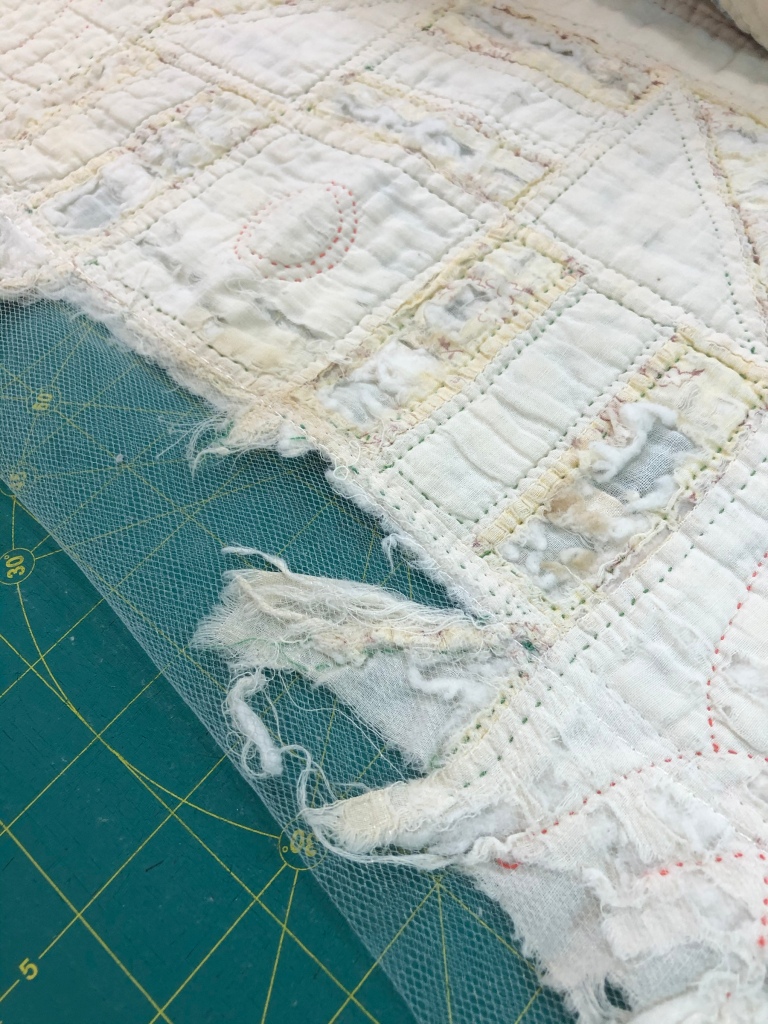
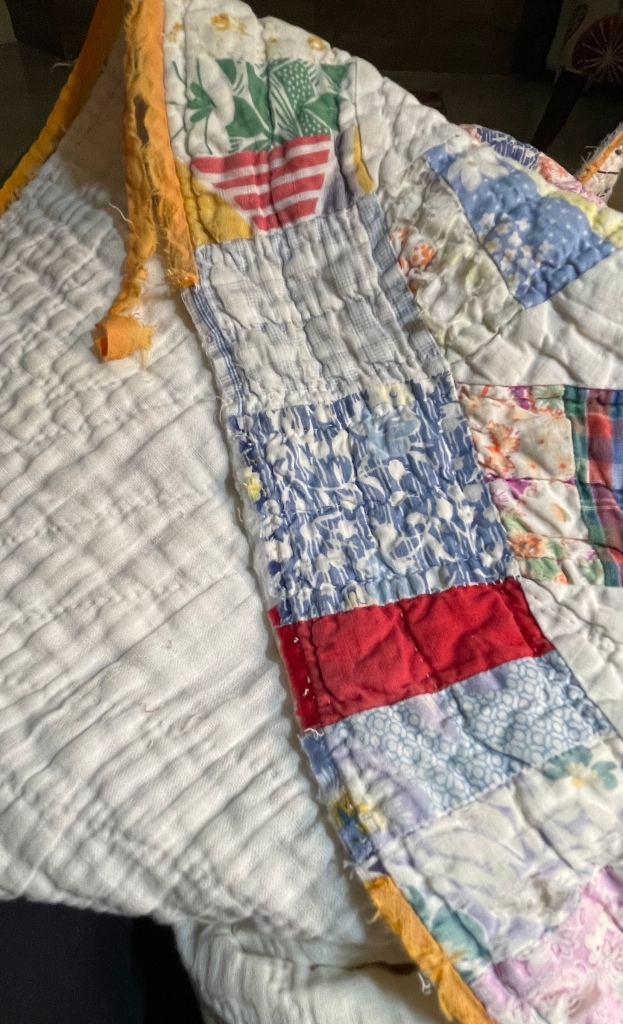
Some areas are missing just fabric, some fabric and batting and then there’s the through and through holes.

The good thing is that it appears all of the edge pieces are still with the quilt albeit some are just hanging.
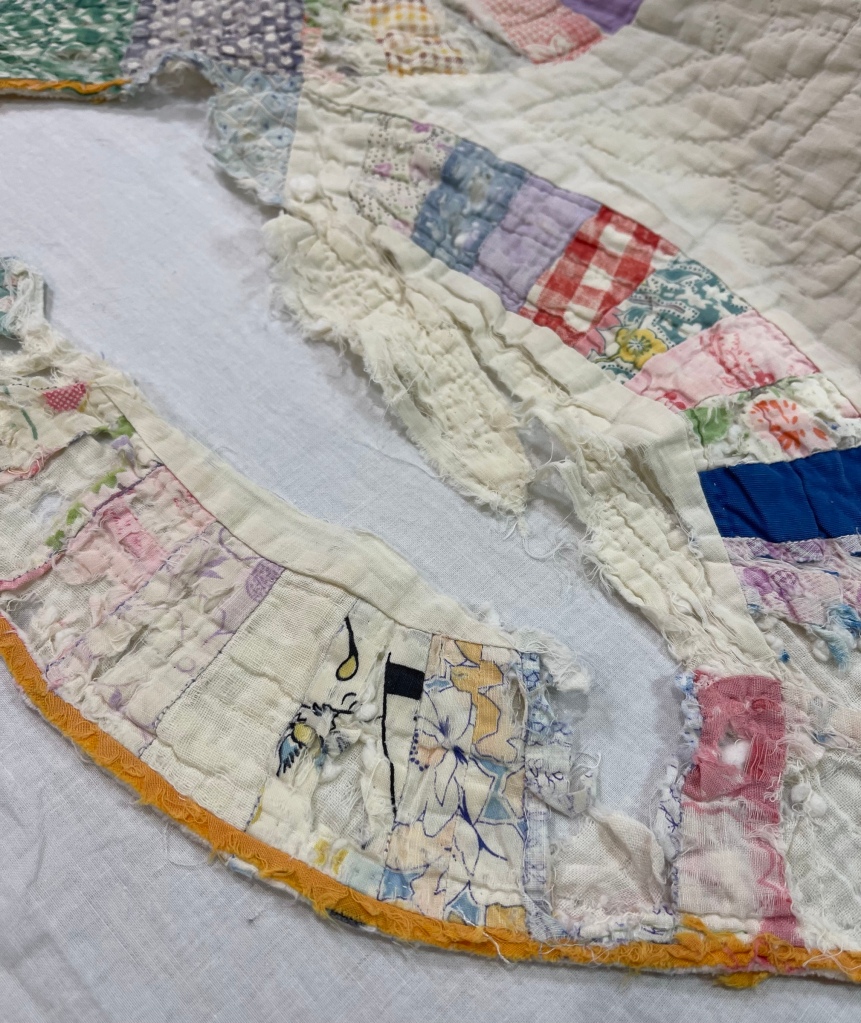
This picture for example…all the parts are still with the quilt, just not where they should be.

Did you read my blog post of March 4, 2021, the one about how to launder a severely damaged quilt before you begin the repairs?
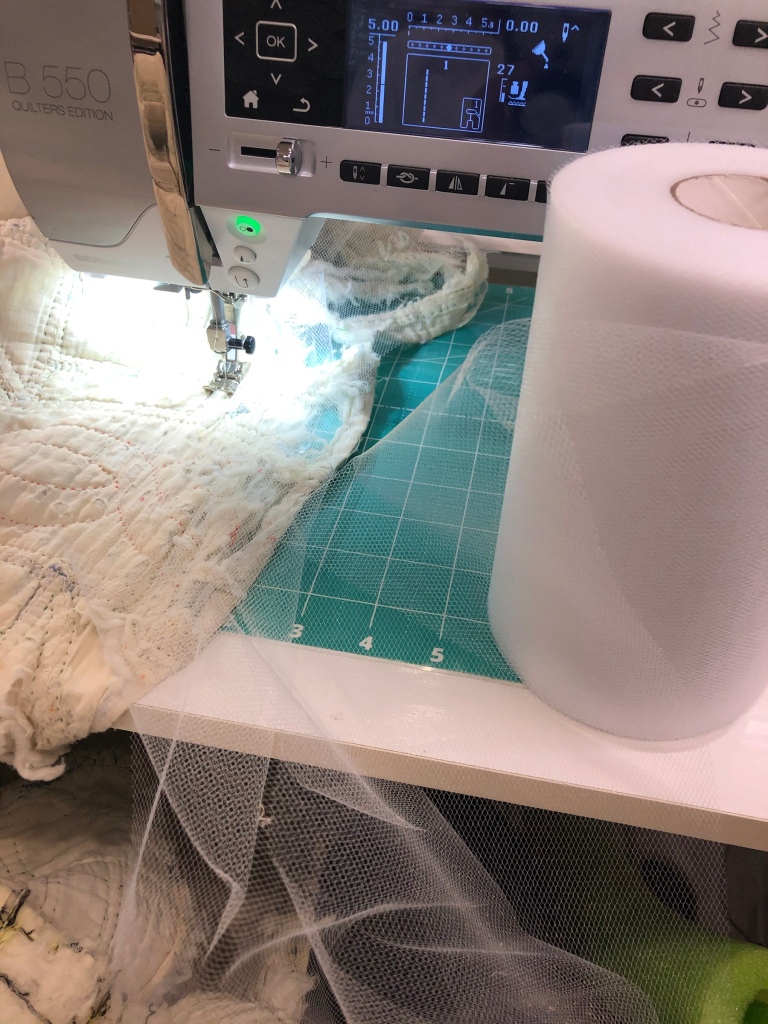
I forgot to take pictures of how I used tulle to hold this battered double wedding ring quilt together so I could send it through the washing machine and dryer. I cannot bring myself to work on a filthy dirty smelly project so if I can’t find a way to clean it, I don’t buy it.
Below you’ll find the picture tutorial on how to secure a torn/damaged quilt in order to launder your piece. You can purchase wedding tulle at almost any craft and/or fabric store, either from the bolt or the cone as shown in the first picture. I don’t use regulag netting because it is rough in texture and I don’t want any of the quilt fabrics “roughed up” anymore than they already are. Lots more info if you scroll back to March 4th.


But before I’m ready to begin any repairs to the double wedding ring quilt I’m going to need to remove the binding.
Important point: I do not nor do I ever plan to “Restore” vintage quilts! I mend, repair, fix, patch, embellish, etc. etc. old quilts as I try my best to give them a second or in many cases, a third chance.


Binding removal is complete!

What’s going on with the white rectangles circled in yellow above? The next picture shows a Pellon product I love: Shape-Flex or SF101. It’s a very light weight (think handkerchief) woven fabric with a fusible on one side that I sometimes use to make repairs. Note: I use it for repairs, not as a stabilizer! Huge difference! I’ve used the very small rectangles above to act as a temporary hold while I work with the battered edges. I oh-so-very-quickly touch them with an iron. They will temporarily hold the pieces of the quilt in place and because I barely fused them they are easily removed when I don’t need them anymore.

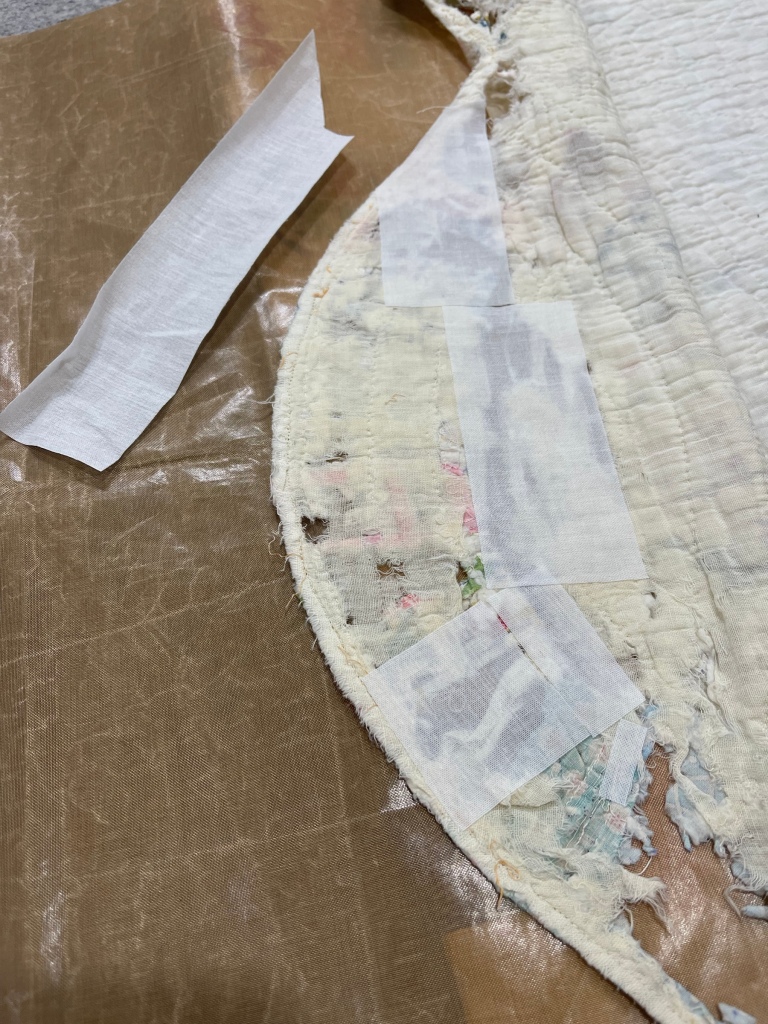
Oh, and I forgot to mention when I use the SF101 I always use one of my Teflon pressing sheets. This keeps me from accidentally ironing the SF101 to my ironing board cover.


These pictures of the quilt back show where I have ironed on the SF101. These back pieces will remain in the repaired quilt, I will not be removing them.

So what’s next? The quilt needs 2 sections of a False Back, one on the top and one on the bottom.

Stay tuned, there’s much more to come, I’ve been working on this quilt off and on since June.
Blessings to all and happy quilting,
Rhonda

Wow, what an incredible undertaking. Thank you for sharing your step by step process. I’m not sure when I will use this but you never know. I so appreciate all you share!
LikeLiked by 1 person
Thank you! 🙂❤️
LikeLike
Rhonda, thank you so much – I really appreciate your generosity of spirit in sharing all of your info – your tutorials are WONDERFUL!!!
LikeLiked by 1 person
Thank you! 🙂❤️
LikeLike
You are amazing!
LikeLiked by 1 person
Thank you! 🙂
LikeLike
You made it look new again. It is a beautiful quilt, I was blessed to get my grandmothers wedding ring quilt , Your skills are incredible!
LikeLiked by 1 person
Thank you! ❤️🙂❤️
LikeLike